Maintenance
bladetipis1/16-5/16inch(1.6-7.9mm)lower
thantherearbladetip(Figure51andFigure52).
9.Whenthefront-to-rearbladeslopeiscorrect
checktheside-to-sidelevelofthemoweragain;
refertoLevelingtheMowerfromSide-to-Side.
RemovingtheMower
ServiceInterval:Asrequired
1.Parkthemachineonalevelsurfaceanddisengage
thebladecontrolswitch.
2.Movethemotioncontrolleversoutwardtothe
parkposition,stoptheengine,removethekey,
andwaitforallmovingpartstostopbefore
leavingtheoperatingposition.
3.Lowertheheight-of-cutlevertothelowest
position.
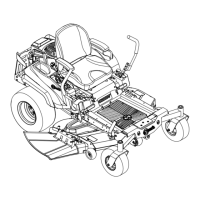
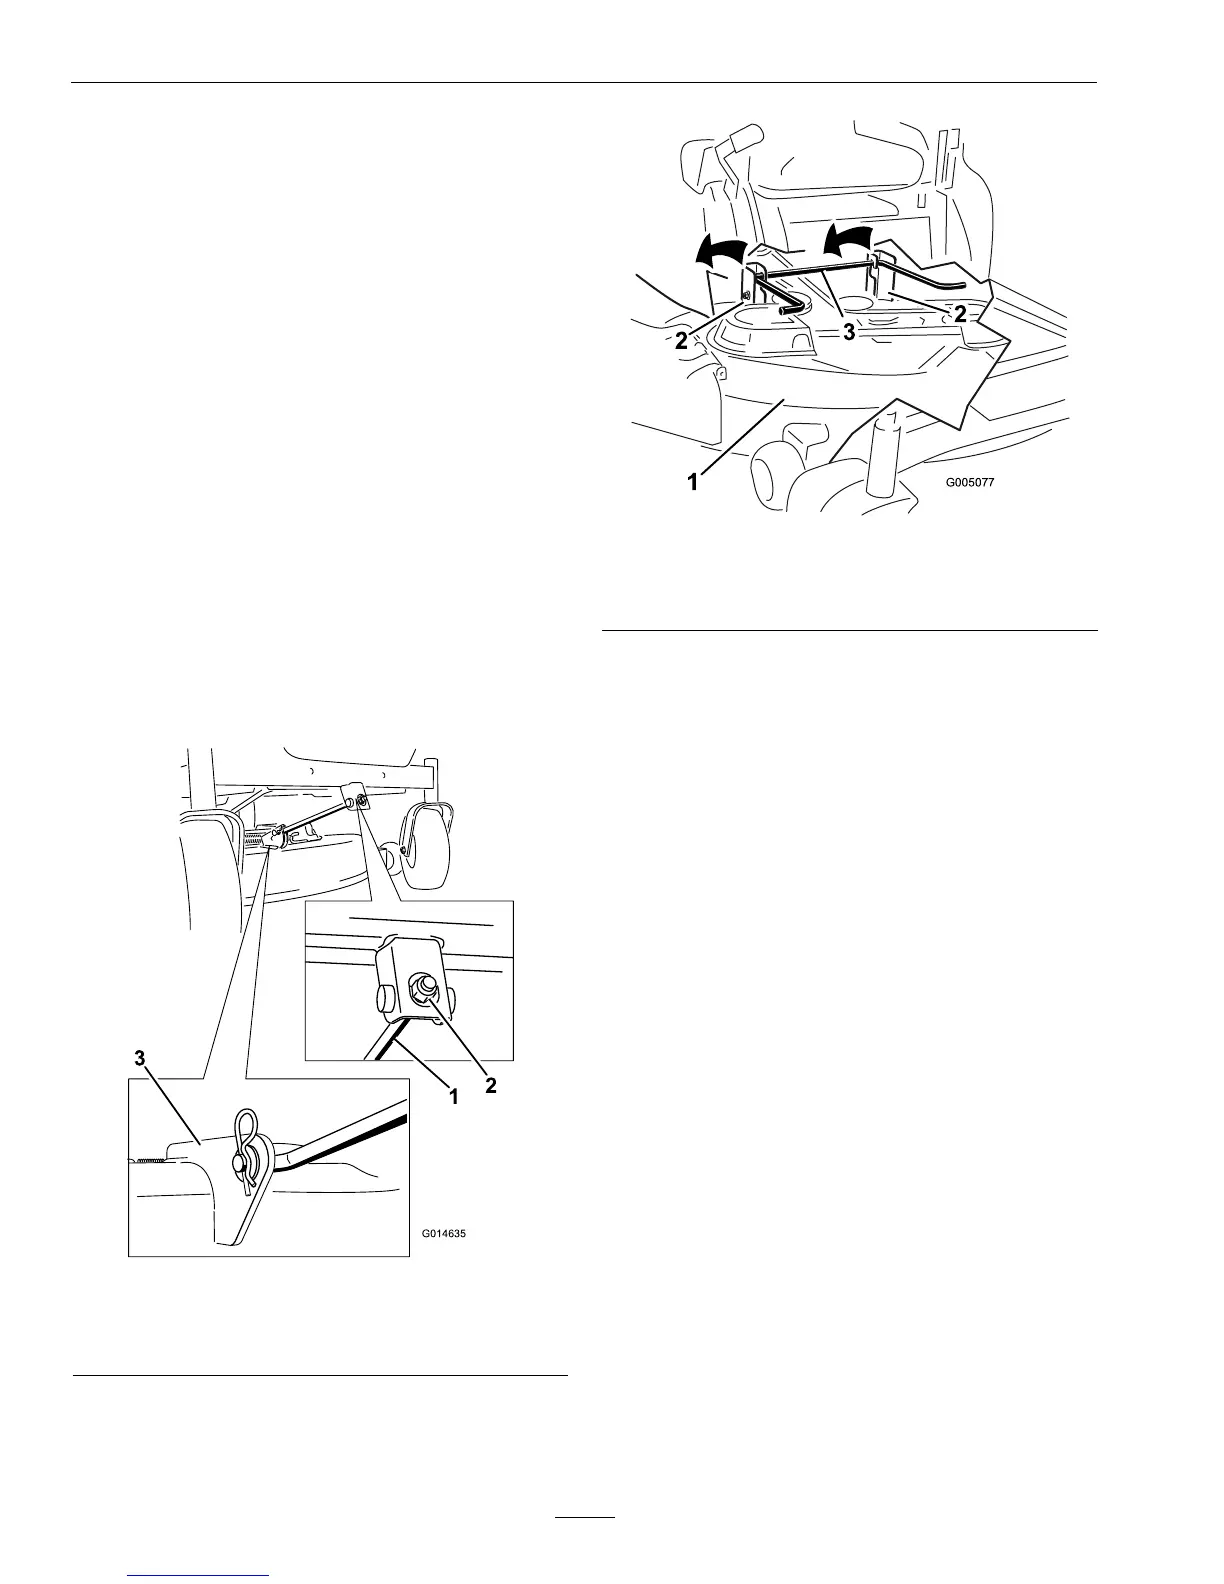
4.Removethehairpincotterfromthefrontsupport
rodandremovetherodfromthedeckbracket
(
Figure54).Carefullylowerthefrontofthe
mowerdecktotheground.
Figure54
1.Frontsupportrod3.Deckbracket
2.Lockingnut
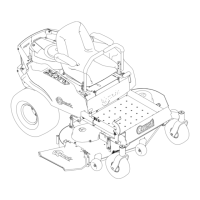
5.Liftthemowerdeckandhangerbracketsclearof
therearliftrodandlowerthemowercarefullyto
theground(Figure55).
Figure55
1.Mowerdeck
3.Rearliftrod
2.Hangerbracket
6.Slidethemowerdeckrearwardtoremovethe
mowerbeltfromtheenginepulley.
7.Slidethemowerdeckoutfromunderneaththe
machine.
Note:Retainallpartsforfutureinstallation.
MowerBeltMaintenance
InspectingtheBelts
ServiceInterval:Every25hours/Monthly
(whichevercomesrst)
Checkthebeltsforcracks,frayededges,burnmarks,
oranyotherdamage.Replacedamagedbelts.
ReplacingtheMowerBelt
Squealingwhenthebeltisrotating,bladesslipping
whencuttinggrass,frayedbeltedges,burnmarks,
andcracksaresignsofawornmowerbelt.Replace
themowerbeltifanyoftheseconditionsareevident.
1.Parkthemachineonalevelsurfaceanddisengage
thebladecontrolswitch.
2.Movethemotioncontrolleversoutwardtothe
parkposition,stoptheengine,removethekey,
andwaitforallmovingpartstostopbefore
leavingtheoperatingposition.
48