Attaching a 24- or 48-Port Switch to a Rack
Before you begin the installation, refer to Pre-installation Requirements on page 37.
To mount your 210 or 220 series switch in a two-post rack, follow these steps.
For 12-port switches, see Mounting 12-Port Switches on page 39. 12-port switches are smaller than 24-
and 48-port switches and are mounted dierently.
Note
Take care to load the rack so that it is not top-heavy. Start installing equipment at the bottom
and work up.
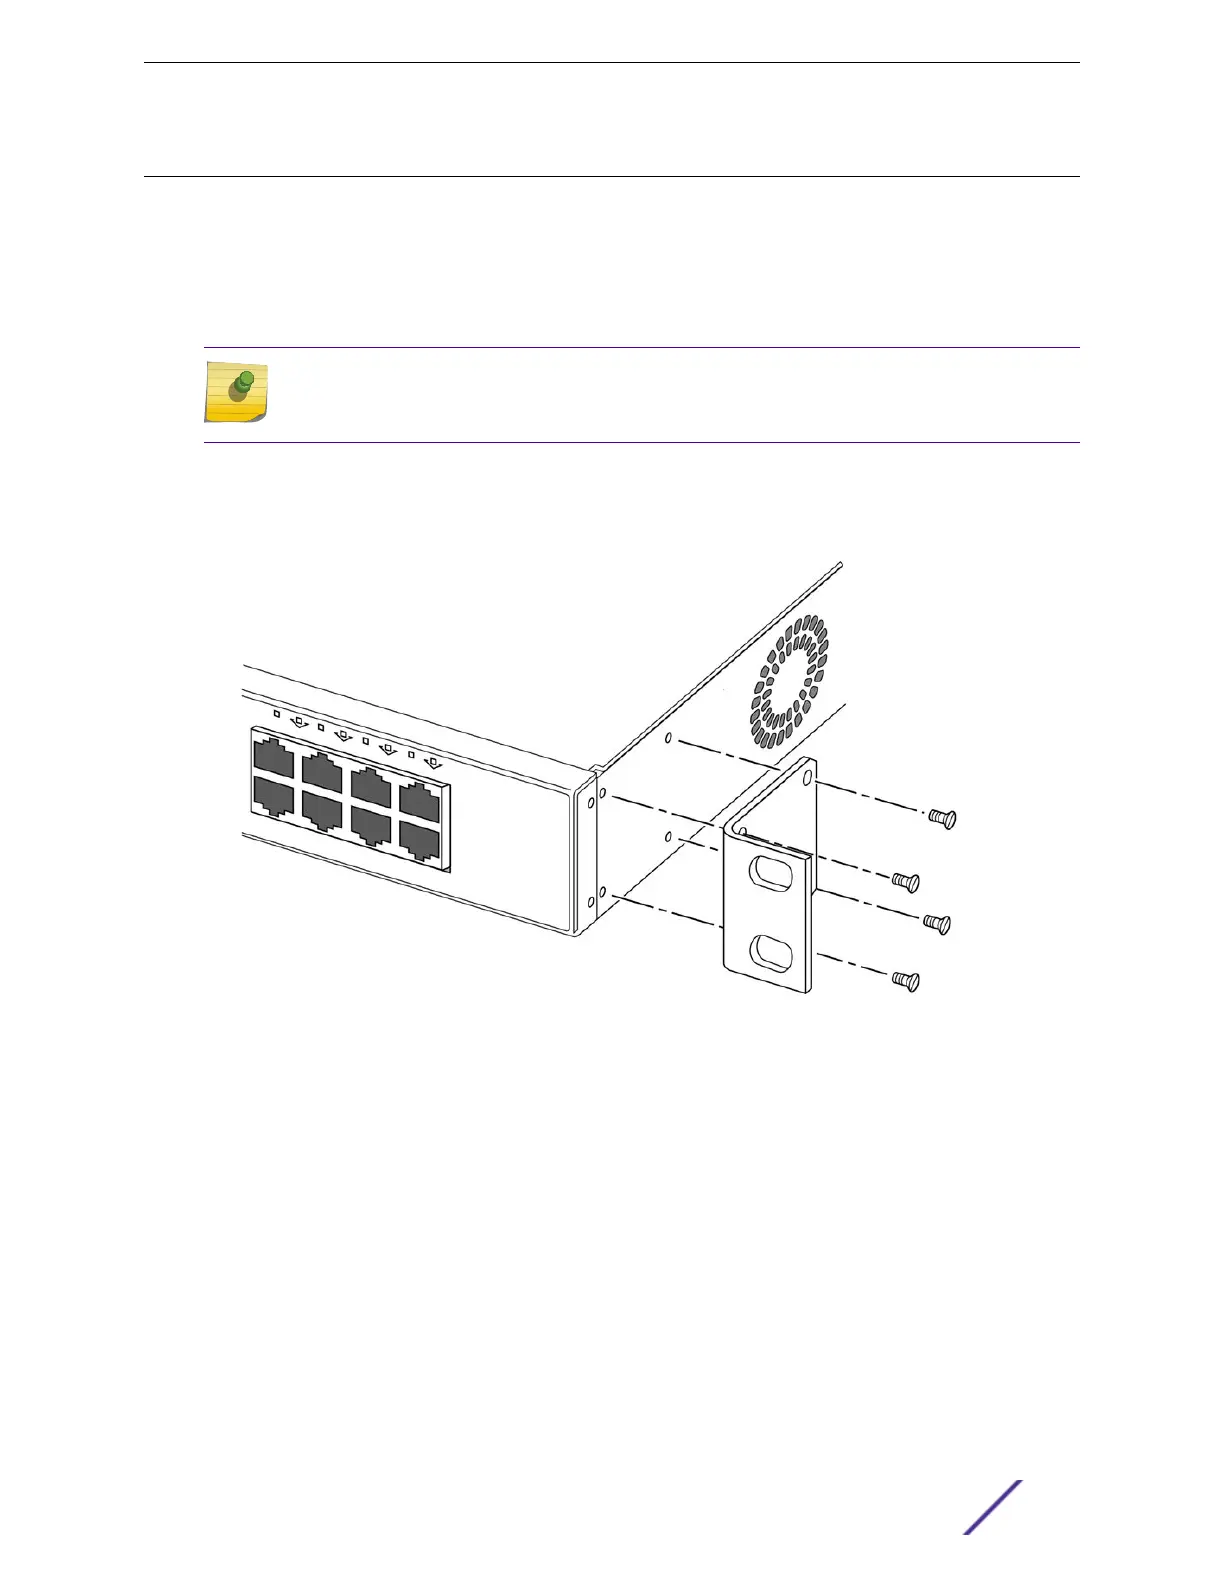
1 On one side of the switch, set a mounting bracket against the switch housing.
Set the flange even with the front panel of the switch and use four chassis screws (provided) to
secure the bracket to the switch. See Figure 33.
Figure 33: Attaching a Rack-mounting Bracket
2 Repeat step 1 to attach the other bracket to the other side of the switch.
Installing Your 210 or 220 Switch
ExtremeSwitching 210 and 220 Series Switches: Hardware Installation Guide 38
 Loading...

