The pads keep the switch from scratching the supporting surface and help ensure adequate airflow
around the switches when they are mounted on top of one another. You can safely place up to four
switches on top of one another.
Caution
Do not place other equipment on top of desktop-mounted switches.
To mount a switch on a desktop – or any firm, flat surface – follow these steps:
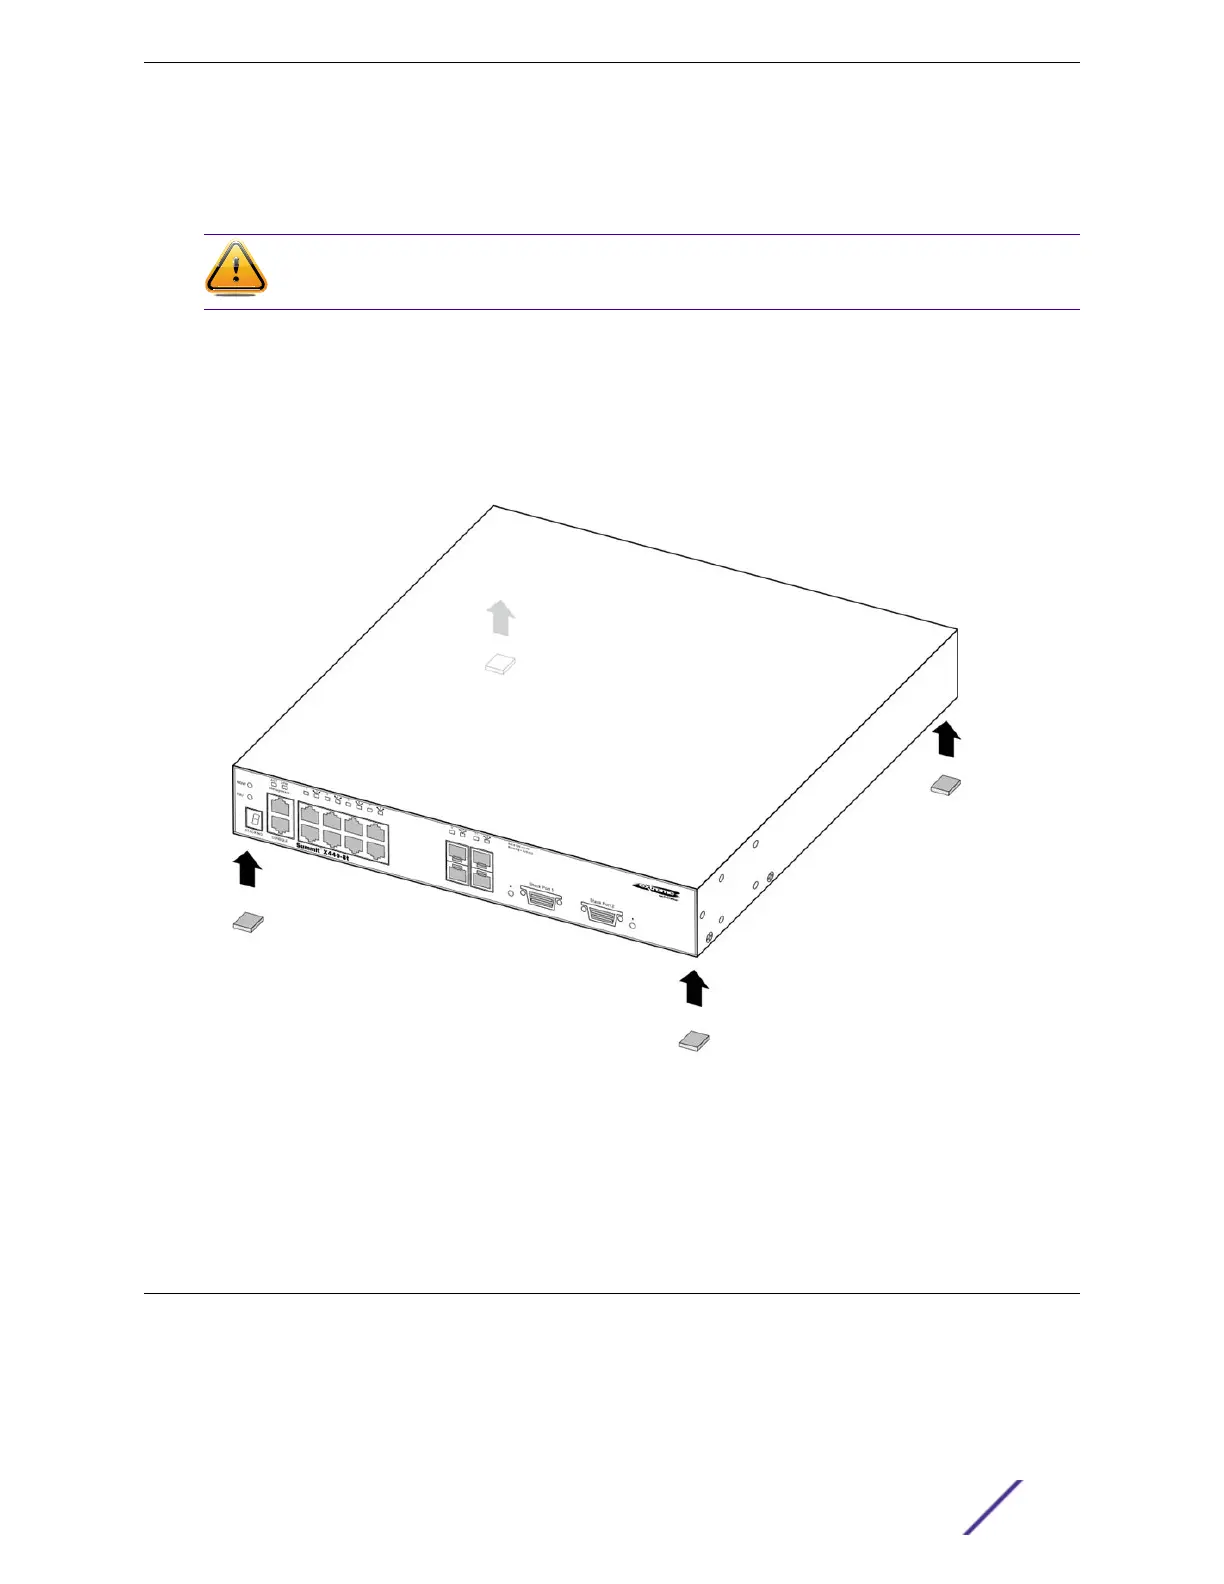
1 Carefully separate the four rubber pads (included).
2 Apply the pads to the underside of the switch by placing a pad at each corner, ensuring that all
corners are aligned.
See Figure 43.
Figure 43: Applying the Rubber Pads to the Underside Corners of a Summit Switch
After the switch is securely in place, install optional components using the instructions in Installing
Optional Components on page 49.
Connect power to the switch. See Connecting Power to the Switch on page 50.
Installing Optional Components
After the switch is secured to the rack or cabinet, install optional components.
Installing Your 210 or 220 Switch
ExtremeSwitching 210 and 220 Series Switches: Hardware Installation Guide 49

 Loading...

