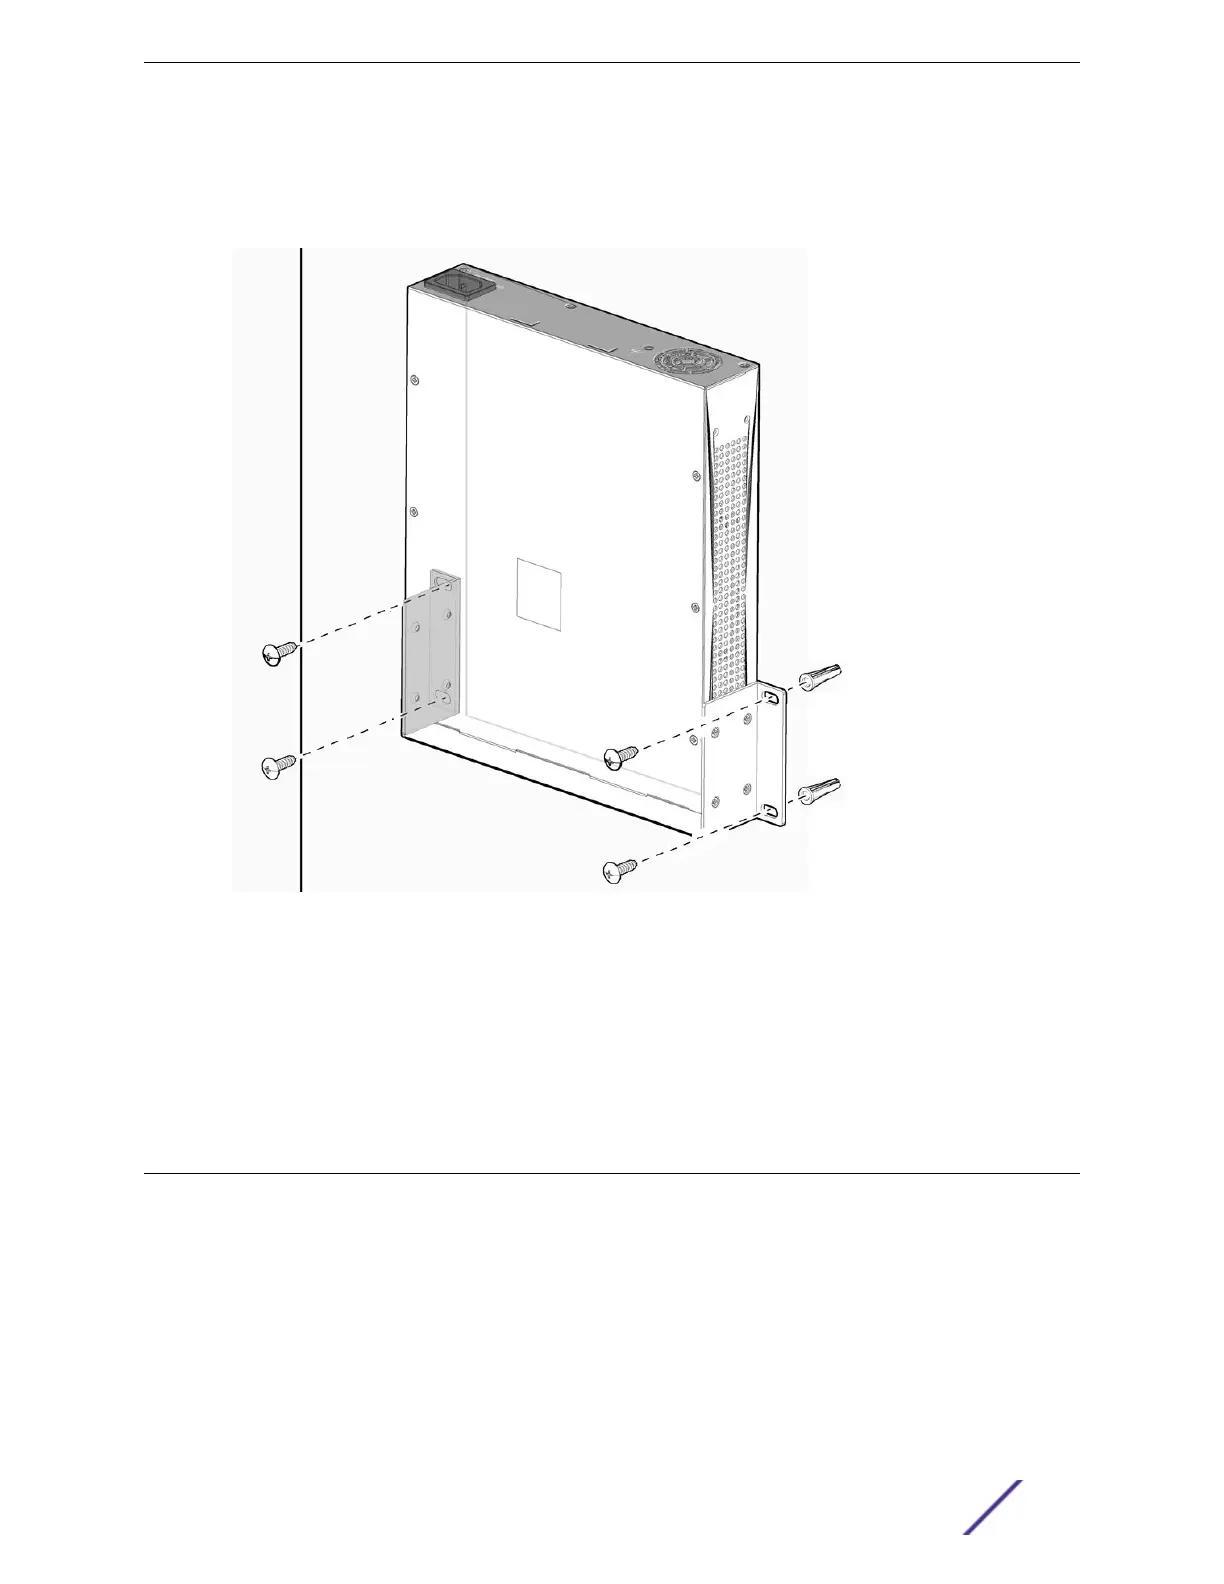
6 Mount the switch assembly on the wall by screwing an anchor screw through each hole in the wall-
mounting brackets into the anchors.
See Figure 42.
Figure 42: Wall-Mount: Mounting the Switch on the Wall
7 Check that all screws have been securely fastened and that the switch is firmly attached to the wall.
After the switch is securely in place, install optional components using the instructions in Installing
Optional Components on page 49.
Connect power to the switch. See Connecting Power to the Switch on page 50.
Installing a Switch on a Desktop or Other Flat Surface
Before you begin the installation, refer to Pre-installation Requirements on page 37.
210 and 220 series switches are supplied with four self-adhesive rubber pads for mounting on desktops
or other flat surfaces.
Installing Your 210 or 220 Switch
ExtremeSwitching 210 and 220 Series Switches: Hardware Installation Guide 48
 Loading...

