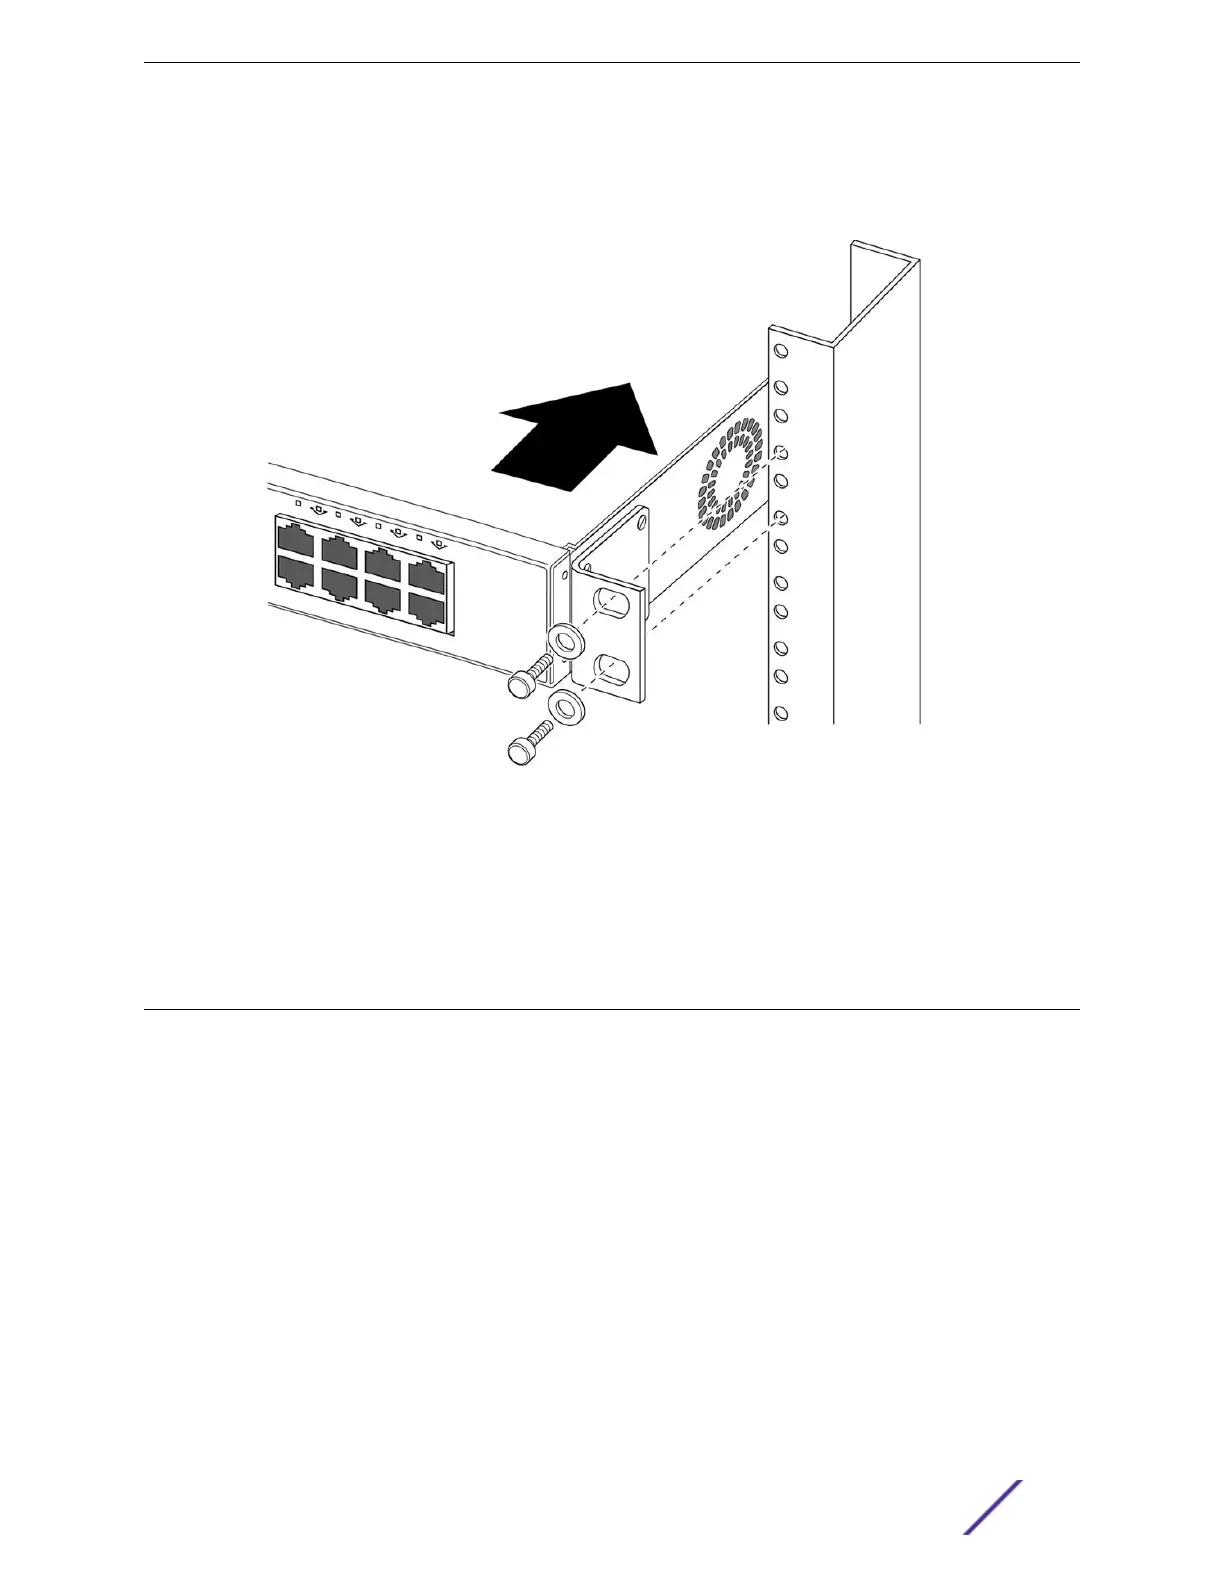
3 Slide the switch into the equipment rack or cabinet.
Secure the mounting bracket flanges to the rack, using screws that are appropriate for the rack.
(Rack-mounting screws are not provided.) See Figure 34.
Figure 34: Sliding the Switch into the Rack
After the switch is securely in place, install optional components using the instructions in Installing
Optional Components on page 49.
Connect power to the switch. See Connecting Power to the Switch on page 50.
Mounting 12-Port Switches
The instructions in this section pertain to the following switch models:
•
ExtremeSwitching 210-12t-GE2 switch
•
ExtremeSwitching 210-12p-GE2 switch
•
ExtremeSwitching 220-12t-10GE2 switch
•
ExtremeSwitching 220-12p-10GE2 switch
There are four possible ways to mount a 12-port 210 or 220 series switch:
•
A single switch in a rack. For mounting instructions, see Mounting a Single 12-Port Switch in a Rack
on page 40.
•
Two switches in a rack, side by side. For mounting instructions, see Mounting Two 12-Port Switches
in a Rack Side by Side on page 41.
•
A single switch on a wall. For mounting instructions, see Mounting a 12-Port Switch on a Wall on
page 46.
•
One or more switches on a desktop or other flat surface. For mounting instructions, see Installing a
Switch on a Desktop or Other Flat Surface on page 48.
Installing Your 210 or 220 Switch
ExtremeSwitching 210 and 220 Series Switches: Hardware Installation Guide 39
 Loading...

