8.
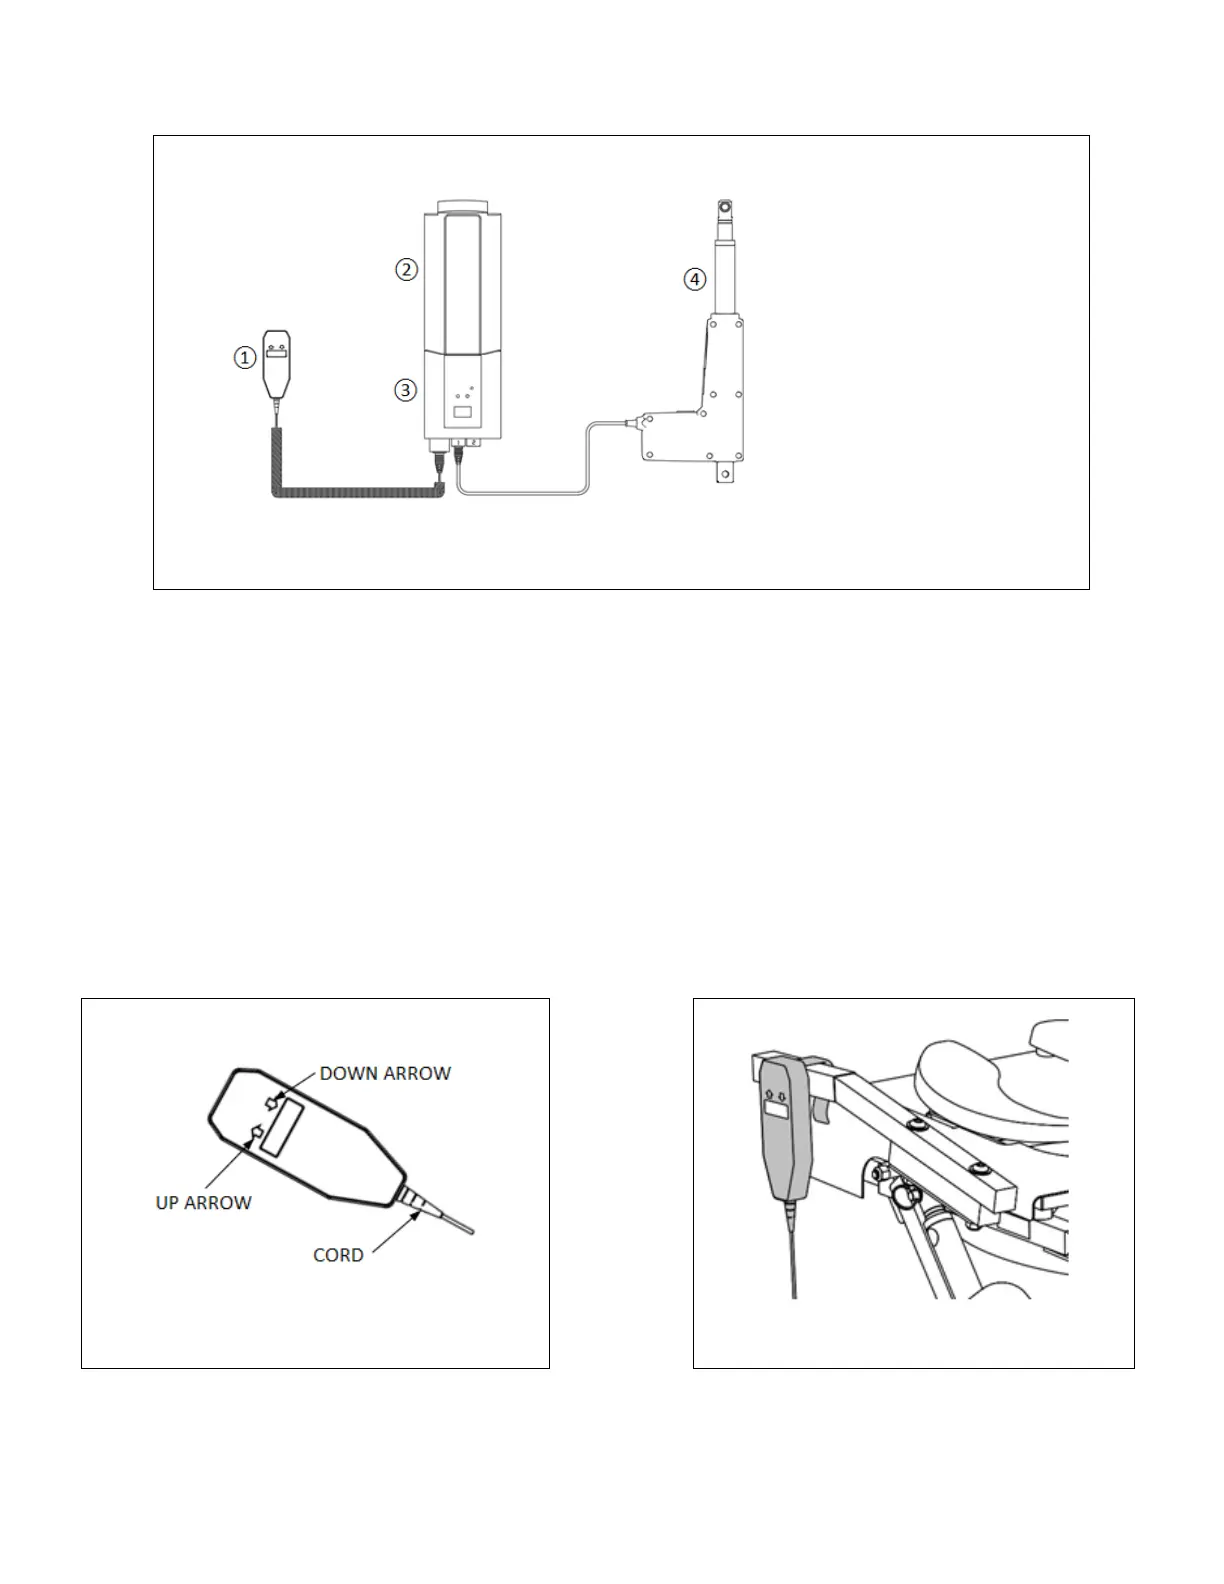
CONNECT ACTUATOR TO CONTROL BOX
8.1 Connect the actuator cord
④
to control box
③
by inserting the jack into the location shown in FIG. 23.
① HANDHELD CONTROL
② BATTERY
③ CONTROL BOX
④ ACTUATOR
9.
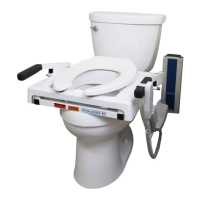
HANDHELD CONTROL
9.1 The handheld control ships from the factory already plugged into the control box; no further assembly is
required.
9.1.1 Should you need to re-connect, insert the round, 8-pin plug on handheld control
①
by aligning
its guide with the groove on the control box
③
, into the location shown in FIG. 23.
9.2 Spend some time to become familiar with the look and feel of the handheld control as well as the
location of the control’s directional arrows (FIG. 24).
9.3 Test cycle (raise and lower) the TILT 3-4 times, without sitting on the seat, to learn its functionality.
9.4 To RAISE: Push and hold the “up” button to raise the TILT.
9.5 To LOWER: Push and hold the “down” button to lower the TILT.
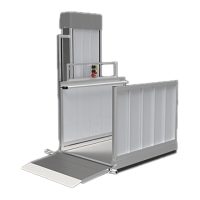
9.6 For convenient storage and access, hang the handheld control onto the TILT handle (FIG. 25).
9.6.1 Ensure the handheld control is placed on the handle nearest the battery and actuator and
route the cord in a manner that is convenient and non-hazardous to the user.