4.
ACTUATOR DETAIL AND ASSEMBLY
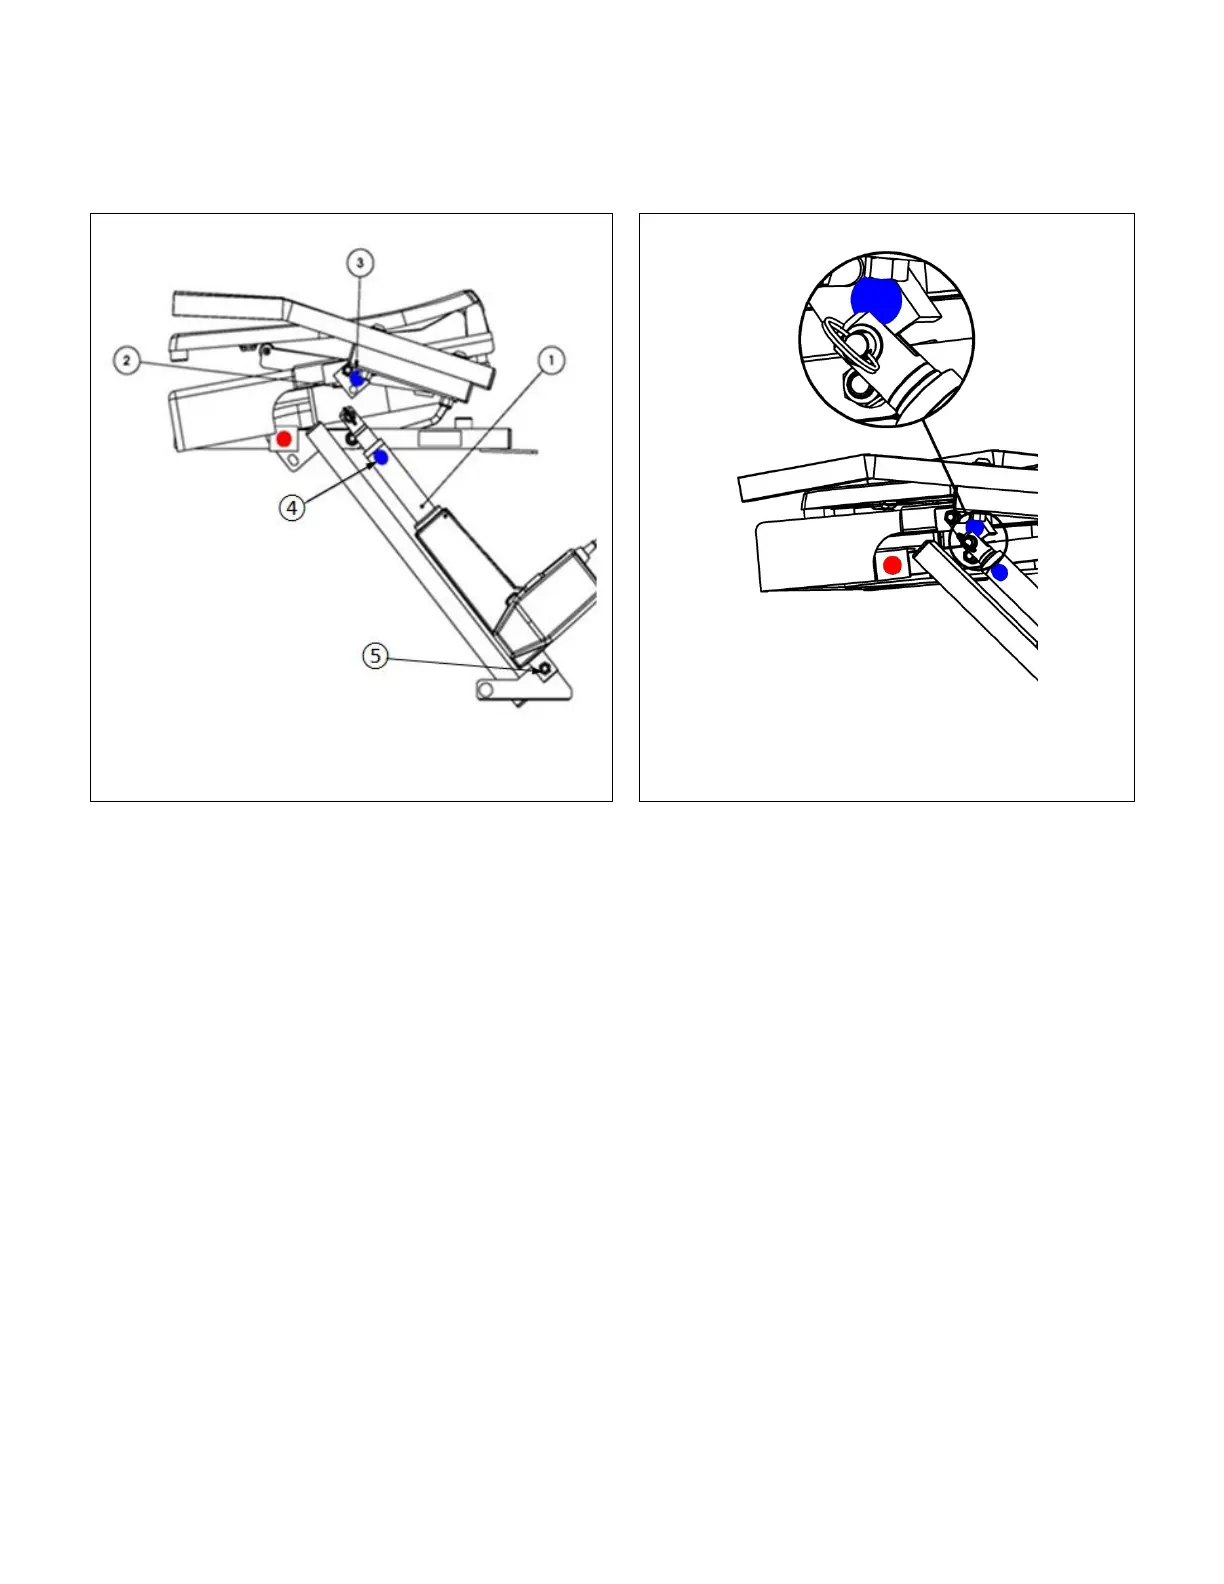
4.1 Using the blue dots on actuator bracket
③
and actuator
④
as guides (FIG. 14), hold actuator
①
and
lower the seat to align the actuator slot with the actuator bracket
②
.
4.2 Ensure the actuator bracket rests inside of the actuator slot.
4.3 Once aligned, fully insert the pin into actuator and through the bracket (FIG. 15).