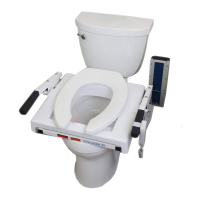
1.
PRE-INSTALLATION
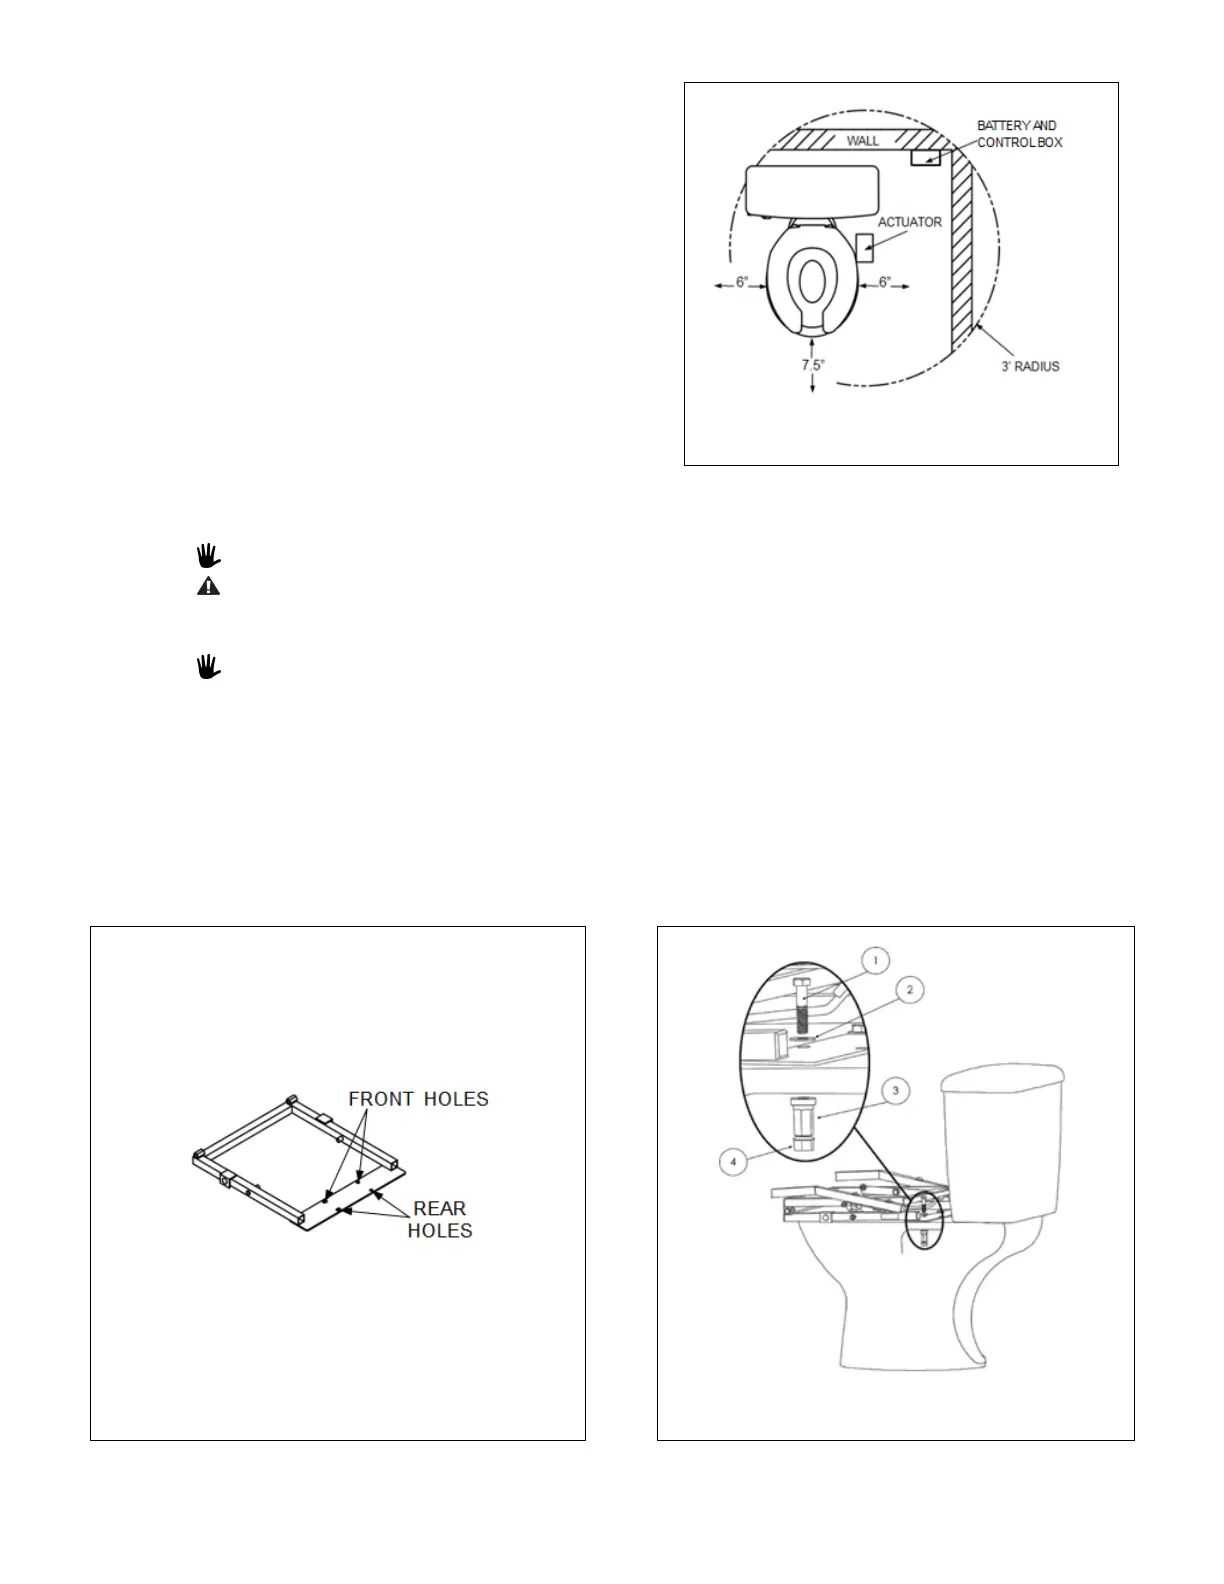
1.1 Before installation, ensure there is sufficient space
around TILT for proper operation. The TILT frame
requires 6” on either side of the toilet bowl and 7-1/2”
in front of the bowl (FIG. 1).
1.2 The battery and control box require 5” x 16” wall space
for mounting (protrudes 3” out from the wall).
1.3 The battery and control box will need to be mounted
within a 3’ radius from the actuator (the control box
cord length requires installing within that range).
1.4 Before use, fully charge the battery by plugging the
charger into a properly grounded GFCI protected outlet
and plugging the other end into the battery. See
‘SECTION 7’ for further instructions.
FIG. 1
2.
FRAME INSTALLATION
2.1 Remove existing seat and lid from toilet bowl.
The TILT ships with its own seat, which will replace your toilet’s current seat and lid.
Always use the toilet seat provided with the TILT; do not replace it with any other seat.
2.2 Set the TILT frame on the toilet, in place of the seat that was previously removed. Align two holes on the
TILT’s mounting plate with the existing two holes on the toilet bowl.
The mounting plate front holes are for a round STANDARD bowl; rear holes are for an
ELONGATED bowl (FIG. 2).
2.3 Using hardware provided, place one bolt
①
and washer
②
through each hole in the TILT frame and
through the hole on the toilet bowl. Using a 9/16” wrench, hold the top of the bolt in place, then thread
the plastic tower nut
③
to the bottom side of the bolt. Hand tighten, and repeat the process for the
second hole (FIG. 3).
2.4 Tighten each plastic tower nut
③
by tightening the snap nut
④
with a 5/8” wrench.
2.4.1 The snap nut
④
will snap off the plastic tower nut
③
once the proper tightness/torque is
applied.
FIG. 2
FIG. 3