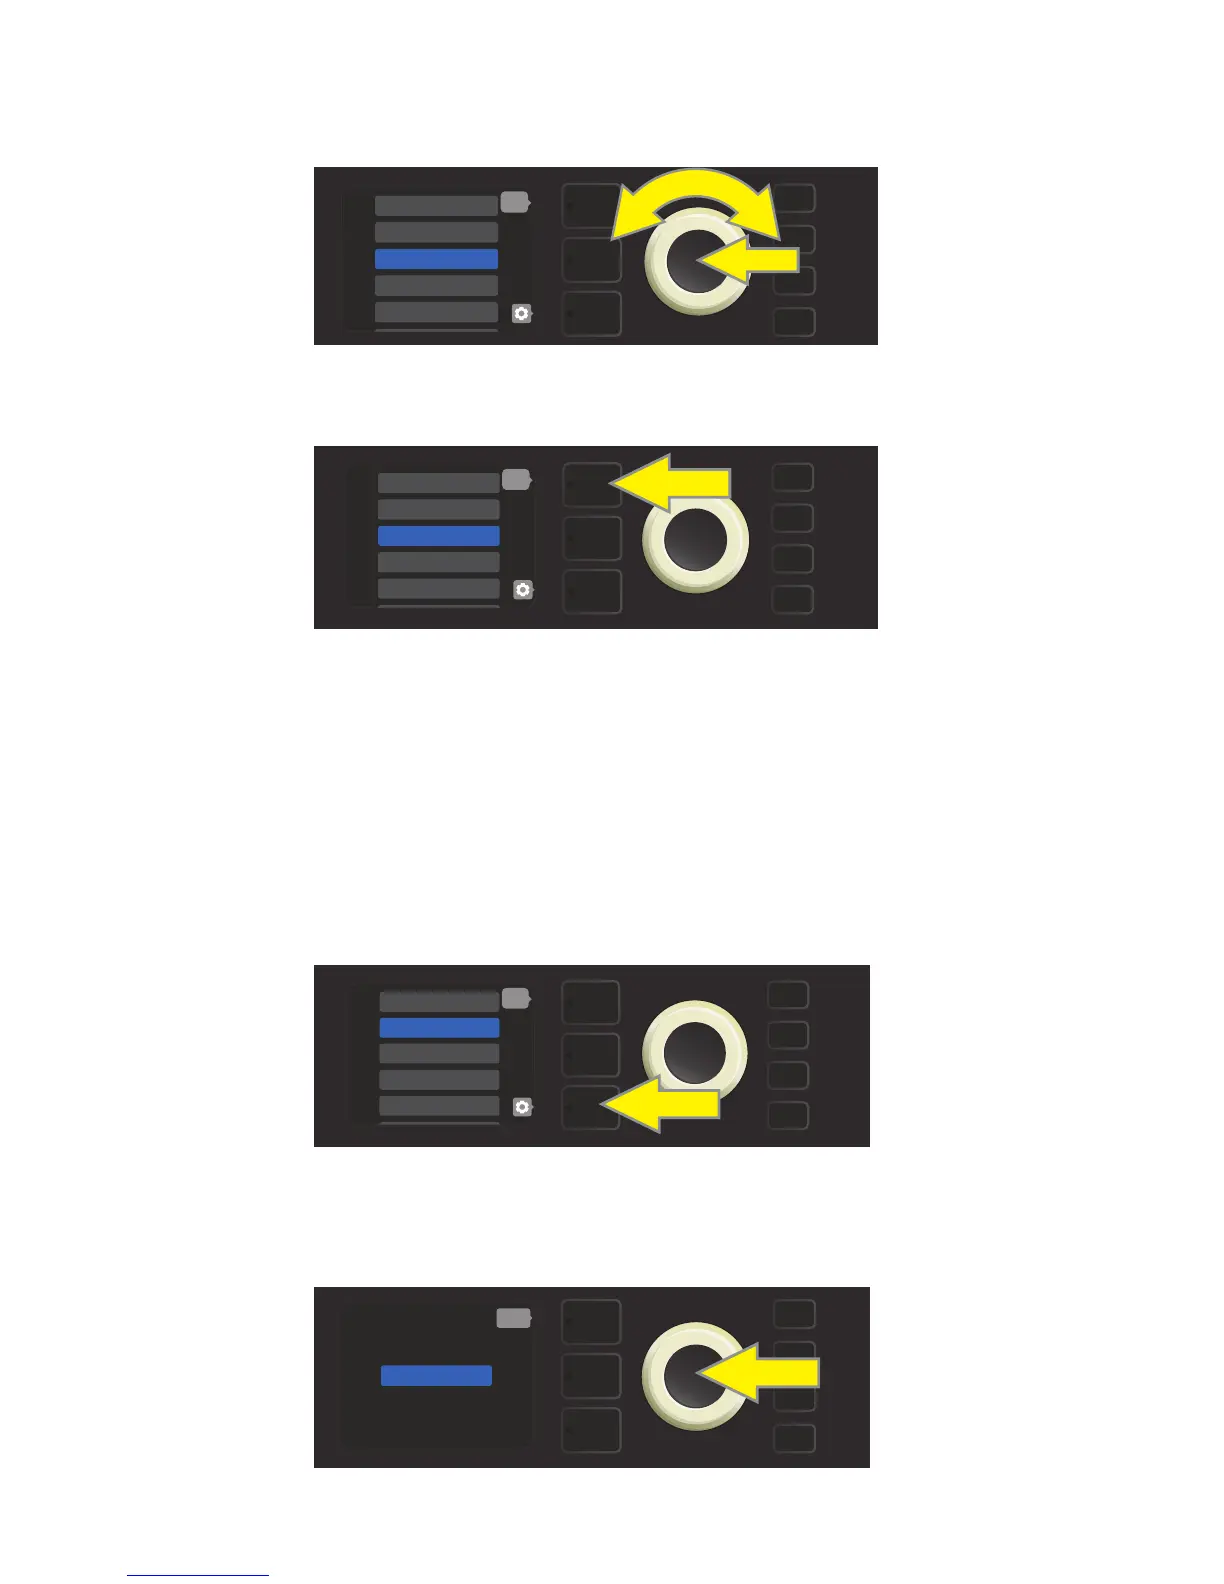
The selected preset is now added to SETLIST 1; repeat the previous two steps to add additional presets to
SETLIST 1. Once multiple presets have been added to SETLIST 1, use the ENCODER to scroll through and acti-
vate dierent presets within the selected Setlist:
When nished creating and using a Setlist, return to main preset mode by pressing the top LAYER BUTTON.
Note that when doing this, the PRESET LAYER will display whichever preset was last highlighted in the Setlist:
To create subsequent additional Setlists, repeat the steps on page 34 and above. These will automatically be
labeled “SETLIST 2,” “SETLIST 3” and so on in numerical order.
Once a Setlist is created, individual presets within them can easily be deleted if necessary (to delete an entire
Setlist, see page 37). To delete a single preset within a Setlist, highlight the preset to be deleted by scrolling to
it using the ENCODER; press the CONTROLS LAYER button corresponding to the “gear” icon in the DISPLAY
WINDOW:
“DELETE” will then appear in a blue box; press the ENCODER on it to delete that preset. Alternately, press the PRE-
SET LAYER button corresponding to “back” in the DISPLAY WINDOW to not delete the preset from the Setlist:
35
4 9 - ’59 BASSMAN 4X>
5 15 - STUDIO PREAM>
1 11 - BASSMAN TV
2 5 - REDHEAD
3 6 - KGB-800
MENU
back
MENU
4 9 - ’59 BASSMAN 4X>
5 15 - STUDIO PREAM>
1 11 - BASSMAN TV
2 5 - REDHEAD
3 6 - KGB-800
back
MENU
4 9 - ’59 BASSMAN 4X>
5 15 - STUDIO PREAM>
1 11 - BASSMAN TV
2 5 - REDHEAD
3 6 - KGB-800
back
DELETE
back
MENU
DELETING AN INDIVIDUAL PRESET FROM A SETLIST