53
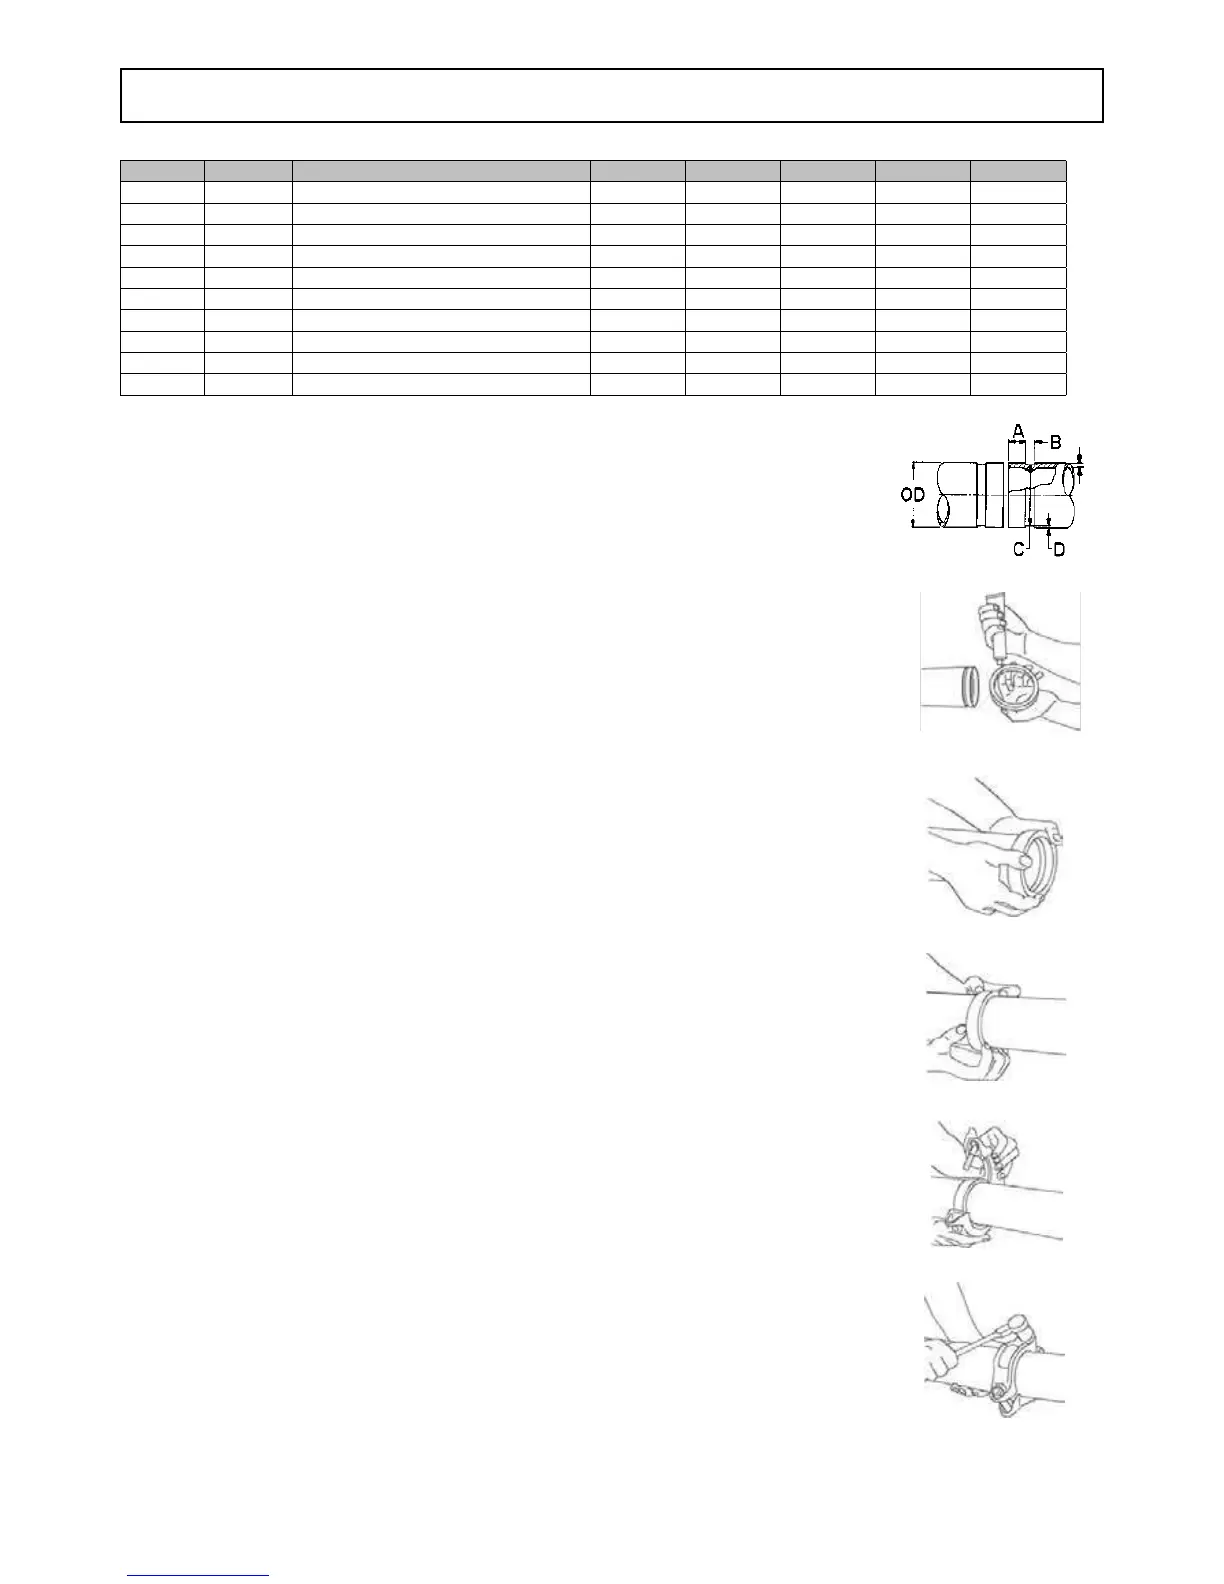
ISO-G DN(mm) EXTERNAL DIAMETER OD(mm) A B O D T
1” 25 33.7 15.875 7.137 30.226 1.600 1.651
11/4” 32 42.4 15.875 7.137 38.989 1.600 1.651
11/2” 40 48.3 15.875 7.137 45.085 1.600 1.651
2” 50 60.3 15.875 8.738 57.150 1.600 1.651
21/2” 65 76.1 15.875 8.738 72.260 1.981 2.108
3” 80 88.9 15.875 8.738 84.938 1.981 2.108
4” 100 114.3 15.875 8.738 110.084 2.108 2.108
5” 125 139.7 15.875 8.738 135.500 2.134 2.769
6” 150 168.3 15.875 8.738 163.957 2.159 2.769
8” 200 219.1 19.050 11.913 214.401 2.337 2.769
HYDRAULIC CONNECTIONS
T
1) Pipe groove inspections
Check the depth and diameter of the grooves and their distance from the pipe ends. Make sure that the
work has been carried out with care and that the end surface of the pipes is smooth and not ovalized.
Make sure that there are no notches, burrs or other imperfections that could impair the tightness.
Groove dimensions in mm A=16-B=8-C=57.2-D=1.6
2) Checking the seal and relative lubrication
Make sure that the type of seal used is compatible with the nature and temperature of the fluid. Signal
green EPDM seals are used.
Apply a film of grease to the seal: on the back, on the side flanks and on the inner lips that contact the
pipe. Work in conditions of the utmost cleanliness as particles of dirt could damage the seal. Always
and only use synthetic grease. Greasing makes it easier to fit the seal on the pipe and improves the
tightness. It also allows the seal to slide within the connection, avoiding tensions and projections near
the bolts.
3) How to fit the seal
Fully insert the seal into the end of a pipe. Make sure that the seal lips adhere to the pipe itself.
4) Alignment
Align the pipes and move their ends near to each other. Now push the seal, centering it on the two pipe
ends. The seal must remain inside the grooves.
5) Joint assembly
Remove one bolt and loosen (without removing) the other one. Seat part of the body of the joint at the
bottom, between the pipe ends, inserting and edges of the grooves. Now seat the other part of the
body at the top, on the two ends, and close the joint. Make sure that the parts of the body of the joint
touch each other.
6) Nut torquing
Fit the previously removed bolt back in place and tighten both nuts by hand. Now torque them with the
relative wrench, tightening them alternately a few turns.
WARNING:
If one nut is fully tightened at a time, the seal could slip between the jaws of the opposite side of the
joint.
 Loading...