EN
ROBOTIC LAWN MOWER USER MANUAL
Installation
13
4. INSTALLATION
Before starting the installation, thoroughly study this entire chapter. The installation process infl uences the performance of the robotic lawn mower. Therefore, careful
planning of the installation is essential.
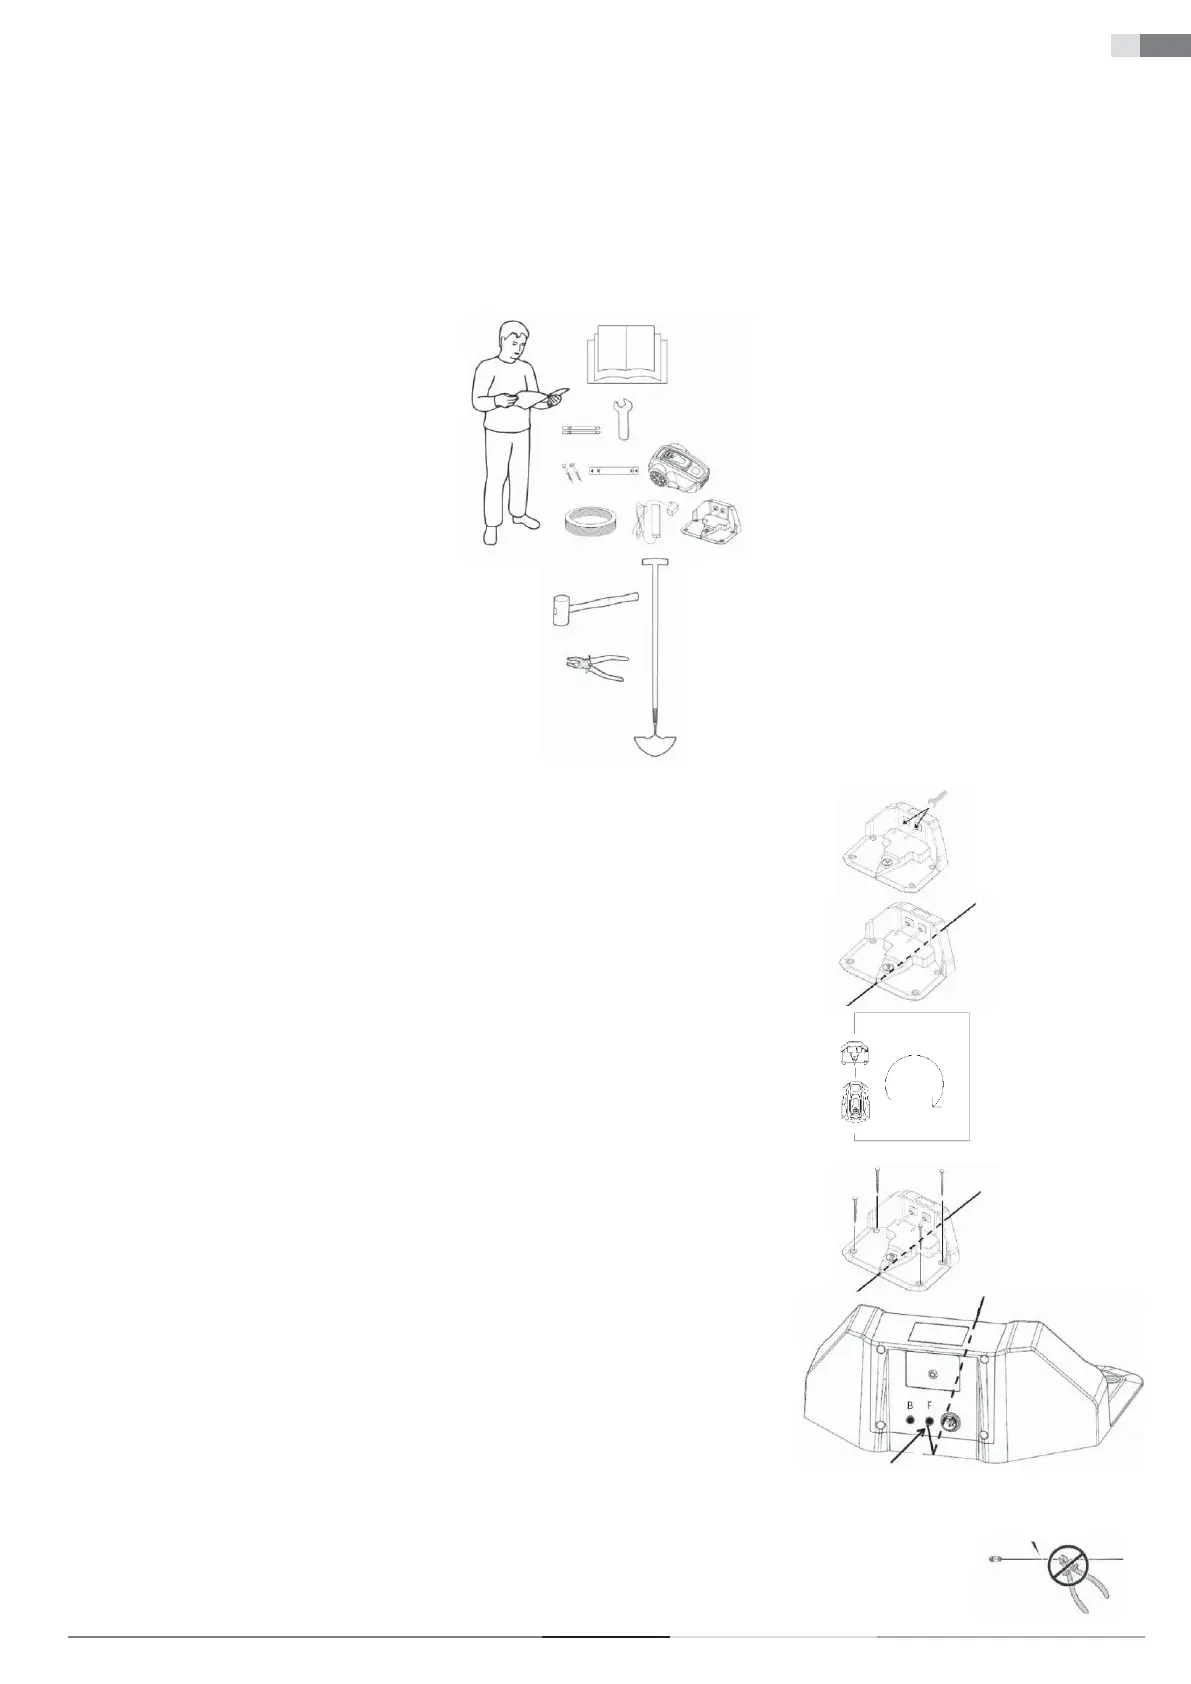
PREPARATION
1. If the grass in the working area is higher than 7 cm, mow it using a standard lawn mower and collect the cut grass.
2. Before installation, carefully read all the steps.
3. Make sure you have all the parts needed for the installation. The numbers in brackets refer to the image “List of Parts” on page 8.
• lawn mower body (1)
• charging base (4)
• perimeter wire (22)
• power adapter (21)
• pin (24)
• charging contacts (5)
• fl at spanner (25)
• nail for the charging base (23)
• gauge (28)
During installation, you will also need the following tools:
• hammer / plastic mallet (for easier driving of stakes into the ground).
• combination pliers for cutting the perimeter wire.
• edge aligner / straight spade, if burying the perimeter wire is necessary.
INSTALLING AND CONNECTING THE CHARGING BASE
Mounting the Charging Base
After selecting a suitable location for the charging base, see “Choosing the Location for the Charging Base” on page 12.
1. Using the supplied spanner, screw the two supplied charging contacts onto the charging base.
2. Secure the perimeter wire in the groove on the bottom plate of the charging base.
3. Determine the direction of the charging base.
The charging base should be oriented so that the robotic lawn mower can approach it along the perimeter wire
clockwise and park correctly.
4. Attach the charging base to the ground using the supplied nails. Make sure that the nail heads do not protrude.
5. Connect the end of the perimeter wire at the front of the charging base to the right connector marked with the
symbol "F".
Power Adapter Connection
Connect the power cord of the power adapter to a 100–240 V power socket.
Consider the following factors when planning the placement of the power adapter:
• Proximity of the charging base
• Protection against rain
• Protection against direct sunlight
The low-voltage output cable of the power adapter is 4 metres long. It is forbidden to shorten or lengthen it.