EN 24
Usage
FZRR 5650-A, FZRR 5950-A
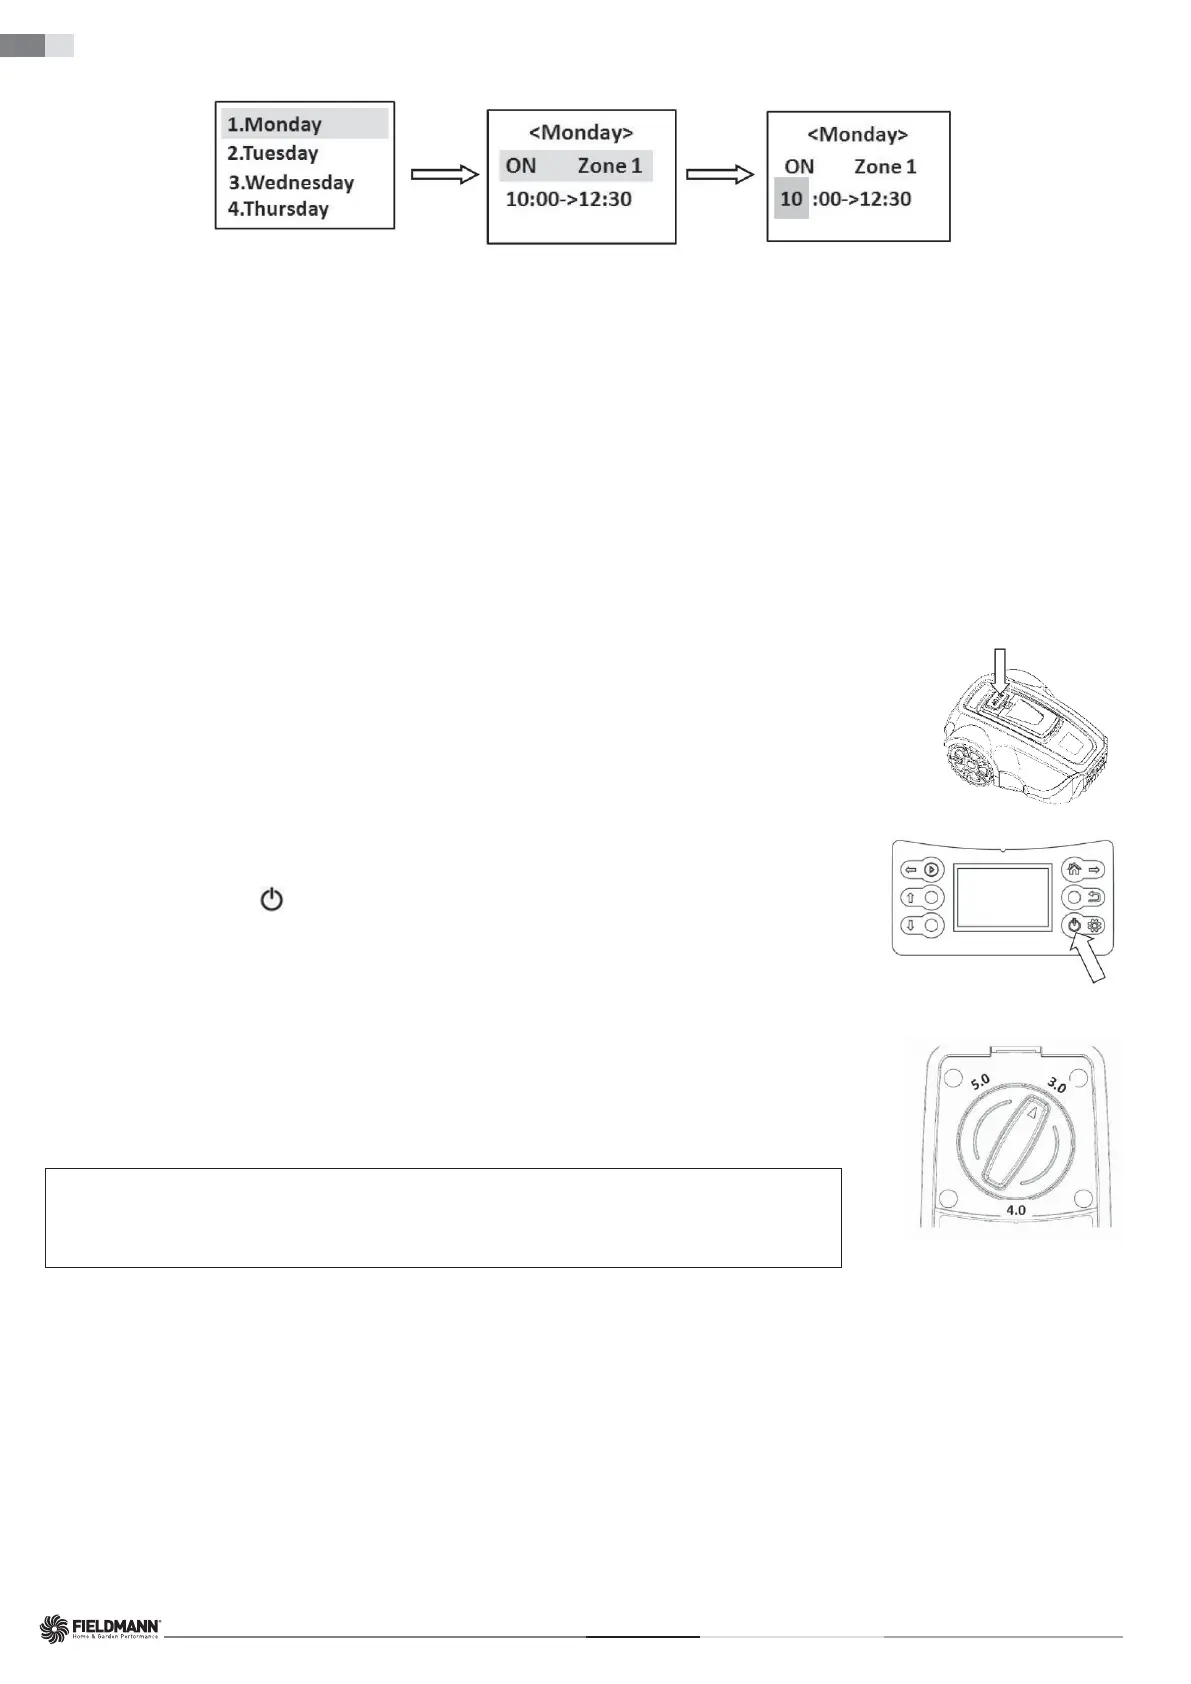
3. Use a similar procedure on the control panel as described in the section “Date/Time” on page 22 to set the timer for grass cutting on different days and in
different zones.
After completing the settings, make sure that the robotic lawn mower correctly parks in the charging station so that it can
automatically start when the time comes.
Note:
1. For each day, you can only select one working zone.
(For a specifi c day, you can select any of the defi ned zones. If you do not divide the area into zones, the main zone is preset as Zone 1);
if you do not want to cut the grass on a certain day, select "OFF" for the Zone selection.
2. For each day, you can set only one working time.
If, after the fi rst use of the timer function, you fi nd that the grass in a particular zone is not well cut, you can adjust the timer in two ways:
1. Choose another day when work will be done in that zone again.
2. Extend the working time in that zone so that the mower will cut longer in that area next time.
For more information on the relationship between the length of the working time and the lawn area, see the section “Timer” on page 21.
STOPPING
Pressing the STOP button; the robotic lawn mower will stop, and the blade disc motor will also stop.
If the mower was started using the quick start: When, after pressing the STOP button, you want to start the mower again for daily work,
follow the steps in the section “Quick Start” on page 23.
If the mower was started using the timer: After pressing the STOP button, it will not continue with the remaining daily work plan, it will
stay in the charging base until you delete the daily work plan and start it manually using quick start or automatically deactivate the timer
set for the next day.
SWITCHING OFF
1. Press the STOP button.
2. Hold down the power switch
for 3 seconds to switch off the power.
Always switch off the robotic lawn mower if it needs maintenance or if it needs to be moved out of the working area.
CUTTING HEIGHT ADJUSTMENT
The cutting height can be set from 3 to 5 cm.
How to adjust the cutting height:
1. Press the STOP button to stop the robotic lawn mower and open the cover.
2. Turn the height adjustment knob to the desired position.
• Turn clockwise to increase the cutting height.
• Turn counterclockwise to reduce the cutting height.
IMPORTANT INFORMATION
During the fi rst week after a new installation, the cutting height must be set to MAX (5 cm) to
avoid damage to the perimeter wire. After that, the cutting height can be gradually reduced
every other week until the desired height is reached.