EN 14
Installation
FZRR 5650-A, FZRR 5950-A
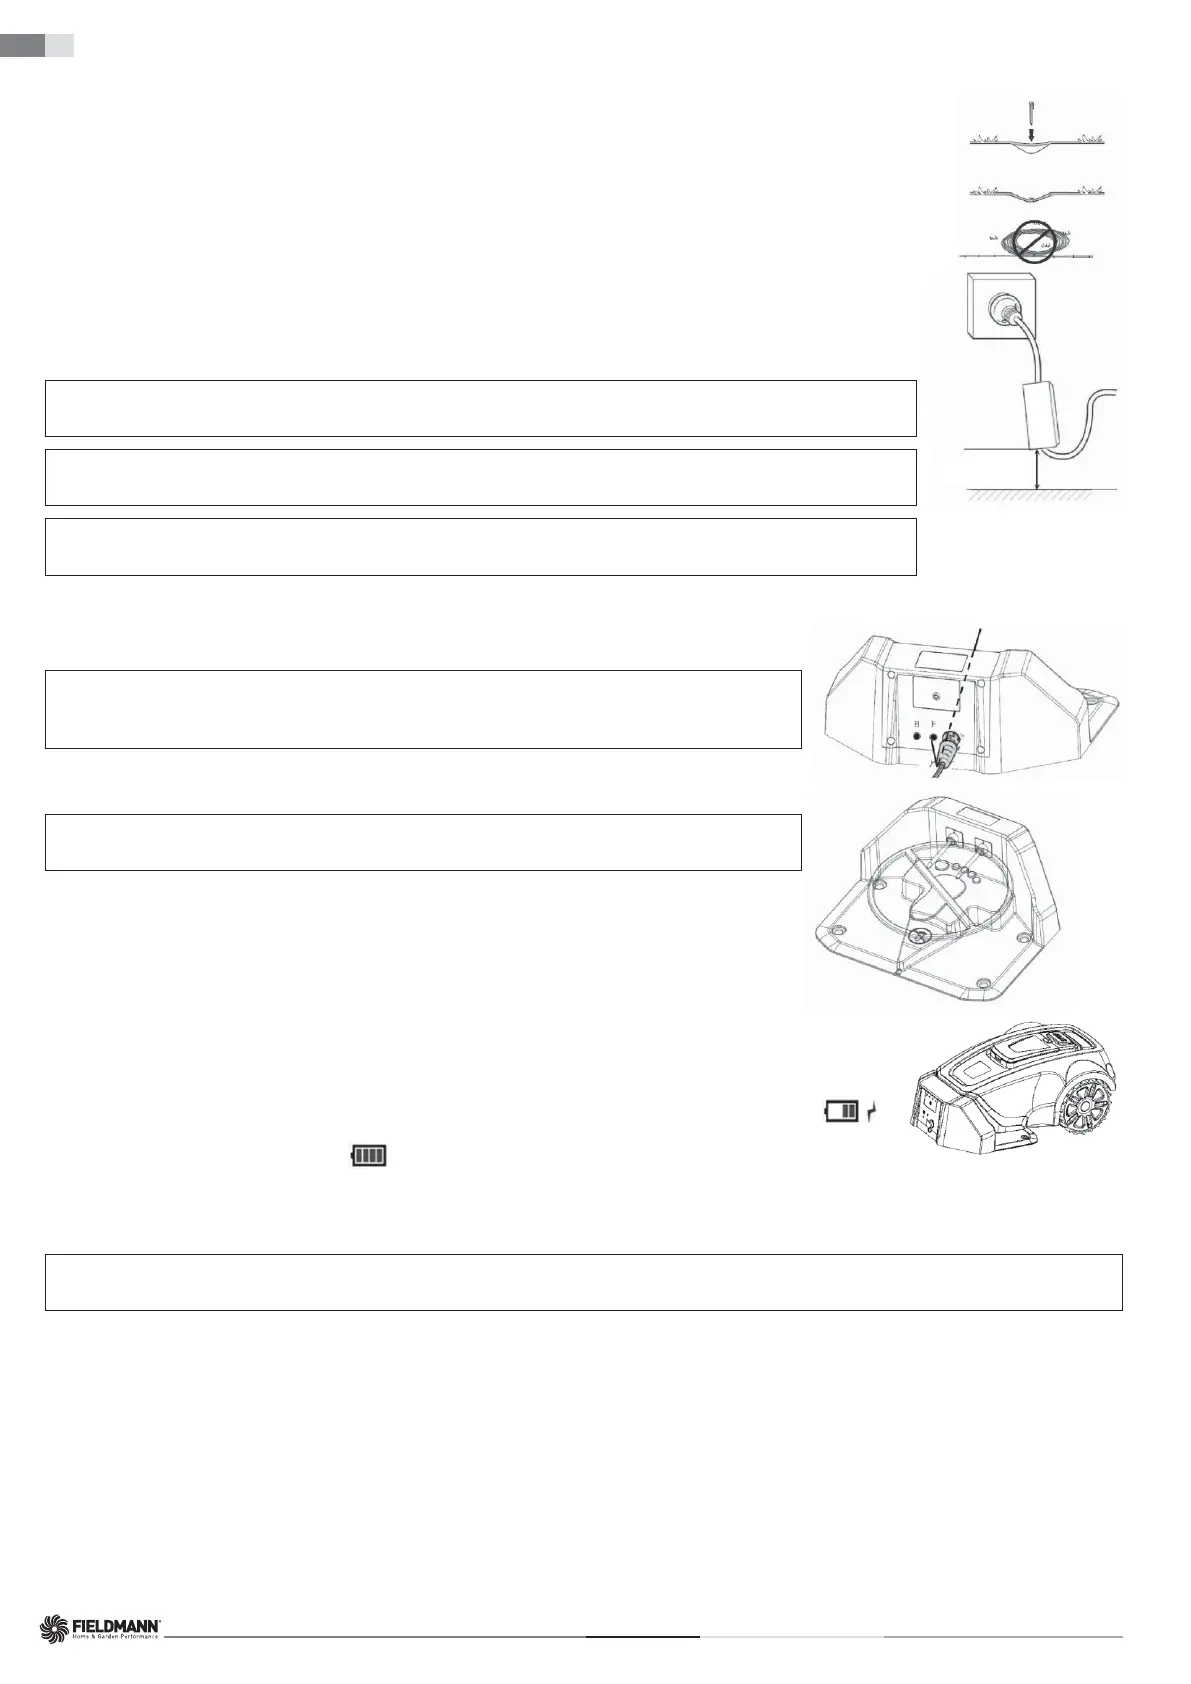
The low-voltage output cable must be laid on the ground and secured with stakes. The distance between the cable and the ground should be
less than 1 cm to allow the robotic lawn mower to pass over it.
Never coil or place the low-voltage output cable in a spool or under the baseplate of the charging base, as it could interfere with signals from
the charging base.
min. of 30 cm/12”
POWER ADAPTER
When connecting the power adapter to a wall socket, it is recommended to use a grounded circuit breaker.
When the power adapter is plugged directly into a wall socket, it must be at least 30 cm above the ground (to prevent contact with water).
Placing the power adapter on the ground is not allowed.
IMPORTANT INFORMATION
Under no circumstances should the low-voltage output cable be shortened or lengthened.
IMPORTANT INFORMATION
Position the low-voltage output cable so that the cutting disc can never come into contact with it.
IMPORTANT INFORMATION
Before cleaning or repairing the perimeter wire, pull out the plug to disconnect the charging base.
Charging Base Connection
Connect the low-voltage output cable to the charging base.
IMPORTANT INFORMATION
Creating new baseplate holes is not allowed. Use only the existing holes to secure the
baseplate to the ground.
IMPORTANT INFORMATION
Do not step or walk on the baseplate of the charging base.
BATTERY CHARGING
Once the charging base is connected, the robotic lawn mower can be charged.
Position the robotic lawn mower correctly into the charging base so that the charging contacts are connected to the input contacts of
the robotic lawn mower.
To verify the correct connection:
Open the control panel cover, press the power switch and check that the lightning bolt symbol next to the battery symbol (
)
is blinking. If yes, the connection is correct. If the lightning bolt symbol does not display, the connection is not correct. When the
battery is fully charged, the full battery symbol (
) is displayed.
Place the robotic lawn mower into the charging base to charge the battery while laying the perimeter wire.
If the battery is discharged, it will take approximately 60–120 minutes for a complete charge.
IMPORTANT INFORMATION
The robotic lawn mower cannot be used until the installation is complete.
INSTALLATION OF THE PERIMETER WIRE
Before starting the laying of the perimeter wire, it is recommended to mow the grass in the areas where it will be placed. It will then be easier to attach the wire to the
ground. This reduces the risk of the robotic lawn mower damaging the wire during operation.
The perimeter wire can be installed in one of the following ways:
1. Securing the wire to the ground with stakes.
If you plan to adjust the position of the perimeter wire after a few weeks of operation, it is advantageous to secure the wire using stakes. After a few weeks, the grass will
grow over the wire, making it less visible. Use a hammer / plastic mallet and the supplied stakes for installation.
2. Burying the wire.
To facilitate verticutting or lawn aeration, it is better to bury the perimeter wire. If needed, both methods can be combined: secure one part of the perimeter wire using
stakes and bury the other part. Use an edge aligner or straight spade for burying. The perimeter wire must be laid a minimum of 1 cm and a maximum of 5 cm deep in
the ground.