Lit. No. 43573/43583/43593, Rev. 01 9 August 15, 2013
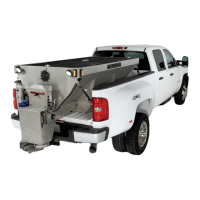
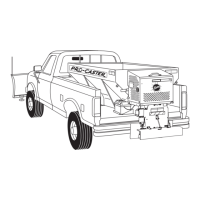
MOUNTING THE SPREADER
MOUNTING SPREADER
NOTE: Periodically throughout the snow and ice
control season, verify mounting devices are secure.
1. Remove the tailgate from the pickup bed.
2. Load the spreader onto the truck bed.
3. Mount the chute to the defl ector using the supplied
hardware kit.
4. Mount the chute/defl ector assembly to the spinner
assembly with supplied hardware to form the drive
assembly.
5. Mount the drive assembly to the spreader with a
bent pin and secure with a hair pin cotter.
6. Slide the spreader forward until the defl ector/chute
assembly makes contact with the vehicle. Then,
slide spreader back approximately 1" to allow
proper clearance.
7. Install stop bars using supplied hole patterns (see
illustration below). To achieve the best position,
you may need to drill additional holes in the
bracket in order to properly position the spreader.
If there are interferences, relocate the holes,
making sure there are at least two forward and
two rearward of the front to back centerline.
CAUTION
Before lifting, verify hopper is empty of
material. The lifting device must be able to
support the spreader's weight as shown in
the spreader specifi cations table.
WARNING
Spreader shall be bolted to vehicle frame.
Do not rely on the tie-down chains or straps
alone to hold spreader in vehicle.
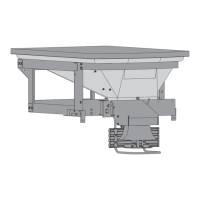
Through floor/bed
mounting fasteners
Adjustable Stop Bracket
CAUTION
Before drilling holes, check to be sure that no
vehicle wiring or other components could be
damaged.