11.13 Changing the image mode
General
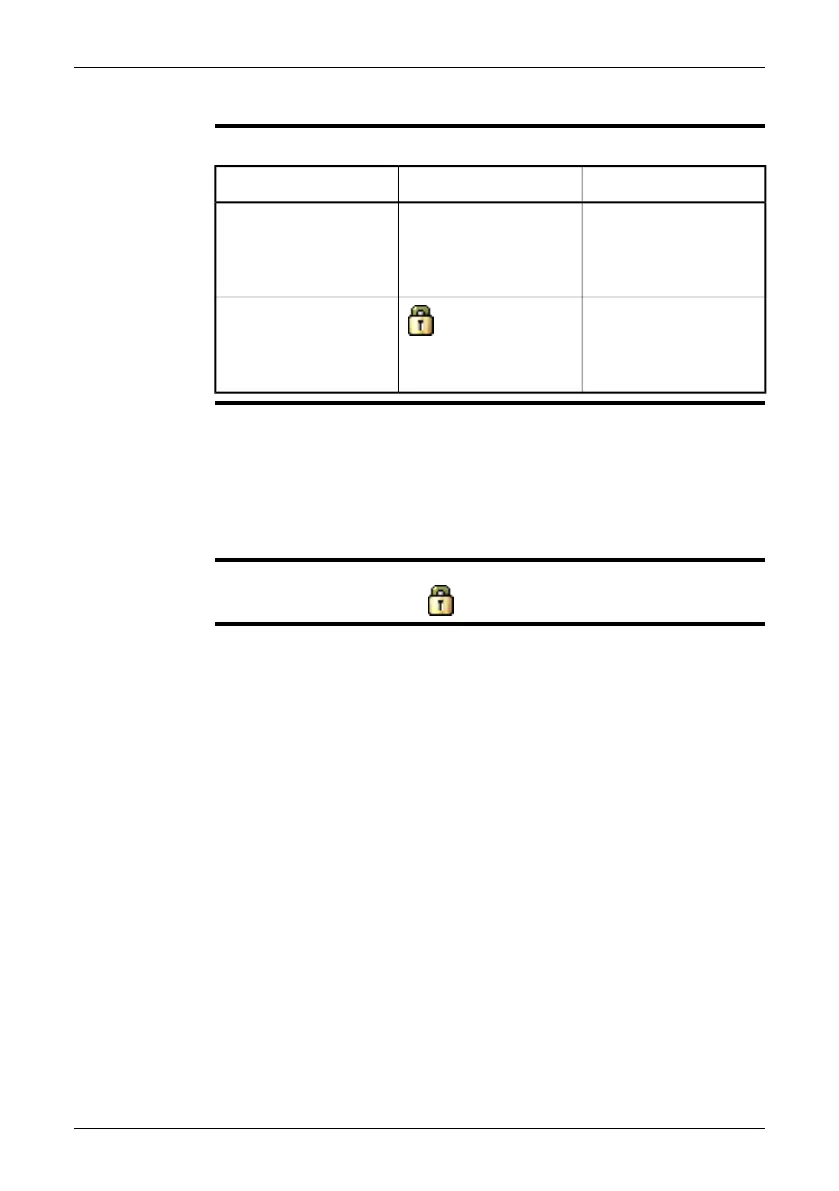
The camera can operate in two different image modes:
ExplanationIconImage mode
In Auto mode, the cam-
era is continuously auto-
adjusted for best image
brightness and contrast.
[None]Auto
In Locked mode, the
camera locks the temper-
ature span and the tem-
perature level.
Locked
When to use
Locked mode
A typical situation when you would want to use Locked mode is when looking for
temperature anomalies in two items of similar design or construction.
For example, if you are looking at two cables, where you suspect one is overheated,
working in Locked mode will clearly show that one is overheated. The higher temper-
ature in that cable would create a lighter color for the higher temperature.
If you use Auto mode instead, the color for the two items will appear the same.
Procedure
To switch between Auto mode and Locked mode, push the right selection button
(Auto/Locked). A padlock icon ( ) indicates the Locked mode.
Publ. No. T559580 Rev. a486 – ENGLISH (EN) – November 17, 2010 29
11 – Using the camera