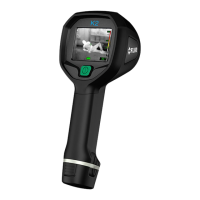
In-truck charger (optional accessory)
13
3. Hole for attaching the charger housing to the metal bracket.
4. Connectors in the cradle.
5. Connector to power the charger using a standard FLIR Systems power supply.
6. Hole for attaching the charger housing to the metal bracket.
7. LED indicator for the battery charger.
8. Battery slot.
9. Eccentric latch to secure the battery during charging.
10. Cable port (1 of 4).
Note There is also one port through the rear of the metal bracket.
11. Routing support.
12. 12–24 VDC cable plinth.
13. Recess for the cable.
14. Routing support.
13.3 Choosing a suitable position
Before mounting the in-truck charger, take a few minutes to think about a suitable
position.
The mounting position should be protected from rain and road splash, and it should be
reasonably easy to install a permanent cable running from the fire engine’s 12–24 VDC
system to the in-truck charger.
Additional considerations may be important, e.g., getting access to panels and equip-
ment behind the in-truck charger.
13.4 Recommended cable area and fuse
Cable area 1.5 mm
2
(No. 15 AWG)
Fuse 5 A
13.5 Mounting instructions
Follow this procedure:
1. Permanently install a cable running from the fire engine’s 12–24 VDC system to the
selected mounting position of the in-truck charger. Do not connect this cable to the
12–24 VDC system at this time. The routing must include a fuse installed close to the
battery. See above for the fuse recommendation.
2. Remove the two screws that hold the metal bracket.
3. Remove the metal bracket.
4. Use the metal bracket as a template to mark where the mounting holes should be
drilled.
5. Drill the holes.
6. Mount the metal bracket using the rivets and/or screws that come with the in-truck
charger.
7. Connect the cable to the cable plinth on the rear of the in-truck charger.
Note Take note of the polarity when you connect the cable to the cable plinth.
8. Route the cable so that it exits through the cable port of your choice.
9. Mount the in-truck charger to the metal bracket using the two screws that you re-
moved in Step 2 above.
10. Permanently connect the cable to the fire engine’s 12–24 VDC system.
#T559946; r. BA/41926/41970; en-US
47

 Loading...