Capturing and Working with
Screen Captures
10
10.1 Capturing Images
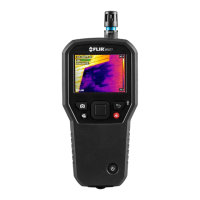
To capture a screen image, press the Camera button (shown above). The dis-
play will briefly show the filename assigned to the captured image at the top
of the screen. Screen images can be captured for any Image mode: Thermal
MSX®, Thermal, Digital Camera, Psychrometrics, and Moisture mode. If the
internal memory is full, an error will display and images cannot be captured
until room is made available in the internal storage drive. Images cannot be
captured if the MR277 is connected to device via USB.
10.2 Viewing Images on the MR277
Press the Image Gallery button (shown above) to open the Image Gallery.
Use the navigation arrow buttons to scroll through the thumbnails and press
Select
to open and enlarge an image. Press Select at an opened image to
view the filename, and press again to see image options (delete, transmit) as
explained below.
10.3 Deleting images
At an opened image, press Select
twice to see the transmit and delete
icons. Scroll to the ‘delete’ icon (trash can) and press Select
to erase the
image. Images can also be deleted in bulk by formatting the storage memory
in the Settings menu, Section 5.8, (Settings/Device Settings/Reset Options).
Images can also be deleted or moved by connecting the MR277 to a PC, see
the next section.
10.4 Transferring Images via PC Interface
Connect the MR277 to a Windows™ or Apple™ computer’s USB port using
the supplied USB cable. The USB jack is located on the bottom of the MR277,
under the protective flap. Once connected, the MR277 can be used as you
would any external storage drive. Note that on Apple™ computers, the ‘Pho-
tos’ App is not compatible with the MR277 and will generate an error message
(No Photos) when opened. However the MR277 images are recognized in the
computer’s Finder window.
#NAS100005; r. AL/76939/76957; en-US
47