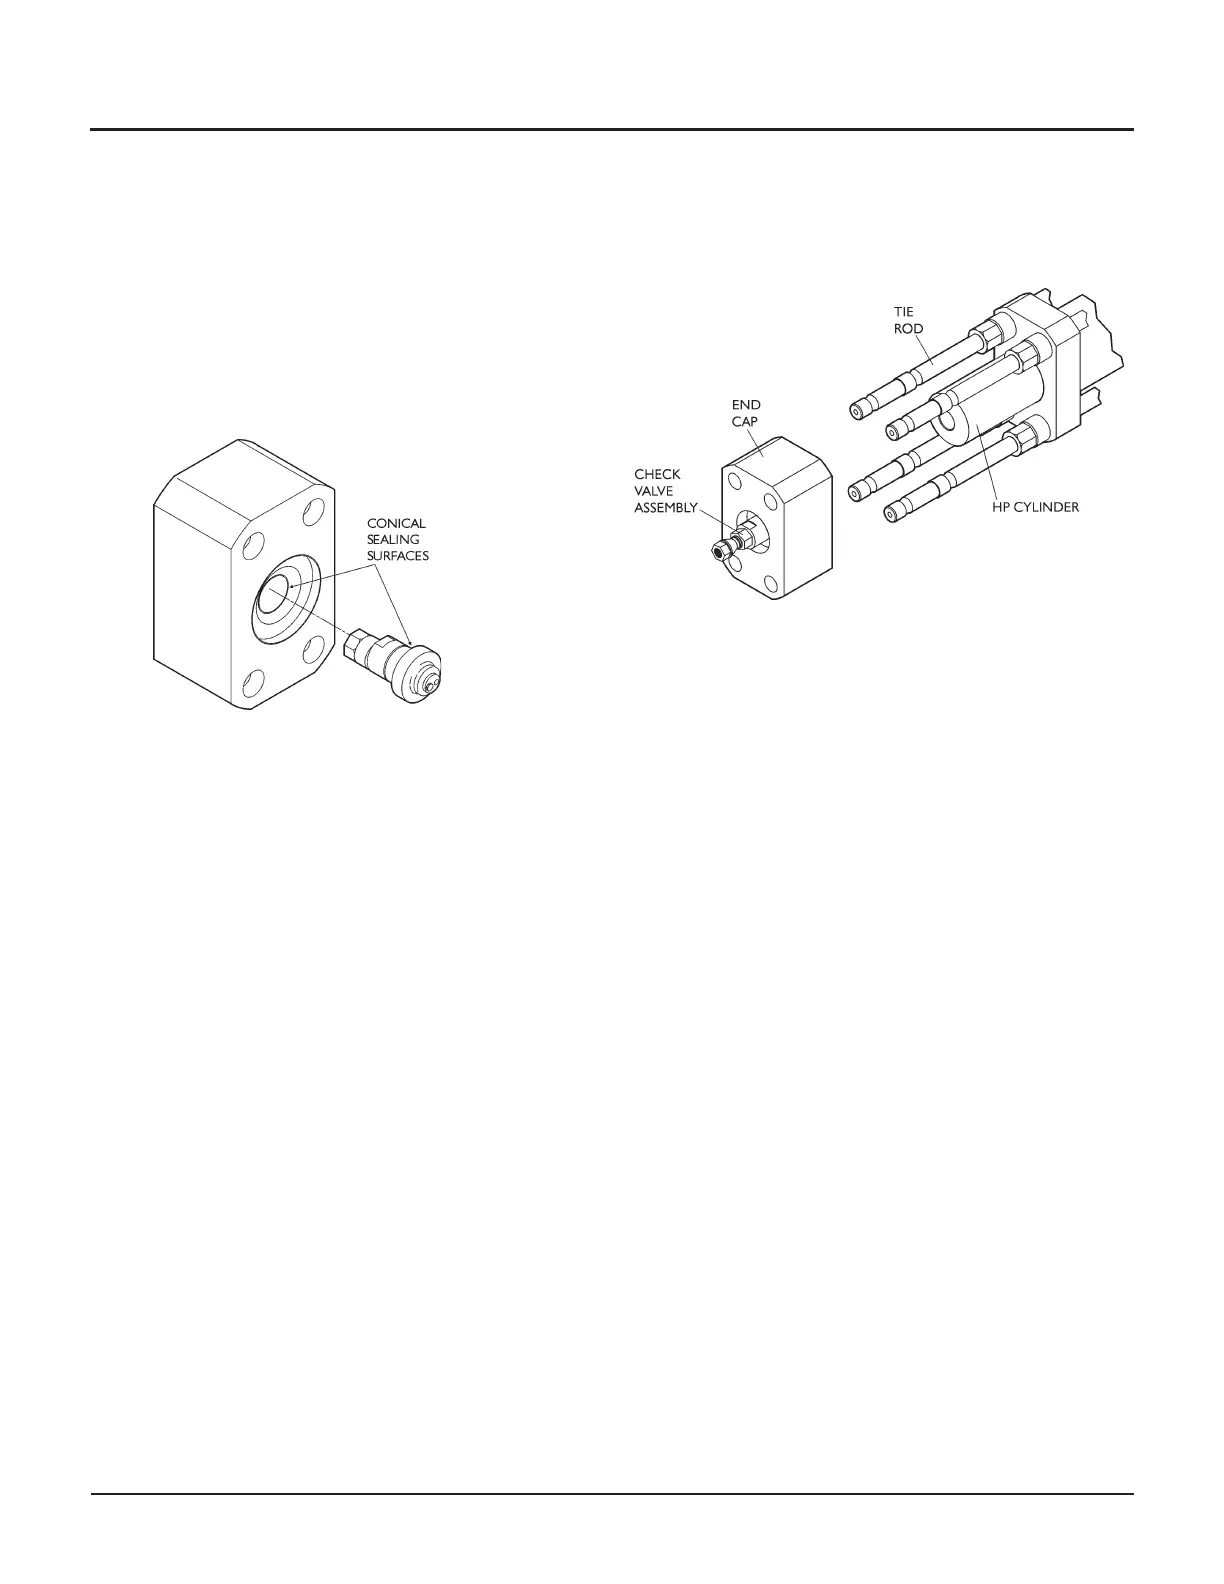
11. Make sure the conical sealing surfaces of the
check valve assembly and the end cap are clean
and free of debris.
Note: Do NOT apply grease or lubricant to the
conical sealing surfaces. This can cause an inlet
water leak.
Install the new check valve assembly by pushing
it into the end cap as indicated. Take care to
align the check valve assembly with the correct
orientation as explained in Step 5.
12. Remove the old anti-seize from the tie rods,
nuts, and washers.
13. Reinstall the end cap (complete with check valve body as
-
sembly) by sliding it along the tie rods and guiding the
high-pressure cylinder into the bronze bushing of the end
cap.
14. Reload the intensifier tie rods.
•
See Maintenance Procedure A, Assembling the
Intensifier
15. Reconnect the high-pressure tubing and the inlet water
hose.
© Flow International Corporation M-376 | 35
CHAPTER 3
Maintenance Procedures