INSTALLATION INSTRUCTIONS
61
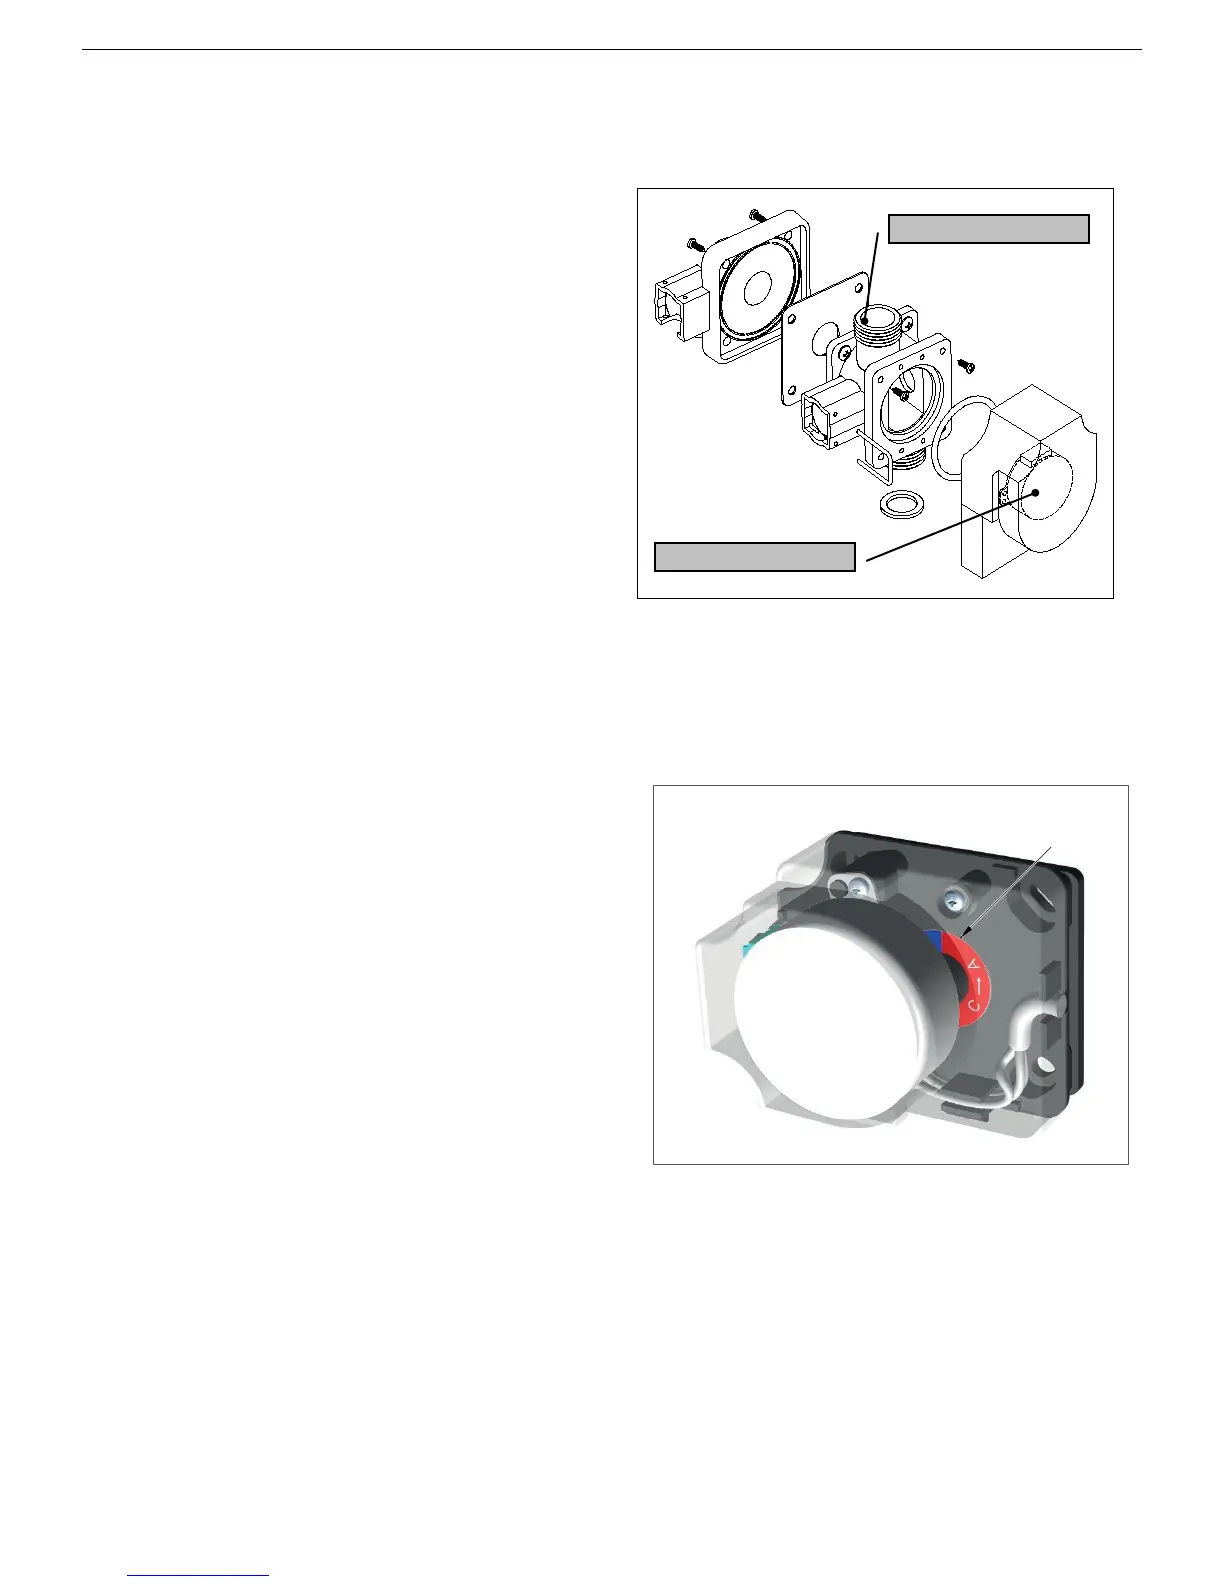
Replacing the Diverter valve body (see fig. 2)
• Close the shut-off valves and drain the central heating
circuit of the water heater;
• Unscrew the fixing screws securing the transparent
cover of the diverter valve and remove the cover;
• Unscrew the four fixing screws and remove the diverter
valve body and washer;
• Replace the valve body and re-assemble the
components following the above procedure in reverse
order;
• Switch on the electricity, water and gas supplies and fill
the system with water. Check for any leaks from the
joints and bleed off any air from the circuit. Restart the
water heater.
Replacing the motor
• Unscrew the fixing screws securing the transparent
cover of the diverter valve and remove the cover;
• Unscrew the two motor fixing screws and disconnect the wires;
• Replace the motor and re-assemble the components following the above procedure in reverse order;
• Replace the motor and re-assemble the components following the above procedure in reverse order;
3-way valve operation
Important: The working position of the 3-way valve is
indicated by the color (Red or Blue) visible in the inside of
the valve. (see Fig. 3).
• The RED color (with C-A) indicates the operation in
the Heating mode.
• The BLUE color (with C-B) indicates the
operation in Domestic Hot water mode.