Models 110, 111 & 112
Calibration Information
14
4. Press the yellow Hz button to proceed to the next step. The Meter records a new constant.
5. Repeat steps 1 through 4 until the display shows “End”. This indicates that the calibration procedure
is complete. Press the yellow
Hz button to resume normal operation, or switch the Meter off.
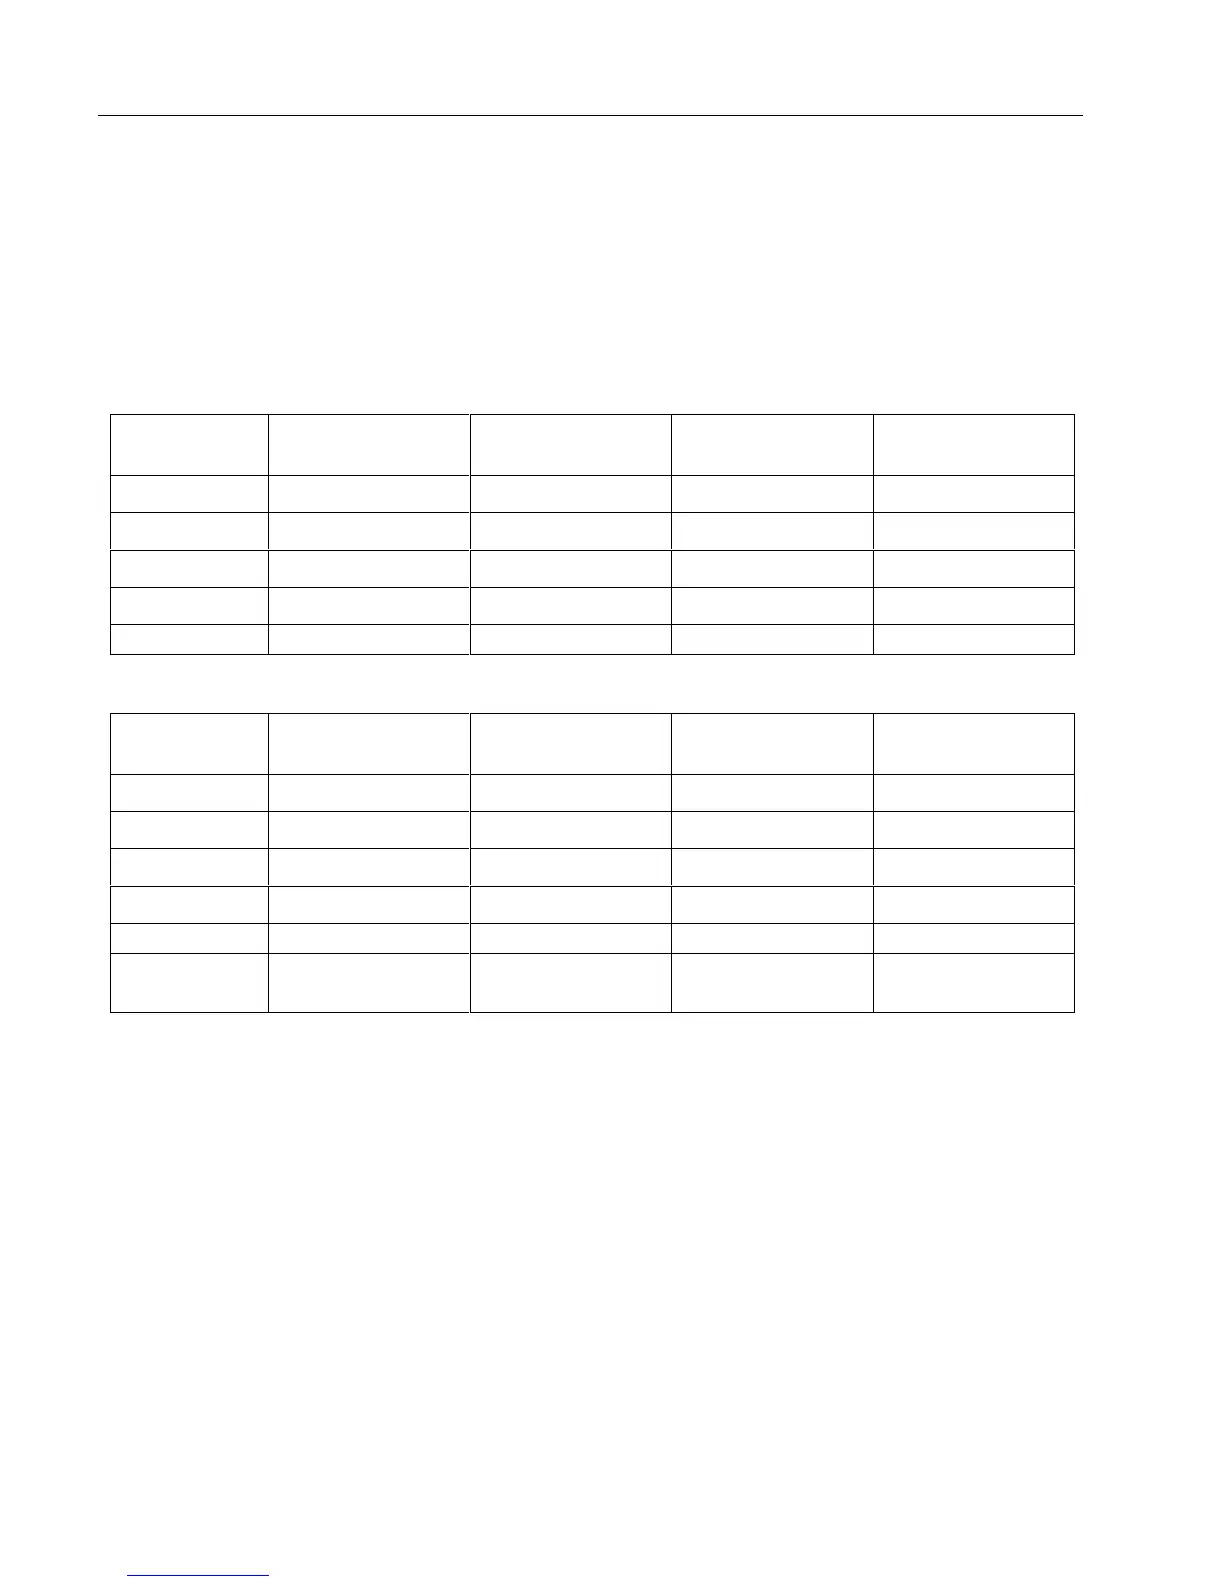
Calibration Settings
Note
The “Seconds to settle” column does not include calibrator settling time.
Table 4. Calibration Settings for the Fluke 110
Step
Number
Function
(switch position) Input value
Frequency
(sine wave)
Seconds
to Settle
C-01
B- Hz
6.000 V 900.0 Hz 4
C-02
B
6.000 V 60 Hz 2
C-03
D
6.000 V DC 1
C-04
s
600 e N/A 1
C-05
e
6.000 ke N/A 1
Table 5. Calibration Settings for the Fluke 111 and 112
Step
Number
Function
(switch position Input value
Frequency
(sine wave)
Seconds
to Settle
C-01
B- Hz
6.000 V 900.0 Hz 4
C-02
B
6.000 V 60 Hz 2
C-03
D
6.000 V DC 1
C-04
s
600 e N/A 1
C-05
e
6.000 ke N/A 1
C-06
I
(use Amps jack)
6.000 A DC 1
Display Messages
If the calibration procedure is not completed correctly, the Meter will not operate correctly. If calibration
is not completed correctly, the Meter alternates the messages “CaL” and “Err” on the display and you will
need to recalibrate the Meter. The meter is damaged and requires service if:
• “CaL” and “Err” messages continue to appear after a proper recalibration.
• “EEPr” and “Err” messages are alternating on the display.
• “EEPr” message appears on the display.

 Loading...