Replacing the Battery and Fuse
7
Replacing the Battery and Fuse
WWarning
To avoid electric shock, injury, or damage to the Meter:
•
Remove test leads from the Meter before opening the case or battery door.
•
Use ONLY a fuse with the amperage, interrupt, voltage, and speed ratings
specified.
•
Replace the battery as soon as the low battery indicator (
N ) appears to
avoid false readings.
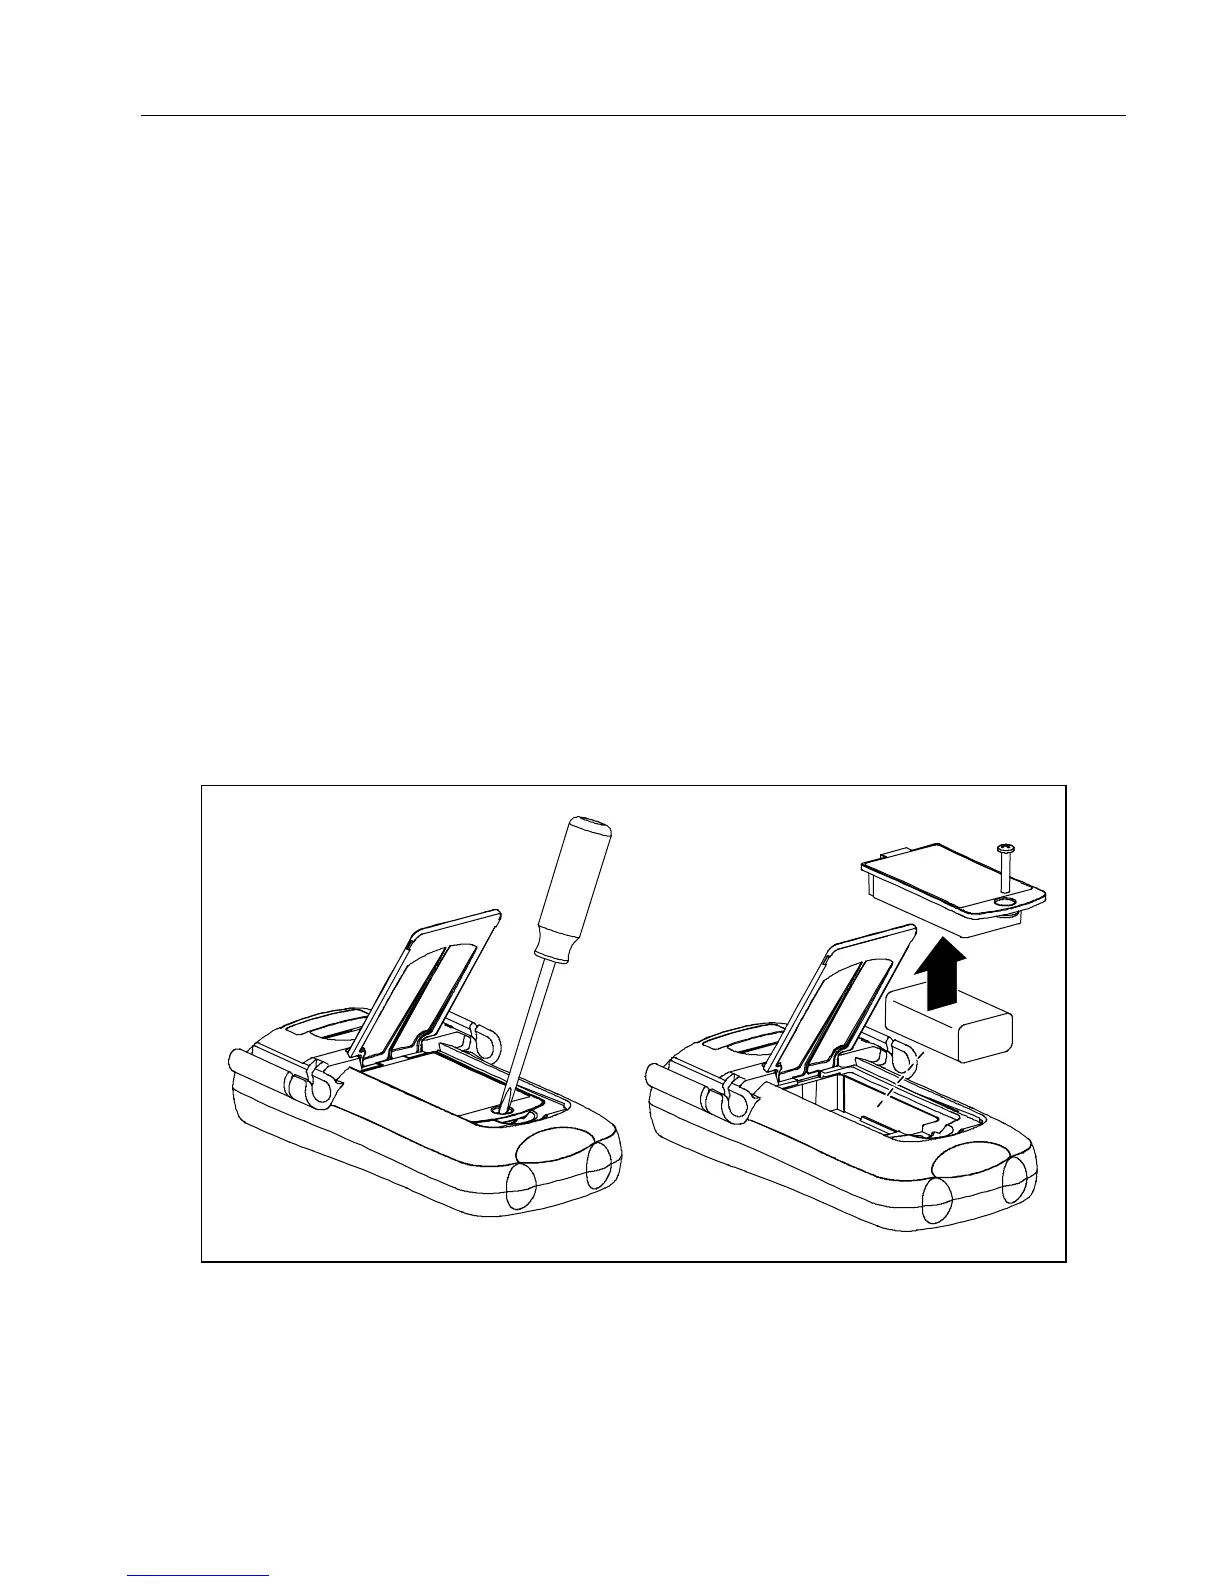
To replace the battery
1. Turn the rotary switch to OFF and remove the test leads from the terminals.
2. Lift the tilt stand to access the battery door.
3. Remove the screw from the battery door.
4. Use the finger recess to lift the battery door slightly.
5. Pull the door toward the bottom of the Meter to release the latch.
6. Lift the battery door straight up to separate it from the case. You can now remove and replace the
battery.
The battery fits inside the battery door, which is then inserted straight into the case until it clicks into
place. Do not attempt to install the battery directly into the case.
aej14f.wmf
Figure 2. Replacing the Battery