EasyManuals Logo

Fluke 112 Calibration Information

Fluke 112
16 pages
To Next Page IconTo Next Page
To Previous Page IconTo Previous Page
Page #8 background imageLoading...
Page #8 background image
Models 110, 111 & 112
Calibration Information
8
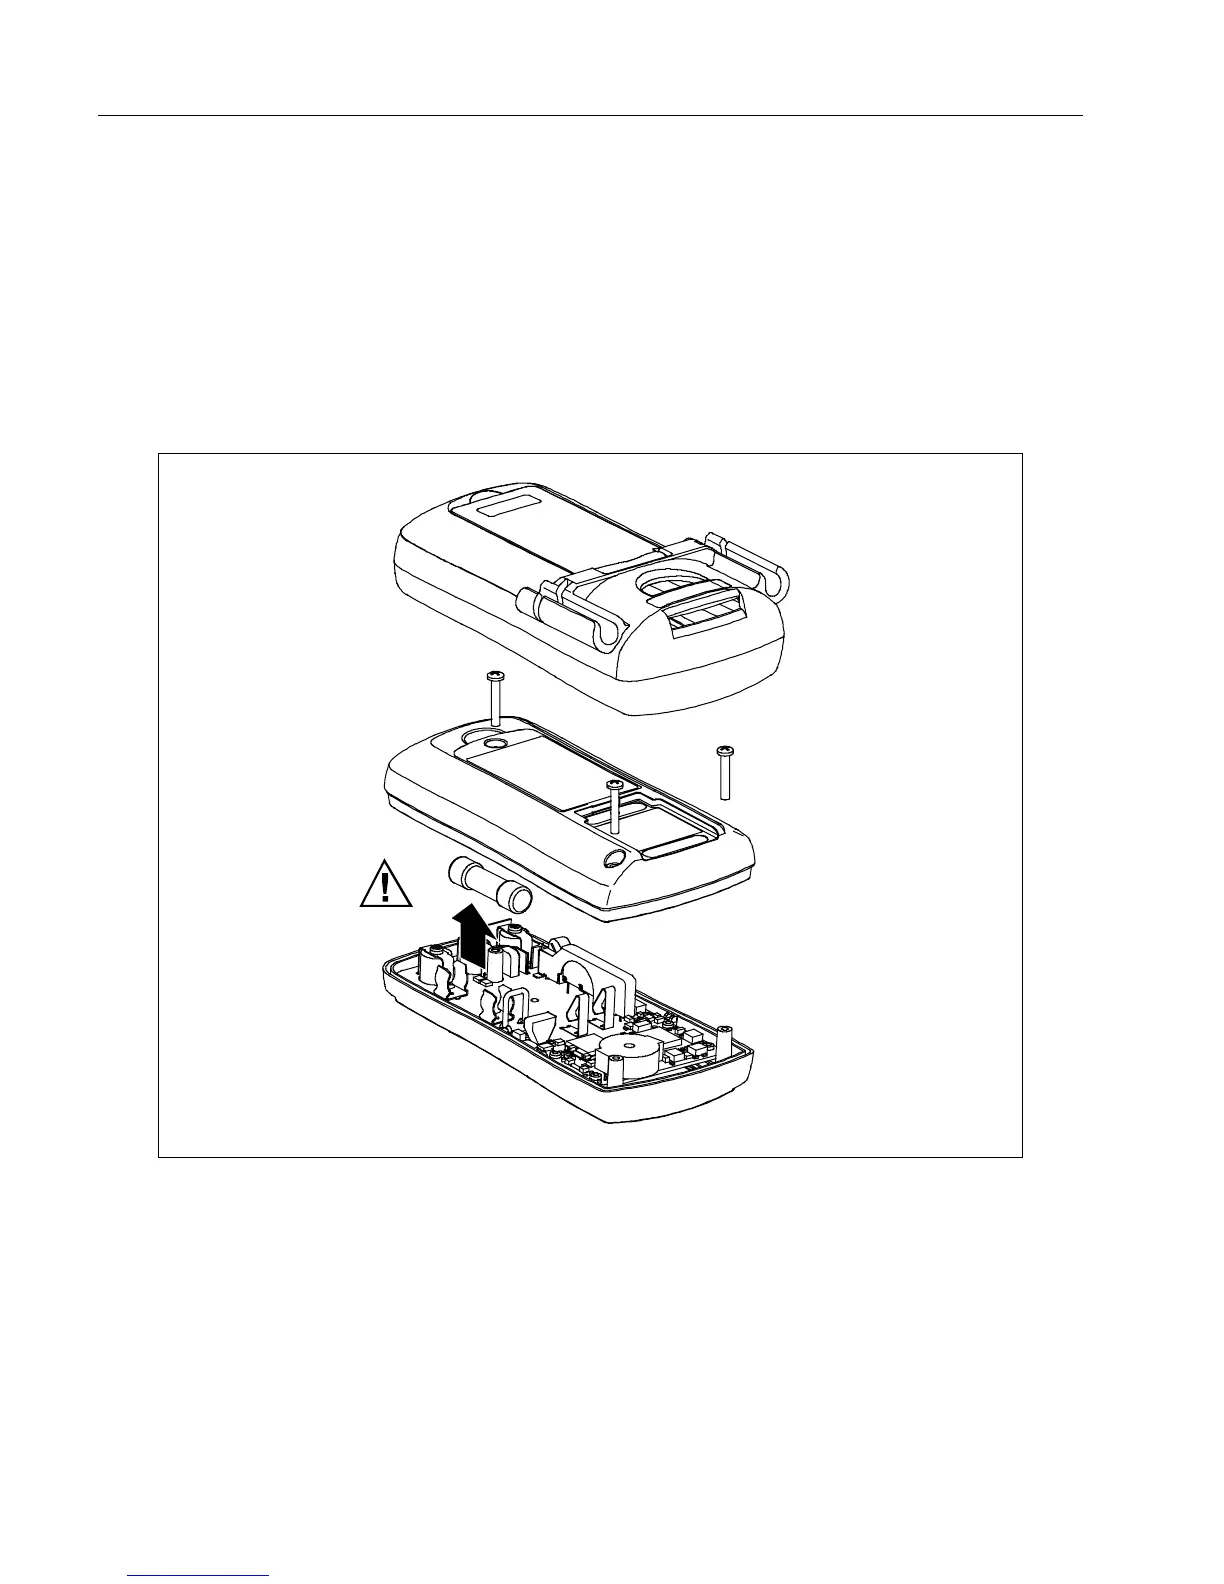
To replace the fuse (Models 111 and 112)
1. Turn the rotary switch to OFF and remove the test leads from the terminals.
2. Remove the Meter from the protective yellow holster.
3. Remove the battery and battery door.
4. Remove the two screws holding the case together.
5. Remove the bottom case and set it aside.
6. Remove and replace the fuse.
7. Reassemble the case and reinstall the battery, battery door, screws, and holster.
aej15f.wmf
Figure 3. Replacing the Fuse

Other manuals for Fluke 112

Questions and Answers:

Question and Answer IconNeed help?

Do you have a question about the Fluke 112 and is the answer not in the manual?

Fluke 112 Specifications

General IconGeneral
CategoryMultimeter
ContinuityYes
Diode TestYes
DisplayDigital
DC Voltage Ranges400.0 mV, 4.000 V, 40.00 V, 400.0 V, 600 V
Resistance Ranges400.0 Ω, 4.000 kΩ, 40.00 kΩ, 400.0 kΩ, 4.000 MΩ, 40.00 MΩ
Safety CategoryCAT III 600 V
AC Voltage Accuracy±(1.0% + 3)
Battery Type9 V
DC Voltage Accuracy±(0.5% + 2 counts)
AC Voltage Ranges4.000 V, 40.00 V, 400.0 V, 600 V

Related product manuals