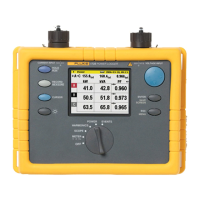
Fluke 434-II/435-II/437-II
Service Manual
6-4
Before opening the Analyzer, you must remove the Hang Strap and the Side Strap. How
to remove and install the Hang Strap is explained in the Users Manual in Chapter 4. The
grip of the Side Strap consists of two halves kept together with Velcro tape. After having
opened it, the straps can be taken apart and be removed from their fixing dowels in the
side of the Analyzer. Before doing this, take careful notice on the correct position of the
strap. To install work in reverse order.
6.2.3 Opening the Analyzer, Removing the Battery Pack
Proceed as follows (Figure 6-1):
1. Remove the battery access door with a standard blade screwdriver by turning the
plastic battery door screws one-quarter turn counterclockwise.
2. Take the battery and the SD memory card out of the instrument. The correct
insert position of the memory card is indicated with an arrow in the
compartment. When installing the SD card, press it into its slot until a click is
experienced. This click indicates that the card is locked into its slot.
Note: take care not to short circuit the battery’s contacts. Never open or damage
the battery’s housing. Do not touch the contacts of the memory card in order to
avoid contanination.
3. When present, take off the Hang Strap and the Side Strap (refer to 6.2.2.).
4. Loosen the two black selftapping screws about 12 mm long (total length) that fix
the grey/yellow Input Cover (Topholster) that is around the BNC-input (and
banana) sockets.
5. Take the Input Cover (Topholster) off.
Note: when reinstalling the Input Cover (Topholster) do not forget to reinstall the
flexible Sealing Strip around the input sockets! The holes in this strip are
arranged in such a way that there is only one correct position possible.
Note: when reinstalling the Input Cover, do not forget to reinstall 4 steel pins
(2x17 mm) in the left and right side of the instrument. The pins are used to attach
the Hang Strap and the Side Strap.
6. Remove 2 screws M3x7 from the Bottomholster. The screws fit into square nuts
that in turn fit into the Rear Case. Take care that the square nuts are not lost.
7. Take the Bottomholster off.
Note: when reinstalling the Holster, take care to reinstall 2 steel pins (2x17 mm)
in the left and right side of the instrument. The pins are used to attach the Side
Strap. Take care that the yellow covers of USB-input and on the right side are
correctly in place.
8. Remove four selftaping screws 16.5 mm long (total length) that attach the Rear
Case. Two of these screws are located inside the battery compartment.
9. Take the Bottom Case off. Unplug the connector of the battery door detection.
Note: when reinstalling the Bottom Case, do not forget to put the steel plate
16x17 mm in place again. This plate is present in the cavity on the right-hand
side of the instrument and its purpose is to attach a Kensington Lock.
Note: when reinstalling the Bottom Case, do not forget to reinsert the connector
of the battery door detection.
Note: when reinstalling the bottom case, take care that flat cables to LCD,
 Loading...