Fluke 434-II/435-II/437-II
Service Manual
5-4
• Power the Analyzer via the BC430 Power Adapter (or any other type that is
recommended by Fluke as suitable).
5.1.4 Equipment required for calibration
The primary source instrument used in the calibration procedures for Fluke 434-II/435-
II/437-II (Series II) is the Fluke 5700A Calibrator. If the required type is not available,
you can substitute another Calibrator as long as it meets the minimum test requirements.
• Fluke 5700A Calibrator.
• Stackable safety test leads (4x), as supplied with the Calibrator.
• Extra set of test leads capable to withstand 1000 V rms.
Note: for good recognition it is advised to use a black lead between the Calibrator’s
LO output and the Analyzer’s Ground banana input.
• 50Ω Coax Cables (3 pieces required): Fluke PM9092 (0.5m, set of 3, 1 set required).
• Male BNC to Dual Female BNC adapter: Fluke PM9093 (3 pieces required).
• Dual Banana Jack to female to male BNC: Fluke PM9082 (1 piece required).
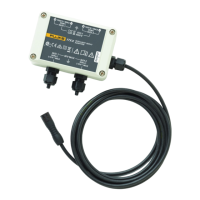
• Power Adapter: BC430.
5.2 Calibration Procedure Steps
To do a complete calibration adjustment you must do all following steps:
1. Select the Calibration Mode, section 5.3
2. Do the Contrast Calibration Adjustment, section 5.4
3. Do the Warming Up, section 5.5
4. Do the Final Calibration, section 5.6
5. Save the Calibration Data and Exit the calibration mode, section 5.7
5.3 Starting The Calibration
Follow the steps below to start the calibration:
1. Power the Analyzer via the power adapter input using the BC430 power adapter.
2. With the Analyzer in off position, keep
SAVE
SCREEN
pressed. Press to turn the
Analyzer on. A double beep indicates that the Analyzer is has been set to default
settings. Next release
SAVE
SCREEN
. Use the default position to start calibration adjustment.
3. Press
F1
, then
SETUP
and then
F4
- MANUAL SETUP and check the actual
Analyzer date. If necessary adjust the date (the calibration date will become the
Analyzer date when saving the calibration data):
• Operate
to highlight the Date.
• Press
ENTER
to open the SETUP DATE menu.
• Operate
to select in sequence Year, Month, and Day.
 Loading...