Calibrator
Calibration Verification of the Product
43
13. Disconnect the shunt output cable from the 8588A and connect it to the 5790B Input 2.
14. Set the 5790B for Input 2, Auto range, High resolution ON, EXT GUARD.
15. Connect heavy gauge guard cable between the DUT and the 5790B.
16. From step 6, Table 16, set the output from the DUT/Measure with the 5790B and record the 5790B
measured in the DMM Reading on Shunt output [V] column. Complete steps 6 to 30,Table 16.
17. Set the Product to STBY.
18. Toggle the power switch of the A40B-1mA shunt to OFF.
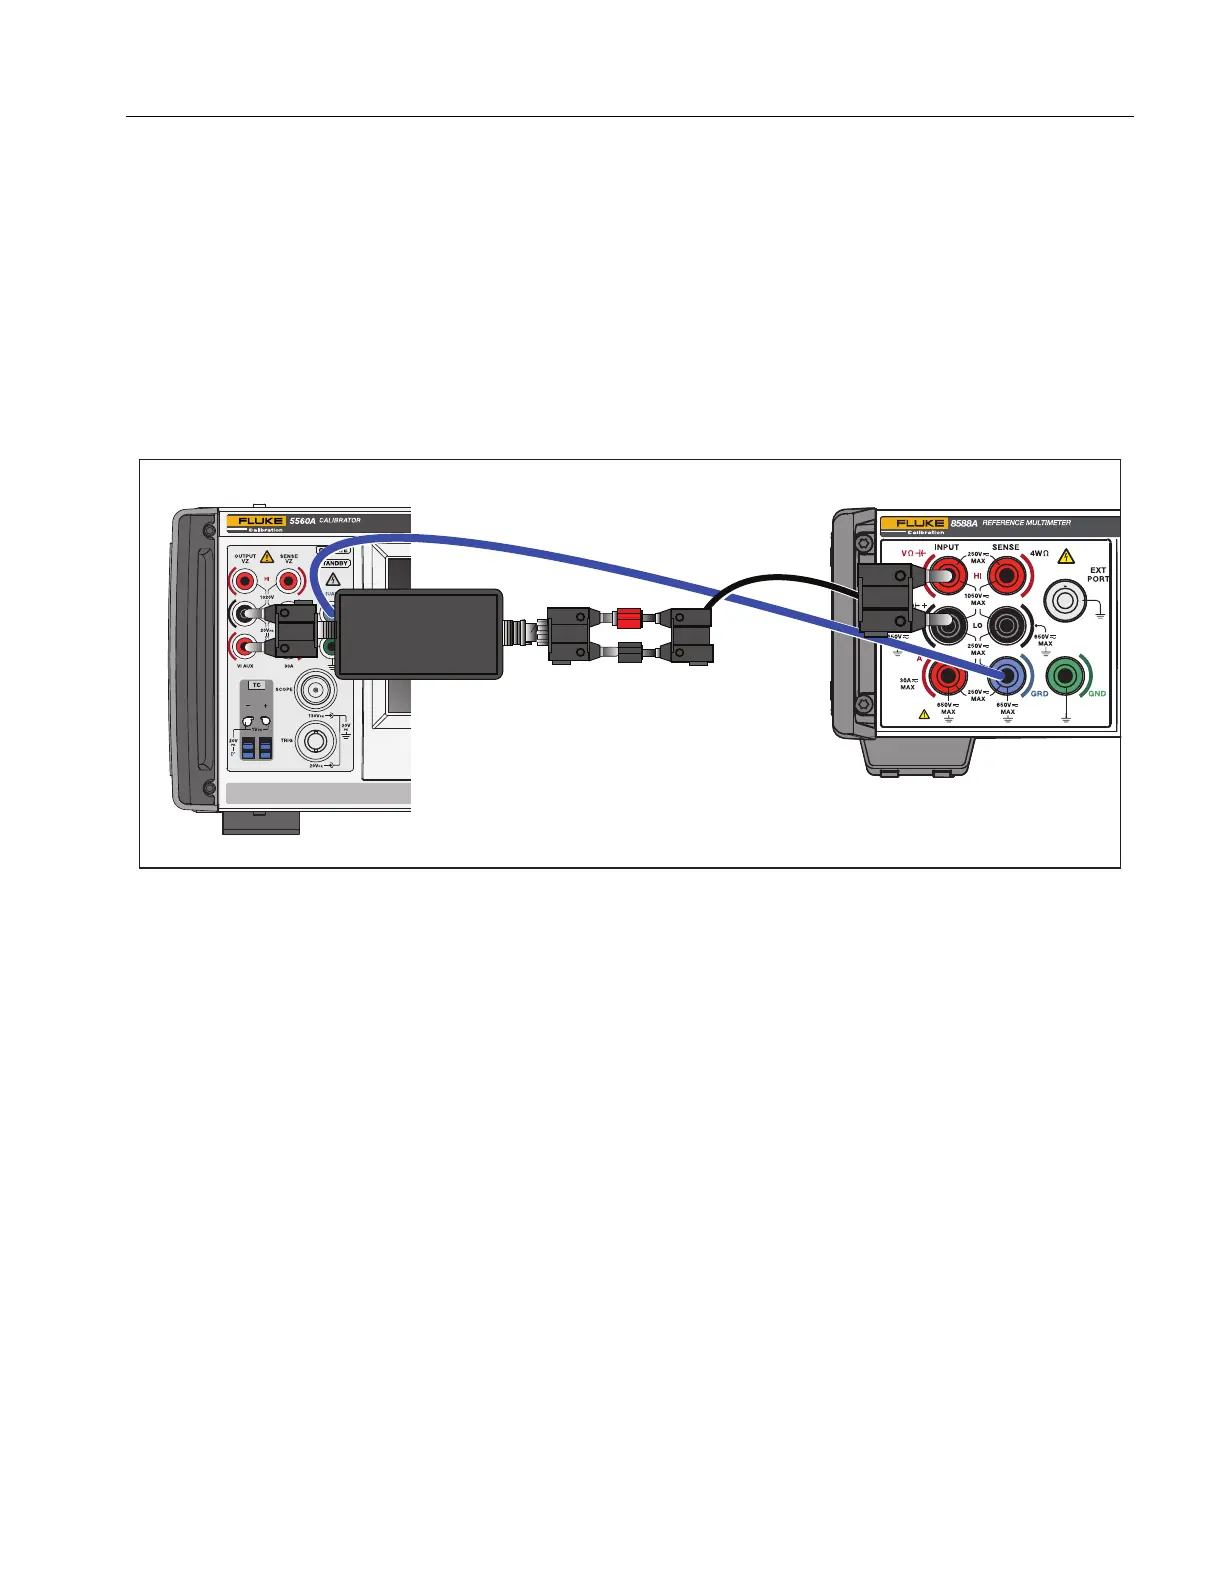
19. Connect the test equipment as shown in Figure 21.
Figure 21. Amps AC with A40B-10mA
20. From step 31, Table 16, output from the DUT/Measure with the meter and record the 8588A
measurement in the DMM Reading on Shunt Output [V] column.
21. Complete steps 31 and 32.
22. Disconnect the shunt output cable from the 8588A and connect to the 5790B Input 2.
23. Set the 5790B for Input 2, Auto range, High resolution ON, GUARD ON.
24. Connect a heavy gauge guard cable between the DUT and the 5790B.
25. From step 33, Table 16, output from the DUT/Measure with the 5790B and record the 5790B
measurement in the DMM Reading on Shunt Output [V] column. Complete steps 33 to 42,
Table 16.
26. Set the product to STBY.
27. Connect the test equipment as shown in Figure 22.
A40B-10mA
INPUT
OUTPUT