Calibrators
Fuses
13
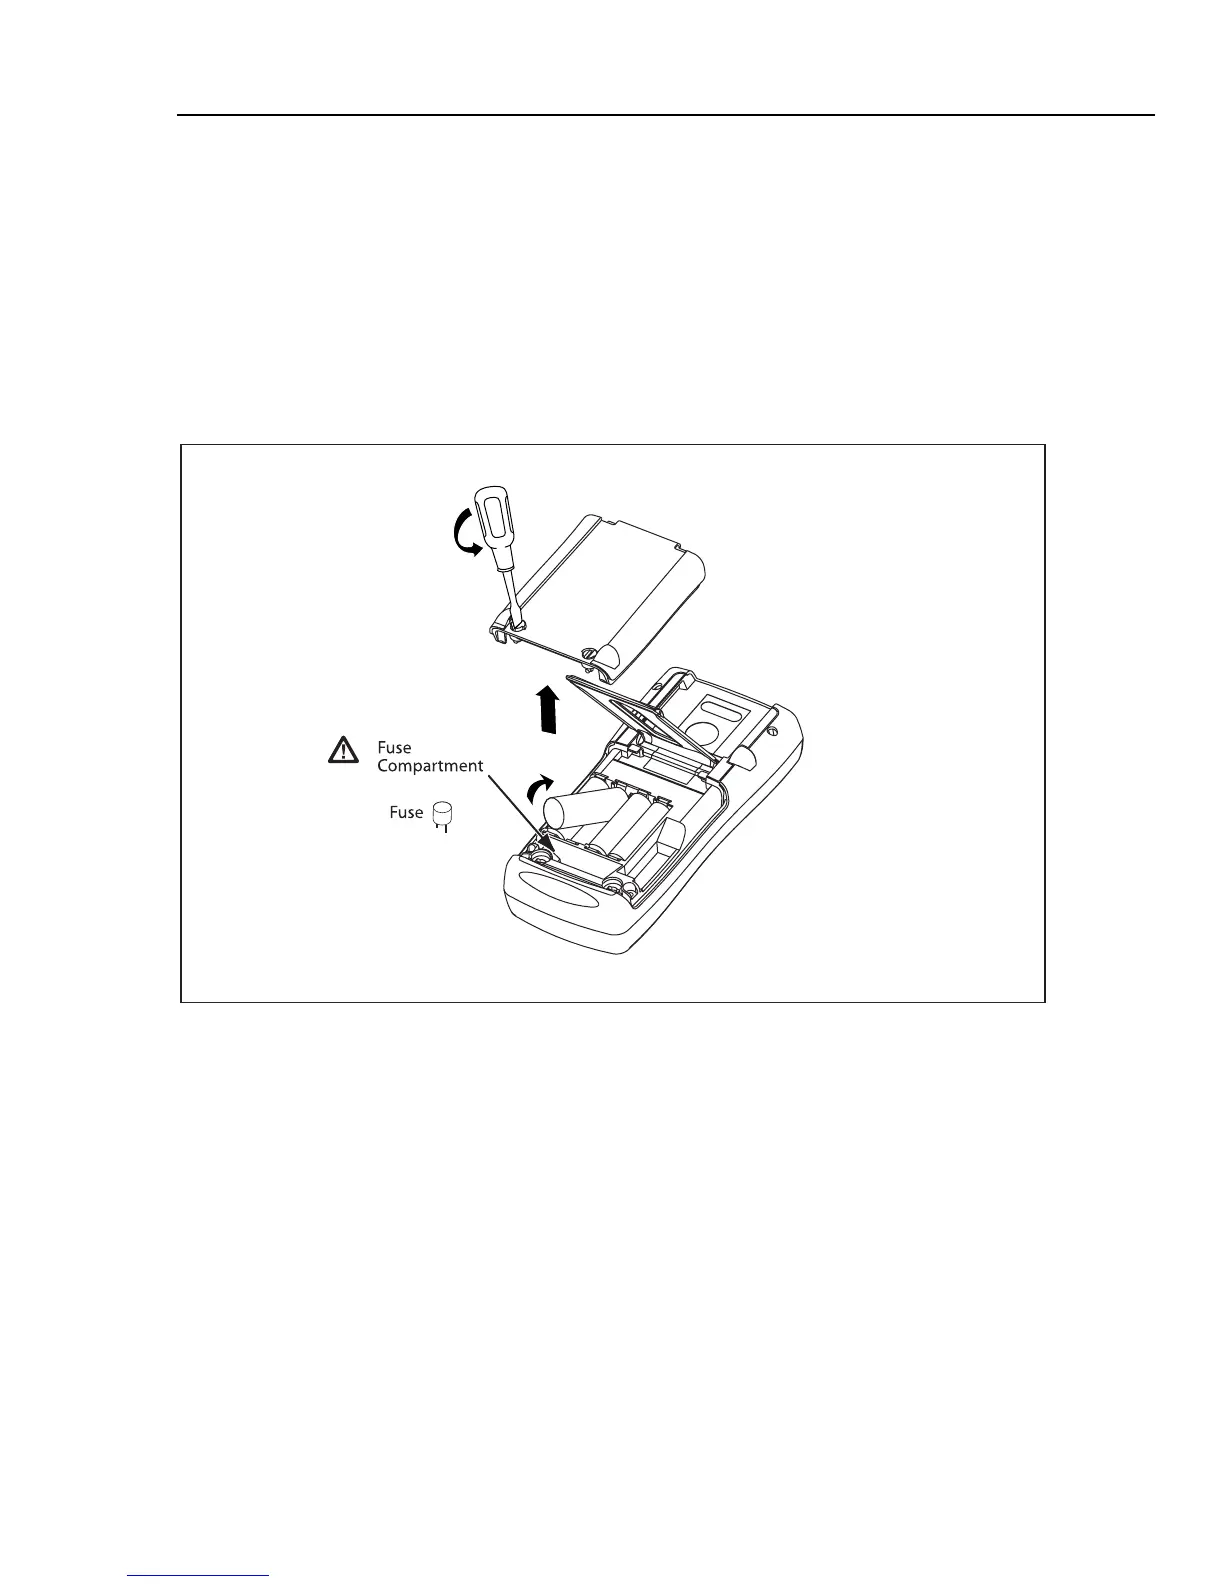
Four AA alkaline batteries (ANSI/NEDA 15A or IEC LR6) are used to power the
Calibrator. To replace the batteries, refer to Figure 1 and do the following:
1. Turn the Calibrator off, remove the test leads from the terminals, and hold the
Calibrator face down.
2. Using a flat-blade screwdriver, turn the battery door screws 1/4-turn
counterclockwise and remove the battery door.
3. Remove the batteries, then install new batteries. Be sure to follow the polarity
markings shown in the battery compartment.
4. Replace the battery door and secure it by turning the screws 1/4-turn clockwise.
aal01f.eps
Figure 1. Replacing the Batteries and Replaceable Fuses
Fuses
XWWarning
To avoid electrical shock:
• Remove the test leads from the calibrator before opening the
battery door. Close and latch the battery door before using the
calibrator.
• Use only the specified replacement fuses listed under
“Replaceable Parts”.
• Do not allow water into the case.
Over time, the input protection has been modified to increase reliability. There will either
be self-resetting fuses, or replaceable fuses in sockets. The self-resetting fuses open when
heated by a current overload, and close when they cool down. When an input’s fuse is
open, the input’s functions will not work.
 Loading...