20
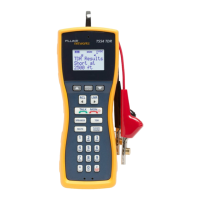
TS54TDR PRO Test Set
Users Guide
Configuring Your Test Set
The test set stores all settings in non-volatile memory.
The settings do not change if you change the battery.
How to Select Tone or Pulse Mode
1
Press M.
2
Press C to put the flashing cursor next to
Settings, then press M.
3
Press D to put the flashing cursor next to Tone/
Pulse, then press M.
4
Press R or L to select Tone or Pulse.
5
To save your selection before you exit or go back
to the main menu, press M. The display shows
Saved.
To go back to the previous menu, press Q. Or,
press C or D until Back shows, then press
M.
Hook Flash Duration
When the test set is off-hook, and you press F, a
timed interruption of the loop current occurs. Some
PBX setups or telephone office switches use this signal
to put a call on hold or to activate a special function.
Each key press generates one flash.
You can select durations of 100 ms to 1000 ms in
increments of 100 ms. The default is 500 ms.
To set the flash duration:
1
Press Q.
2
Press M, press C to put the flashing cursor next
to Settings, then press M again.
3
Press C to put the flashing cursor next to
Flash Time, then press M.
4
Press R or L to change the time period.
5
To save your selection before you exit or go back
to the main menu, press
M. The display shows
Saved.
To go back to the previous menu, press Q. Or,
press
C or D until Back shows, then press
M.
Pause Duration
When you enter numbers into the speed-dialing
memory, you can press
F to include pauses
between digits. The default pause duration is 4
seconds. You can select durations of 1 second to 8
seconds.
To set the pause duration:
1
Press Q.
2
Press M, press C to put the flashing cursor next
to
Settings, then press M again.
3
Press C to put the flashing cursor next to
Pause Time, then press M.
4
Press L or R to change the time period.
5
To save your selection before you exit or go back
to the main menu, press M. The display shows
Saved.
To go back to the previous menu, press Q. Or,
press C or D until Back shows, then press
M.
Make Receive-Only Loud Speaker Mode the
Default
If a test set has factory defaults, and you put it in the
off-hook mode and press s, the Speakerphone
turns on. If you then press N, the Receive-Only
Loud Speaker is enabled temporarily. When the
Receive-Only Loud Speaker is enabled, the
speakerphone microphone turns off and the test set
can only receive audio signals – it cannot transmit any
audio signals. Receive-only is preferred when your
main concern is to listen to the line and you do not
want ambient noise such as caused by a passing car to
switch the Speakerphone into transmit mode.
 Loading...