19
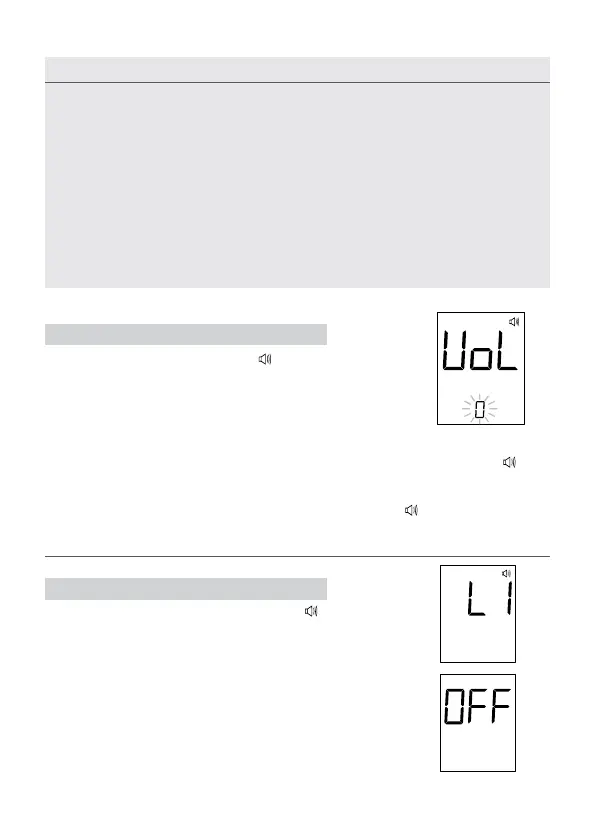
STEP 7 Select Speaking Function
The meter displays “VOL”, “
” and ashing num-
ber. Press M button to select speaking volume
from 0 to 7. Then press the set button to proceed
to the next step.
STEP 8 Select Language
L1 (English) or L2 (Spanish) and “
” display
on LCD. Press the M button to select one of the
two languages.
After the set-up is complete, press the set but-
ton to turn off the meter. “OFF” will be displayed
before shut down.
Congratulations! You have nished all settings now!
1. The time, date, memory deletion, voice volume and language can ONLY be
changed in the setting mode. Therefore, while performing a blood glucose,
these parameters cannot be changed.
2. Your meter displays 7-, 14-, 21-, 28-, 60- and 90-day averages which you can
access from the meter memory. These averages are calculated from results
obtained during the 7-, 14-, 21-, 28-, 60-and 90-days preceding the current
date and time settings. When the date and time are changed, the 7-, 14-, 21-,
28-, 60- and 90-day averages may change as well.
3. If the meter is at the setting mode, and if there is no button pressed for 3 min-
utes, the meter will turn off automatically.
Number 0 indicates that the speaking function is turned off. “ ”
will not display on LCD during testing. Numbers 1 to 7 indicates
speaking volume from low to high. At this time “
” will be dis-
played on LCD during test.
NOTE