14
4. Preparation and Set Up
4.1 Arranging the Workspace
Choose a stable, level workspace to install and operate the Form 3. Reserve the following
minimum dimensions for the most convenient access:
Width: 40 cm (15.5 in) Depth: 53 cm (21 in) Height: 78 cm (30.5 in)
Allow additional space for accessories, such as the Form 3 Finish Kit, Form Wash, and Form Cure.
4.2 Unboxing the Form3
During unboxing, inspect the Form 3 for any damage or missing items. In the case of damage
or missing items, contact Formlabs or the certified service provider.
To unbox the Form 3:
1. Open the box from the top. If the box has a side gate, fold down the side of the box.
2. Use the provided handles to lift the printer, in its carrier tray, out of the box.
3. Remove the printer from the carrier tray and set the printer in its workspace.
4. Remove any additional wrapping and packaging from the outside of the printer.
Remove all packaging material and release the Light Processing Unit (LPU) housing
before connecting power.
To release the LPU housing from its shipping position:
1. Open the printer cover.
2. Read and remove the instructional sticker wrapped around the LPU housing.
3. Locate the latch on the left side of the LPU housing.
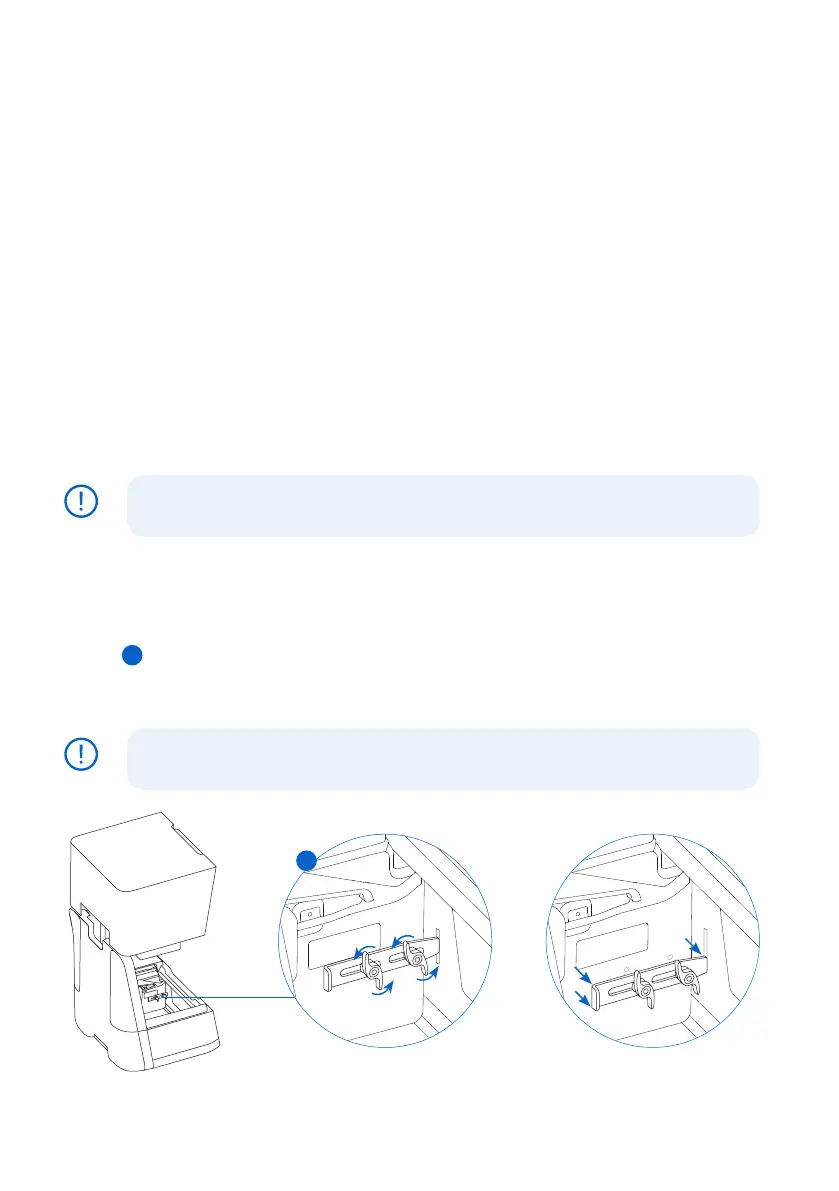
4.
Turn the thumb screws counter-clockwise by hand. Loosen and remove the two thumb
screws and the latch.
5. Save the latch and screws along with the original printer packaging.
Save the Form 3 packaging for transporting your printer. Original packaging
isrequiredfor warranty service.
NOTICE
NOTICE
4
4