NT8 User's Guide | Chapter 6: Initial Setup
4. Select Aspirate next to Action.
5. Select the columns you wish to dispense to. To select multiple columns, hold the
SHIFT key and click the desired columns. In the example above we selected all well
columns, 1-12.
6. Select a liquid class from the Liquid Class list. You can apply liquid class to individual
well columns if the Repeat command on the Task List is selected.
7. Enter the volume to be dispensed in the Volume box.
8. Click Add to add the command to the task list, or select Add More to add additional
commands.
Setting the Dispense Volume
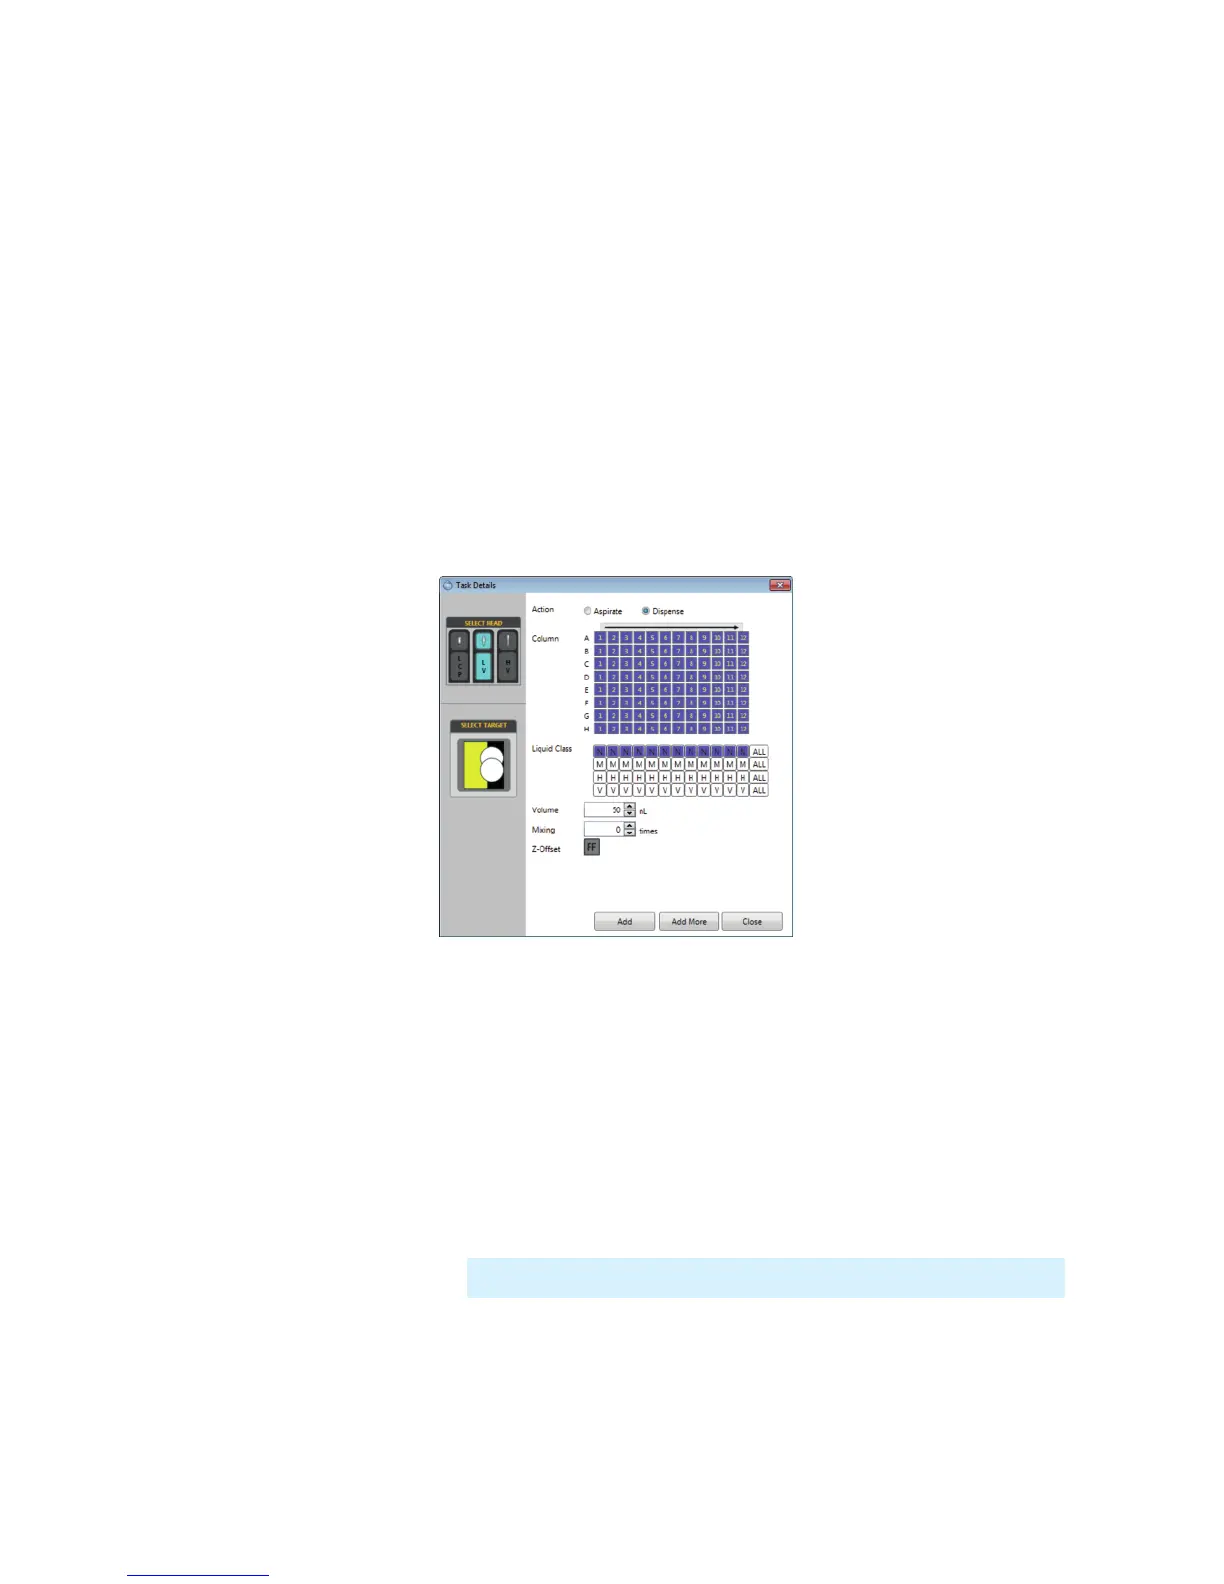
1. Next to Action, select Dispense.
2. Optional: If you are performing a LCP experiment, you must select the LCP head
from the SELECT HEAD field first before configuring LV head setup.
3. Select the columns that you want to dispense to. In the example above we selected
the first well columns, 1-12.
4. Optional: Click on the long arrow below the dispense radio button to reverse the
dispense direction. This step is required for hanging drop experiments.
5. Select the desired target drop located in the lower-left of the dialog by clicking on
any of the circles. The top circle represents drop 1 and the bottom circle represents
drop 2. The selected drop is highlighted in yellow.
6. Select a liquid class from the Liquid Class list. You can apply liquid class to individual
well columns if the Repeat command on the Task List is selected.
7. Set the volume field with the total actual drop volume of solution.
You now have two options: Click Add to confirm and exit the Task Details dialog box,
Note: The drop image will vary depending on the microplate type in use.
 Loading...