PRIMO Instruction Manual
18
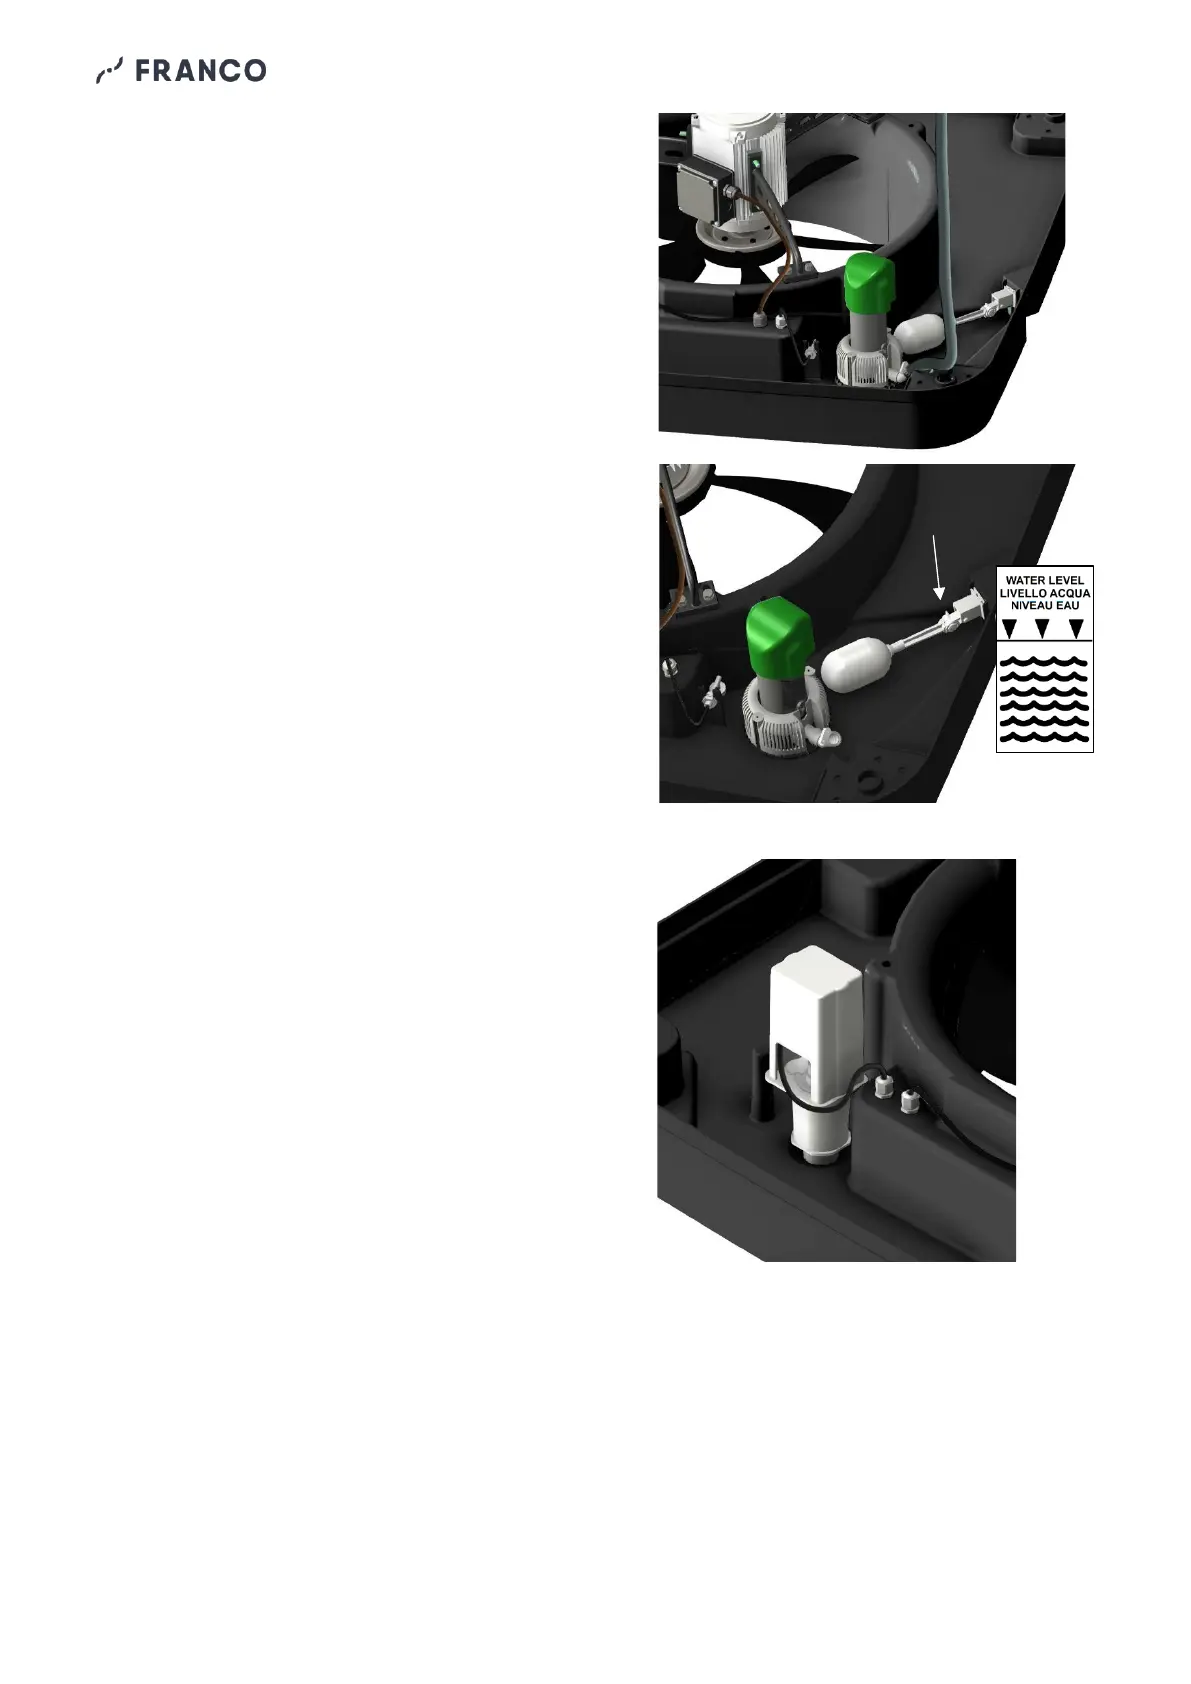
e) Cleaning and replacing the pump
(Fig. 4.2.5)
Check the condition of the pump and remove
any dirt deposits. For replacement: Disconnect
the pump's power cable from the mains and
disconnect the water hose by loosening the
clamp on the delivery side. Hold down the
locking lever (marked with a padlock) and
rotate the pump to release it from its seat.
Fit the new pump, repeating the sequence in
reverse and making sure that the locking lever
clicks once in place.
f) Adjusting and replacing the float (Fig. 4.2.6)
Check the filling level of the tank. If necessary,
adjust the float so that the filling level is as
indicated on the label on the machine.
For replacement: disconnect the water supply
and remove any fittings from the machine
connection. Unscrew the plastic ring nut and
remove the float body.
Position the new float and repeat in reverse the
sequence used to remove the old one. Adjust
the position of the float so that the filling level
is correct.
g) Cleaning and replacing the drain valve (Fig.
4.2.7)
Check the condition of the drain valve and
remove any dirt deposits, especially around the
sealing gasket.
To replace the valve:
- drain the water in the tank and disconnect the
valve power cable.
- Disconnect the exhaust pipe and remove the
drain valve.
- Mount the new valve by repeating the
sequence in reverse. Ensure that the sealing
gasket is firmly seated at the bottom of the tank
and that there are no water leaks.