DAVCO Models: Remove the vent cap
and open the drain. See Fig. 21.13.
4.3
Stop draining fluid when fuel begins to
drain out.
4.4
Alliance/Racor Models: turn the drain plug
clockwise to close it.
DAVCO Models: close the drain valve.
Install and hand-tighten the vent cap.
5.
Inspect the steering components. See
Fig. 21.14.
5.1
Inspect tie rods, steering arms, and the
drag link for signs of looseness (i.e., shiny
spots or rust tracks).
5.2
Check the steering gear mounting bolts
and pitman arm nut for signs of loose-
ness.
5.3
Check the drag link nuts for missing cotter
pins.
02/03/2010 f470552
1
2
3
4
5
6
7
8
9
10
11
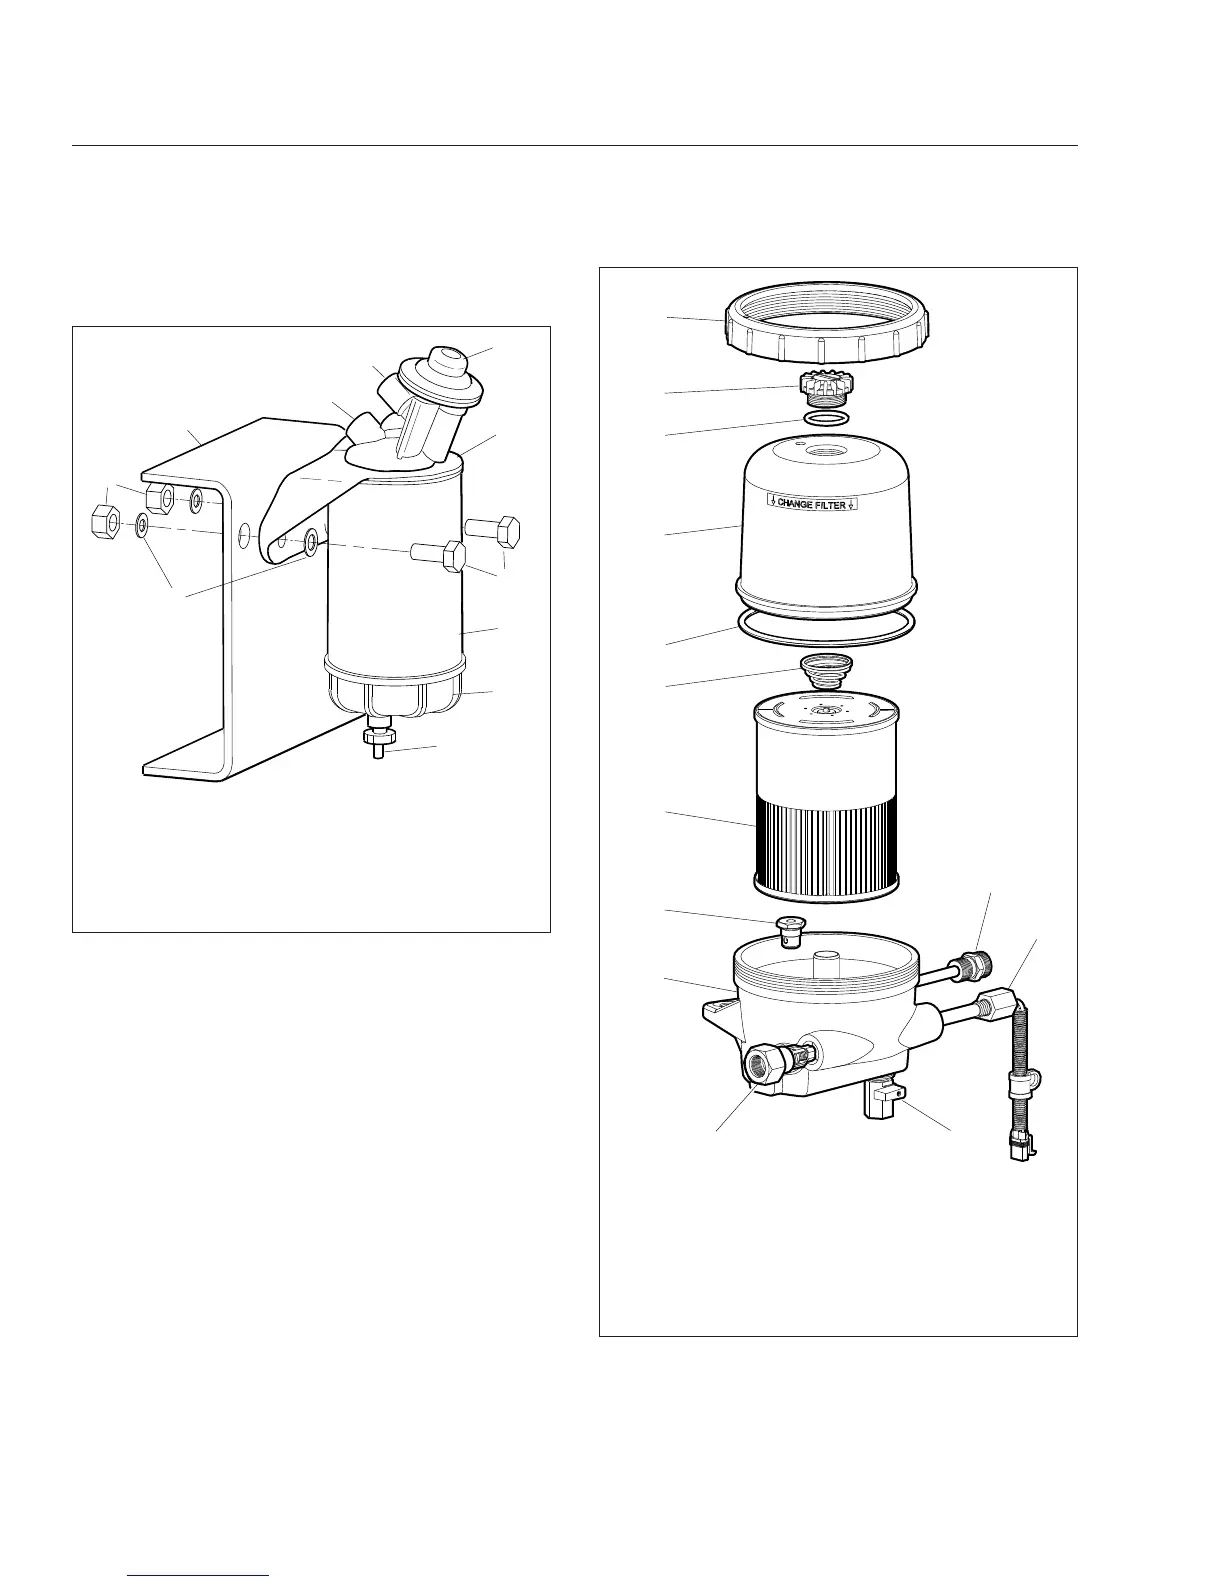
1. Washers (qty 2)
2. Nuts (qty 2)
3. Frame Rail
4. Fuel Outlet Port
5. Fuel Inlet Port
6. Priming Pump
7. Mounting Head
8. Mounting Bolts (qty 2)
9. Filter Element
10. Sight Bowl
11. Drain Plug
Fig. 21.12, Alliance Fuel/Water Separator Assembly and
Installation
05/05/2009 f470530
1
2
3
4
5
6
7
8
9
10
11
12
13
1. Inlet Port/Check Valve
2. Lower Housing
3. Bypass Valve
4. Filter Element
5. Spring
6. Cover O-Ring
7. Clear Cover
8. Vent Cap O-Ring
9. Vent Cap
10. Collar
11. 120VAC Pre-Heater
12. 12VDC Pre-Heater
13. Drain Valve
Fig. 21.13, DAVCO Fuel/Water Separator (Fuel Pro 482
shown)
Pre- and Post-Trip Inspections and Maintenance
21.11