15
3.
T
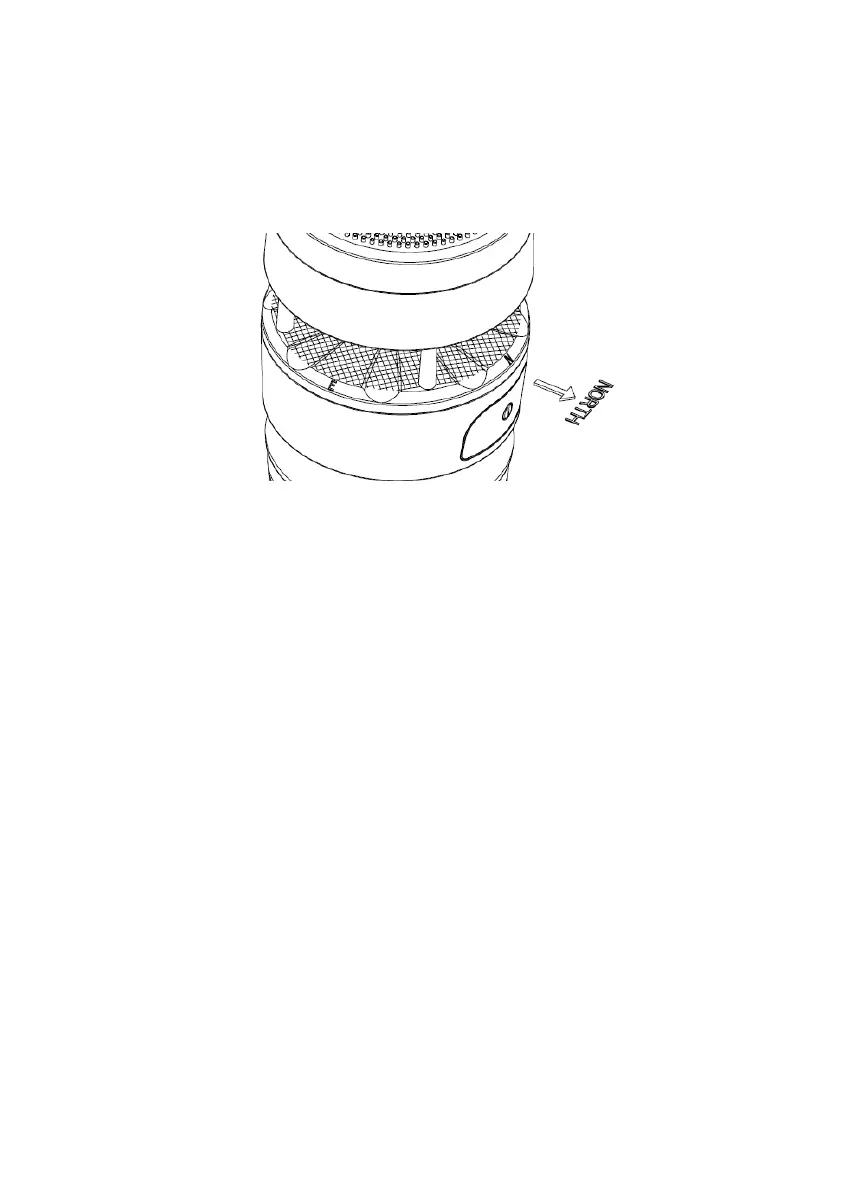
here is an arrow icon with”N” words (Figure 5) representing the direction
of North. The sensor body has to be adjusted so that the “N” indication is
facing to real north direction in your location. A compass device is
recommended to help adjust direction. Permanent wind direction error will
be introduced when the outdoor sensor is not installed in right direction.
Figure 5 Facing North diagram
Note: In Southern hemisphere, it is not necessary to change the
orientation to SOUTH as its solar panel is a rounded type and it is
orientation free for its charging capability.
Make sure the mounting tube for the sensor package is installed
vertically (use a level at 90-degree offsets around the tube). Adjust the
mounting pipe as necessary. Next also make sure the mounting of the
anemometer body on the pipe is level. If it is not, wind direction and
speed readings may not operate correctly or accurately. Adjust the
mounting assembly as necessary.
4. During wintertime, to prevent ice formed on the reflection surface, the
optional extension cord be connected to a 12v/1.0A outdoor type power
adapter as Figure 6 showed below.
After power by the adaptor, the built-in thermostat heating plate will
automatically turns on below 5°C (40°F) and atutomattically turns off
above 10°C (50°F), the heat plate will melts snow and ice and keeps its
anemometer working as usual.