Replacing the charging lead
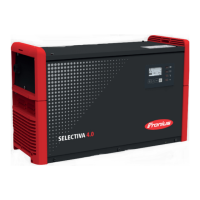
Removing the
charging lead
1
Remove the two 4x20 TX20 screws.
2
Remove the DC connection plate.
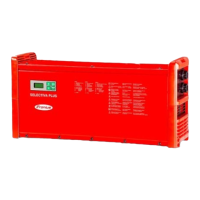
1
Remove the 4x20 TX20 screw and
remove the strain-relief device.
2
Undo the two size 13 M8 hexagon
nuts and remove the charging leads.
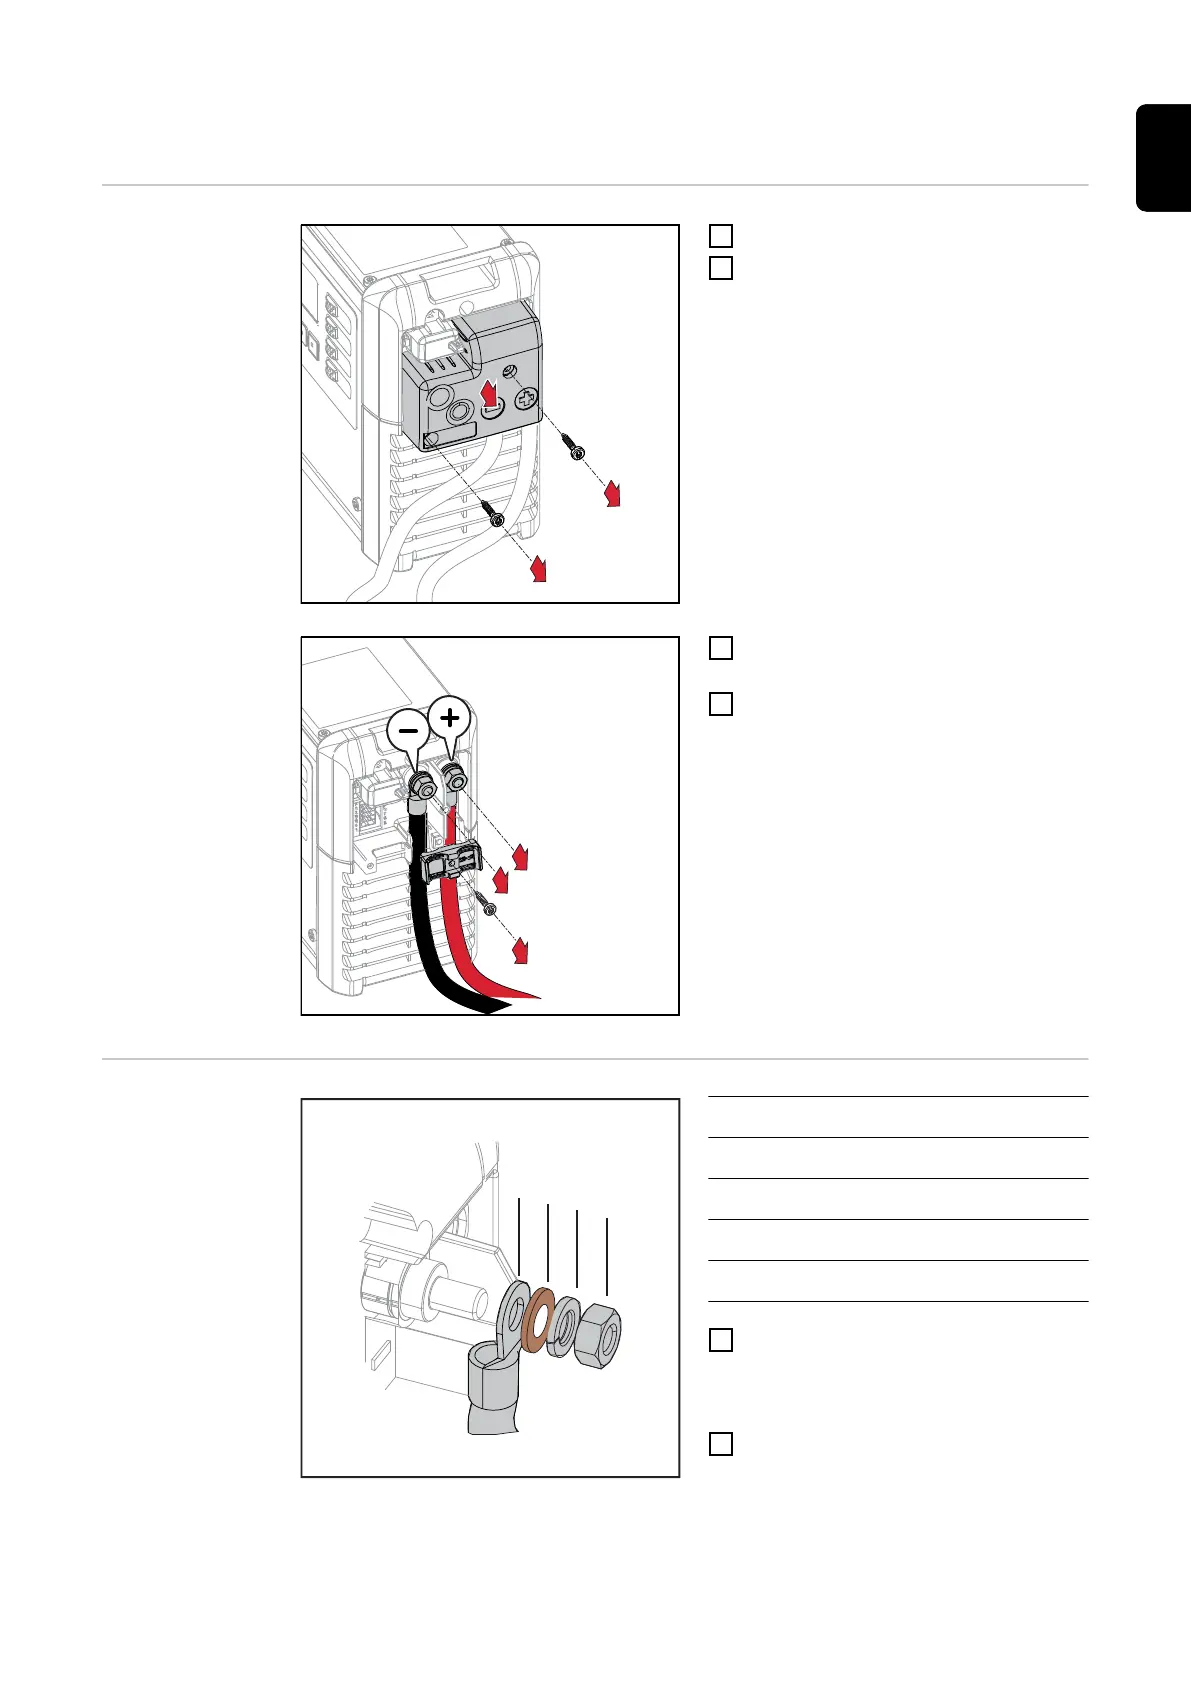
Installing the
charging lead
Item Description
(1) Charging lead cable lug
(2) M8 brass washer
(3) M8 lock washer
(4) Size 13 M8 hexagon nut
1
Thread the positive charging lead,
washer and lock washer onto the M8
bolt as shown and fit the size 13 M8
nut loosely.
2
Thread the negative charging lead,
washer and lock washer onto the M8
bolt as shown and fit the size 13 M8
nut loosely.
25
EN