11
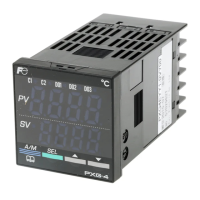
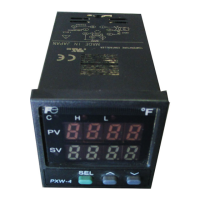
FRONT PANEL OPERATION
The PXW controller programming menu consists of three blocks—
PRIMARY (SETPOINT) MENU, SECONDARY (SYSTEM) MENU, and
FACTORY PRESET MENU. At power up the controller will be in the
operational mode, and process variable (PV) and setpoint variable
(SV) will be displayed. PV is the variable that is being controlled, and it
is not programmable. When setting the parameters, turn off the power
to the load (operating equipment) to ensure safety. Since it takes 30
minutes for the unit to stabilize in terms of temperature, all measure-
ments should be carried out at least 30 minutes after the power is
turned on. Option-related features are displayed only when the
options are used.
Viewing and Setting Parameters
• The data is automatically registered in 3 seconds after the setting. It
can also be registered by pressing the SEL key.
How to set Setpoint value (SV)
Operation Display
1. Power on. – Operational mode
2. Press UP or DOWN key – SV value changes accordingly
PRIMARY (SETPOINT) MENU
Operation Display
1. Operational mode – PV, SV
2. Press SEL key for 3 seconds – ‘H’ LED blinks; AH data (for
units with alarm option)
3. Press UP or DOWN key – AH data changes
4. Press SEL key to access the – ‘L’ LED blinks, ....
next parameter
5. Press SEL key for 3 secs. – Operational mode
SECONDARY (SYSTEM) MENU
Operation Display
1. Operational mode – PV, SV
2. Press SEL key for 7 seconds – 3 seconds later, “H” LED blinks
7 seconds later, “P”
3. Release and press SEL key again – “P” data
4. Press UP or DOWN key – “P” data changes accordingly
5. Press SEL key once – “P”
6. Press DOWN key to scroll down – “i”, “d”, ..... “Mod”
the menu
7. Press SEL key for 3 secs. – Operational mode
FACTORY PRESET MENU
Operation Display
1. Operational mode – PV, SV
2. Press SEL key for 9 seconds – 3 seconds later, “H” LED blinks
7 seconds later, “P”
9 seconds later, “P-n1”
3. Release and press SEL key again – “P-n1” data
4. Press UP or DOWN key – “P-n1” data changed
5. Press SEL key once – “P-n1”
6. Press DOWN key to scroll down – “P-df”, ........ “dsp7”
the menu
7. Press SEL key for 3 secs. – Operational mode
AUTOTUNING
Before initiating the autotune function, first decide if you would like
to autotune at setpoint or 10% of full scale below setpoint. Set the set-
point (SV), alarms (AL, AH) and the cycle time (TC). Bring your process
near setpoint before starting the autotune procedure.
Set the parameter AT to either “1” (to auto-tune at setpoint) or “2” (to
auto-tune at 10% of full scale below setpoint) and press SEL key to
start auto-tuning. The point indicator at lower right will then start blink-
ing. When the auto-tuning is completed, the point indicator stops blink-
ing and the parameter AT will automatically be set to “0.”
Duration of the autotune process varies with every application. The
auto-tuning process may take between 1 and 30 minutes to complete.
If it fails to complete, an abnormality may be suspected. In this case,
recheck the wiring, control action, and input type code. Refer to
page 12 and Appendix A for additional details.
The PID parameters calculated by autotuning will be retained even if
the power is lost. However, if the power is turned off during the auto-
tuning process, you must restart Autotuning. To abort the autotune
procedure, set AT to “0.” Auto-tuning has to be repeated if there is a
significant change in SV, P-SL or P-SU, or in the controlled process.
Autotuning can also be performed while fuzzy control is selected.
PRIMARY (SETPOINT) MENU
PARAMETER DESCRIPTION
roFF - rhLd Ramp/Soak Command: The Ramp/Soak program auto-
matically changes the setpoint value with time
according to a preset pattern.
Setting: roFF : Normal operation is performed
rrUn : Ramp/Soak operation is performed
rhLd : Ramp/Soak operation is suspended
rEnd indicates that the operation is terminated.
AH High Alarm Setpoint: The High Alarm Setpoint is that
point of the process above which, the high alarm out-
put relay is energized. If the alarm type, programmed in
the secondary menu, includes an absolute value for
the High Alarm Setpoint, enter the actual value you
want the alarm to be activated at regardless of what
the main setpoint is set for. If the alarm type includes a
deviation value for the High Alarm Setpoint, enter the
number of units above main setpoint in which you want
the alarm to be activated at; the deviation alarm tracks
main setpoint.
Settable within the Input Range.
Not indicated without the alarm option.
AL Low Alarm Setpoint: The Low Alarm Setpoint is that
point of the process below which, the low alarm output
relay is energized. Absolute and deviation alarm con-
figurations are programmable from within the sec-
ondary menu.
Settable within the Input Range.
Not indicated without the alarm option, or in PXV3.
Blinking
‘H’ LED
Blinking
‘L’ LED
 Loading...