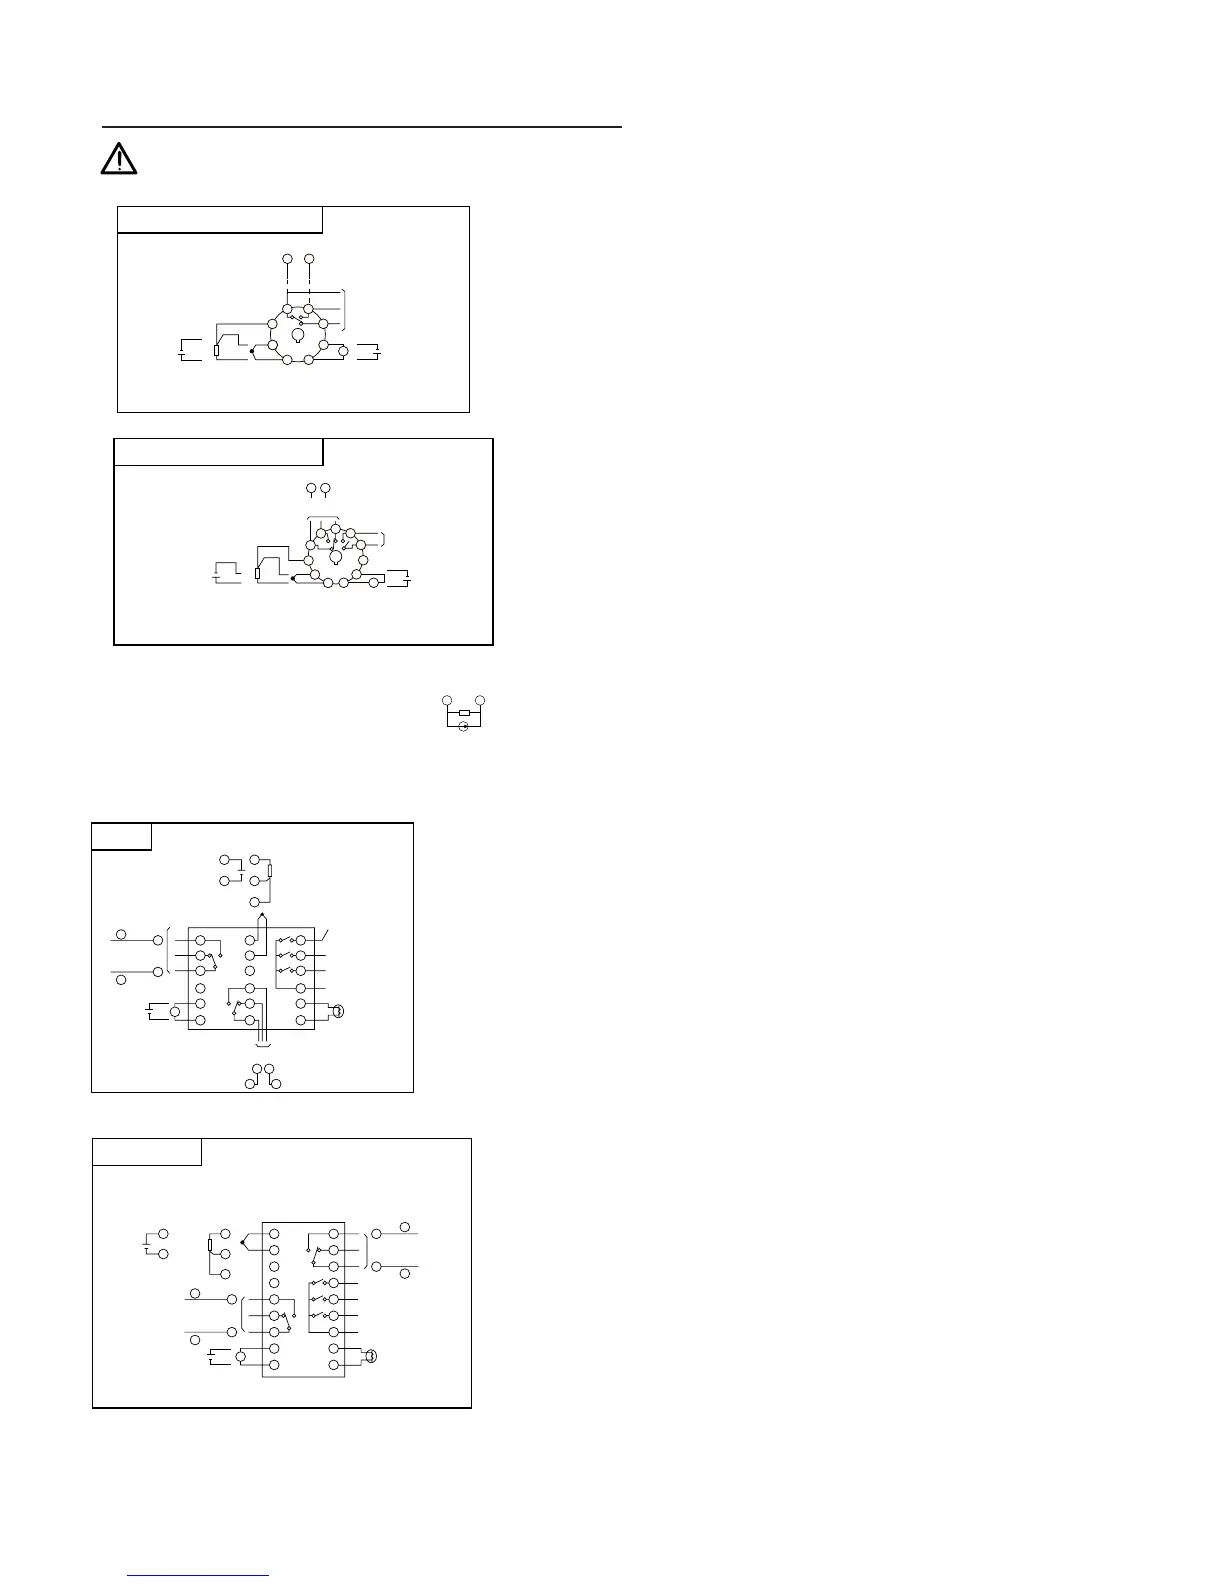
Wiring Power to Controllers
• Be sure to use the rated power supply voltage and polarity for the unit to
protect it against damage and to prevent the occurrence of failure.
• Keep the power off until all of the wiring is completed to prevent electric
shock and abnormal operation.
• Keep the power supply wires separated from the input and output wires.
• Power connections should be made with 18-gauge or larger insulated
wire. Stranded wire improves noise immunity. Noise filters and isolation
transformers are recommended in case of noisy power lines.
• When the Heater Break option is selected, use the same power line for
both the controller and the heater.
Wiring Inputs
There are two input categories available: Thermocouple/RTD or
current/voltage. Make sure you have the right type before wiring the
inputs. Refer to Table of Input Type Codes and set the parameter
“P-n2” accordingly.
Note: In order to minimize the risk of high frequency noise induced by
coils and windings in relays, solenoids, and transformers, use leads which
have braided sheath and ground one end of the sheath. Keep your input
leads separate from power and output leads. If you have to bring the
input signal from a long distance, a signal transmitter might be needed to
maintain an accurate reading; in this case, a unit that accepts
current/voltage input would be necessary.
Thermocouple
• Connect thermocouples directly to the input terminals whenever
possible.
• If using extension wires, make sure they are of the same thermocouple
material and grade; any dissimilar metal junctions will lead to erroneous
readings.
• Ungrounded thermocouples are recommended for optimal performance
and to prevent ground loops.
• Make sure the polarity is correct.
RTD Pt100
• Use a 3-wire Pt100Ω RTD whenever possible. All three wires must have
low lead resistance (less than 10Ω) and no resistance differentials
among them.
• If using a 2-wire RTD, jumper the two B-legs with a wire of equal resis-
tance.
• Make sure A and B leads are connected to the right terminals.
Current/Voltage
• The controller accepts 1-5V, 0-5V, 4-20mA, and 0-20mA DC signals. If
wiring for a voltage input, feed the signal directly to the input terminals.
For current inputs, first connect the 250Ω precision resistor that comes
with the unit.
• Make sure the polarity is correct.
Wiring Outputs
Before wiring the outputs, make sure the unit has the right kind of control
output, and that all the load handling devices conform to the controller
specifications. Note that it takes 5 seconds for the outputs to activate
after the power is turned on.
 Loading...