Replacing Consumables
65
Maintenance
3
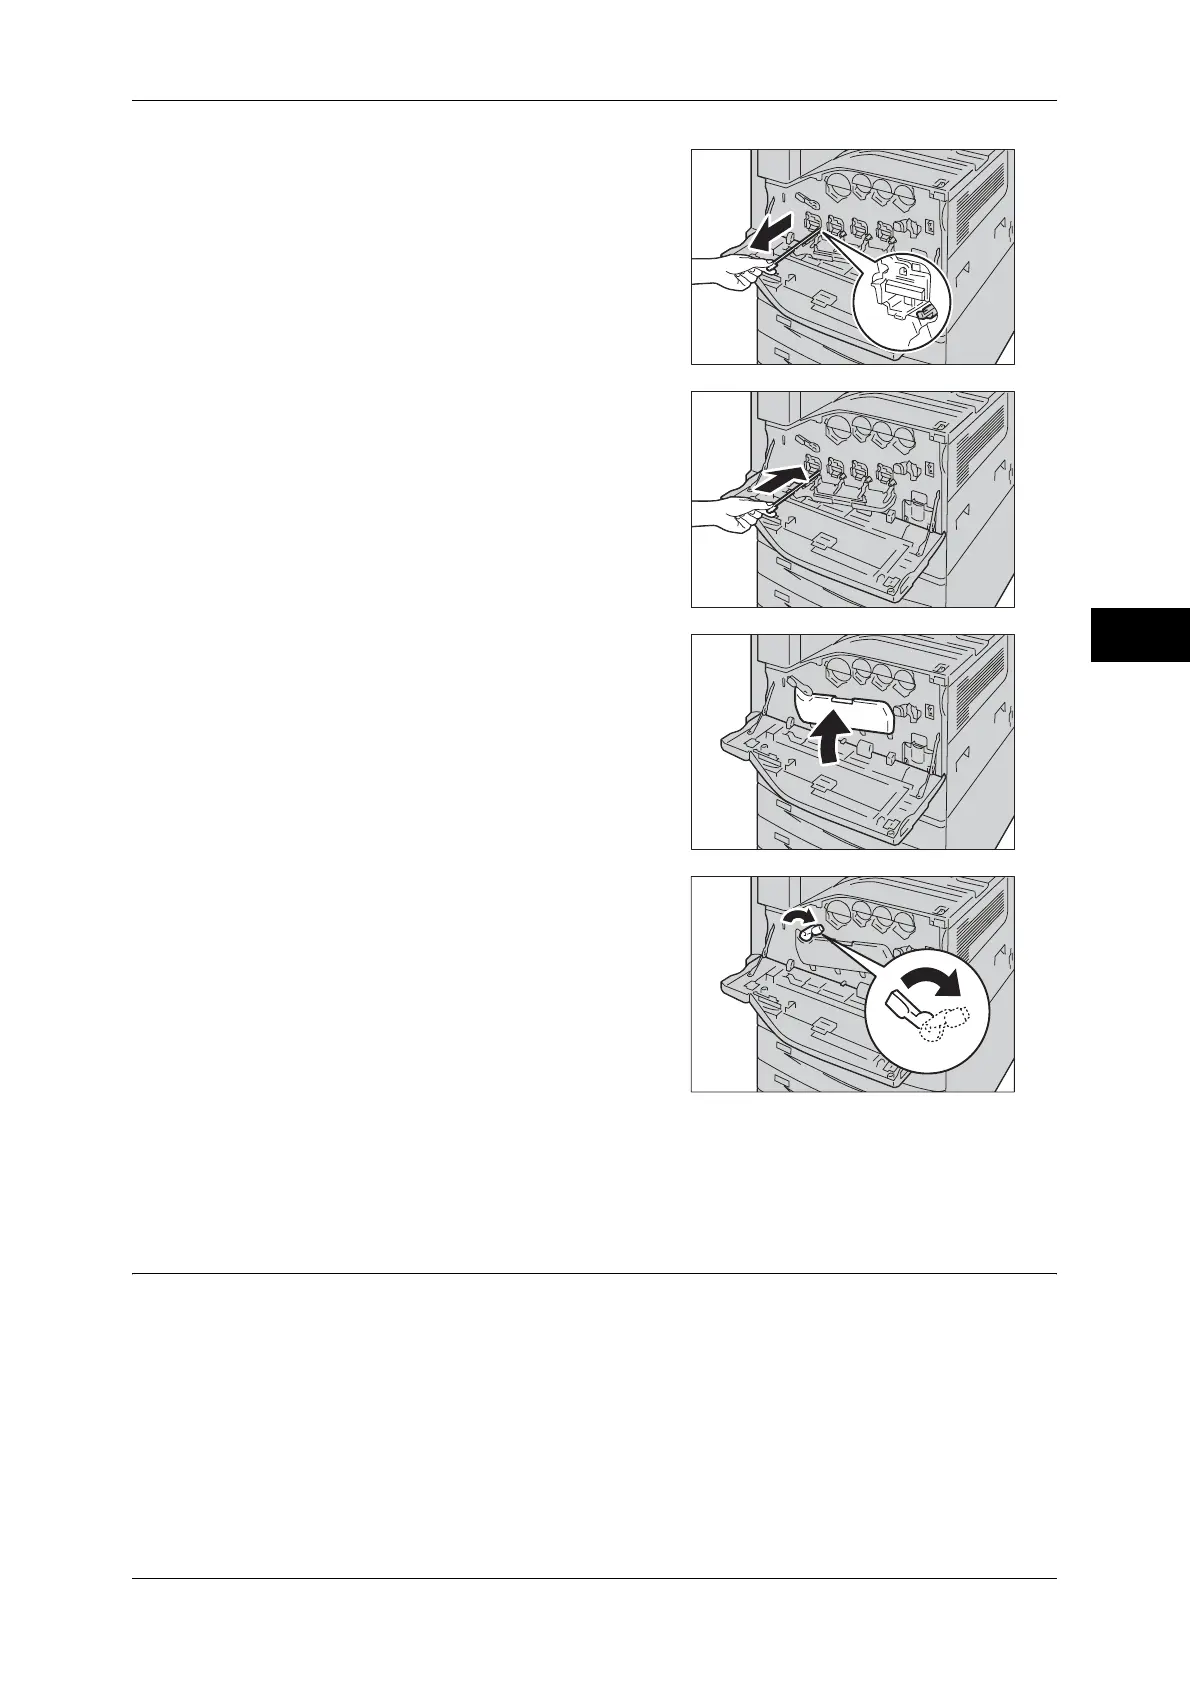
9 Slowly slide out the cleaning bars housed
within the LED printhead until it stops. The
cleaning bars are located in the cleaning
connection just under the drum cartridges
(R1, R2, R3, or R4).
Note • Slide out the cleaning bars until you see
"zzz".
Important • Do not remove the cleaning bars from the
housing.
10 Slowly slide the cleaning bars back into
place.
Note • Clean the four LED printheads (R1 to R4)
by sliding the cleaning bars back and
fourth for two or three times, respectively.
11 Return the cover to the original position.
Note • Push the cover until it clicks into place.
12 Rotate the release lever clockwise to lock
the cover.
13 Close the front cover.
Note • If the front cover is not completely closed,
a message will appear and the machine
remain paused.
Replacing Drum Cartridges R1, R2, R3, or R4 (for Customers Having a
Spot Maintenance Contract)
The machine displays the following messages when a drum cartridge needs to be
replaced. When the message is displayed, contact our Customer Support Center.
Refer to this section and locate the position or the indicated drum cartridge (R1, R2,
R3, or R4), and replace the drum cartridge.
 Loading...

