Importing Scanned Data
439
Computer Operations
12
4 Click [Confirm].
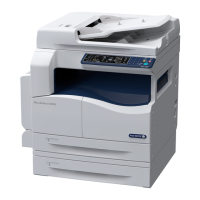
5 Select a file to be imported from the list. To import a file, there are two ways as follows:
Importing a file by clicking
[Import].
Click [Import].
The file is extracted and saved the
specified save location.
Note • You can select multiple files.
• When [File Saving Options] is
set to [Set Destination for Each
File] under the import settings, a
dialog box for specifying a save
destination is displayed. When
the dialog box appears, specify
a save destination, and click
[OK].
For information on the import
settings, refer to "Import
settings for scanned files"
(P.440).
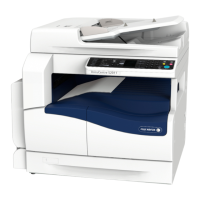
Importing a file by drag and drop
operation
Drag and drop the file to the save
location such as the desktop.
The file to be dropped remains in the
folder.
Note • The file can be imported by
copy and paste operation. The
file to be pasted remains in the
folder.
• To delete the file in the folder,
click [Delete] on the toolbar.
6 The file is imported to the specified directory.
Note • When [File Saving Options] is set to [Save in Fixed Destination] under the import settings, a file is
saved in the specified directory.
For information on the import settings, refer to "Import settings for scanned files" (P.440).
Changing Stored File Manager 3 Settings
To learn about fields in the displayed dialog box, click [Help] to view the Stored File Manager 3 help.
 Loading...