259
Scanning
After you configured settings, go to "Sending the Scanned File to the Network" on page 262.
From the Address Book Editor
1
Click start → All Programs → Fuji Xerox
→
Fuji Xerox Printer Software for Asia-Pacific →
your printer → Address Book Editor.
NOTE:
• The window to select a device appears when multiple fax drivers are installed on your computer. In this
case, click the name of the desired printer listed in
Device Name
.
• The
Enter Password
window appears when
Panel Lock Set
is set to
Enable
. In this case, enter the
password you specified, and click
OK
.
2
Click OK on the "Retrieval Successful" message window.
3
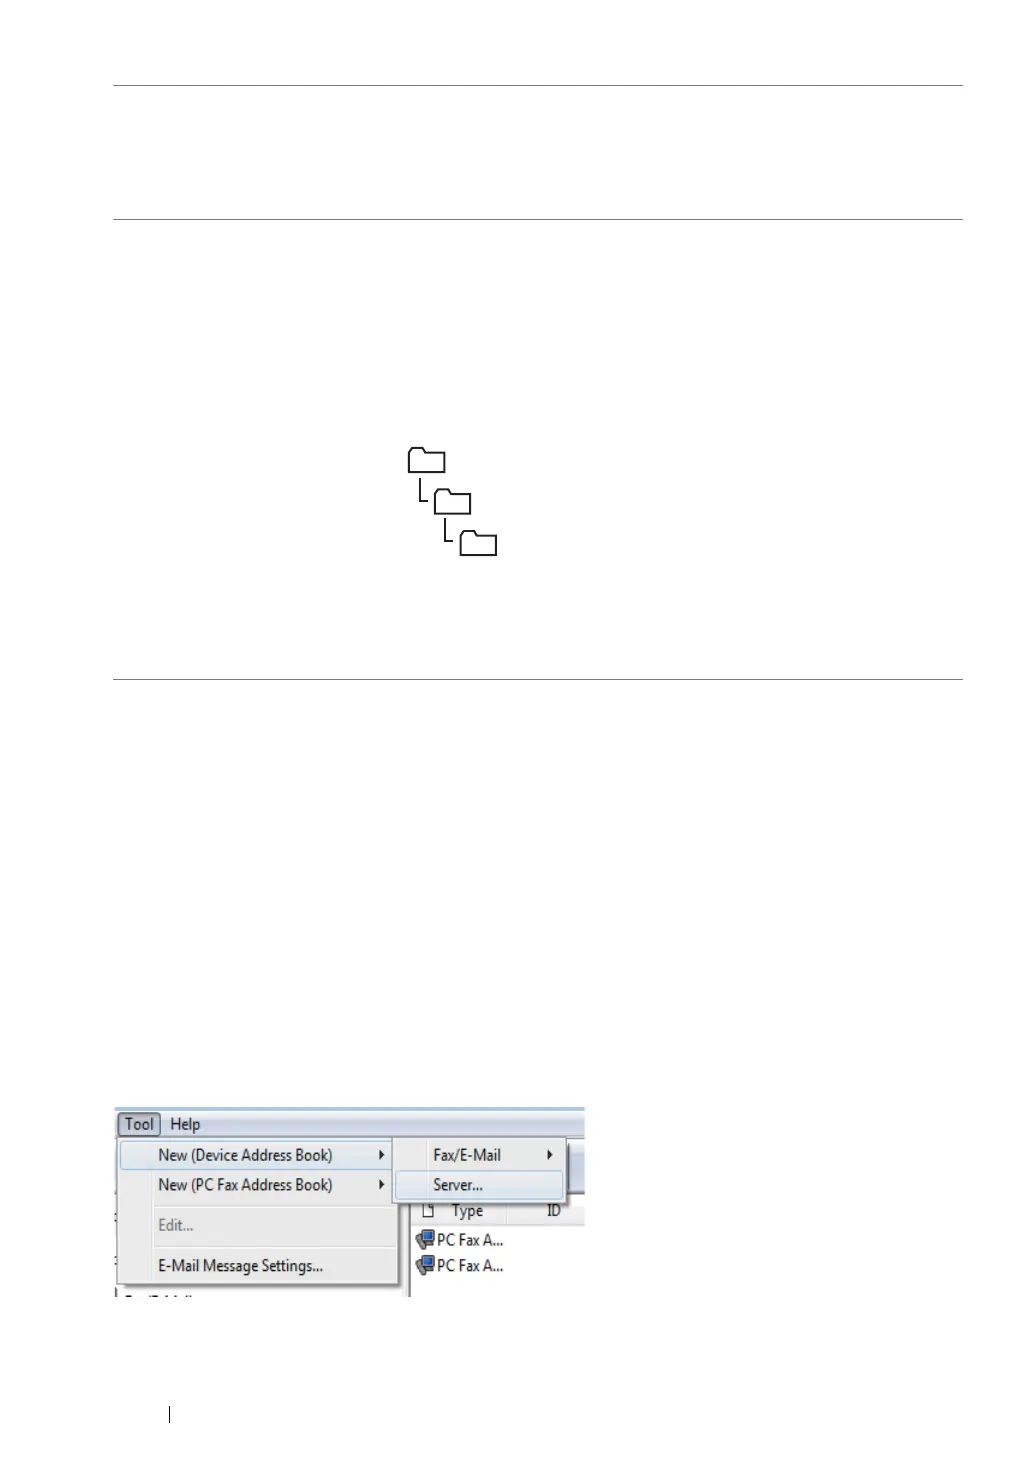
Click Tool → New (Device Address Book) → Server.
8
Name of Shared
Directory
For
Computer SMB
only.
On the Windows operating system, enter the share name of the folder
to store the scanned document on the recipient computer.
On the Mac OS, enter the folder name to store the scanned document
on the recipient computer.
9
Subdirectory Path
(optional)
For
Computer SMB
To store the scanned document in the share folder directly without
creating any subfolder, leave the space blank.
To store the scanned document in the folder you created under the
share folder, enter the path as following.
Example: Share Folder name:
MyShare
, Second-level folder name:
MyPic
, Third-level folder name:
John
You should now see
MyShare\Mypic\John
in your directory.
In this case, enter the following item.
Server Path:
\MyPic\John
For
Server FTP
Enter the server path to store the scanned document.
MyShare (Share folder)
MyPic
John
 Loading...