4.2 Changing Scanning Settings
ScanSnap S510M Operator's Guide 75
Setting the ScanSnap
4
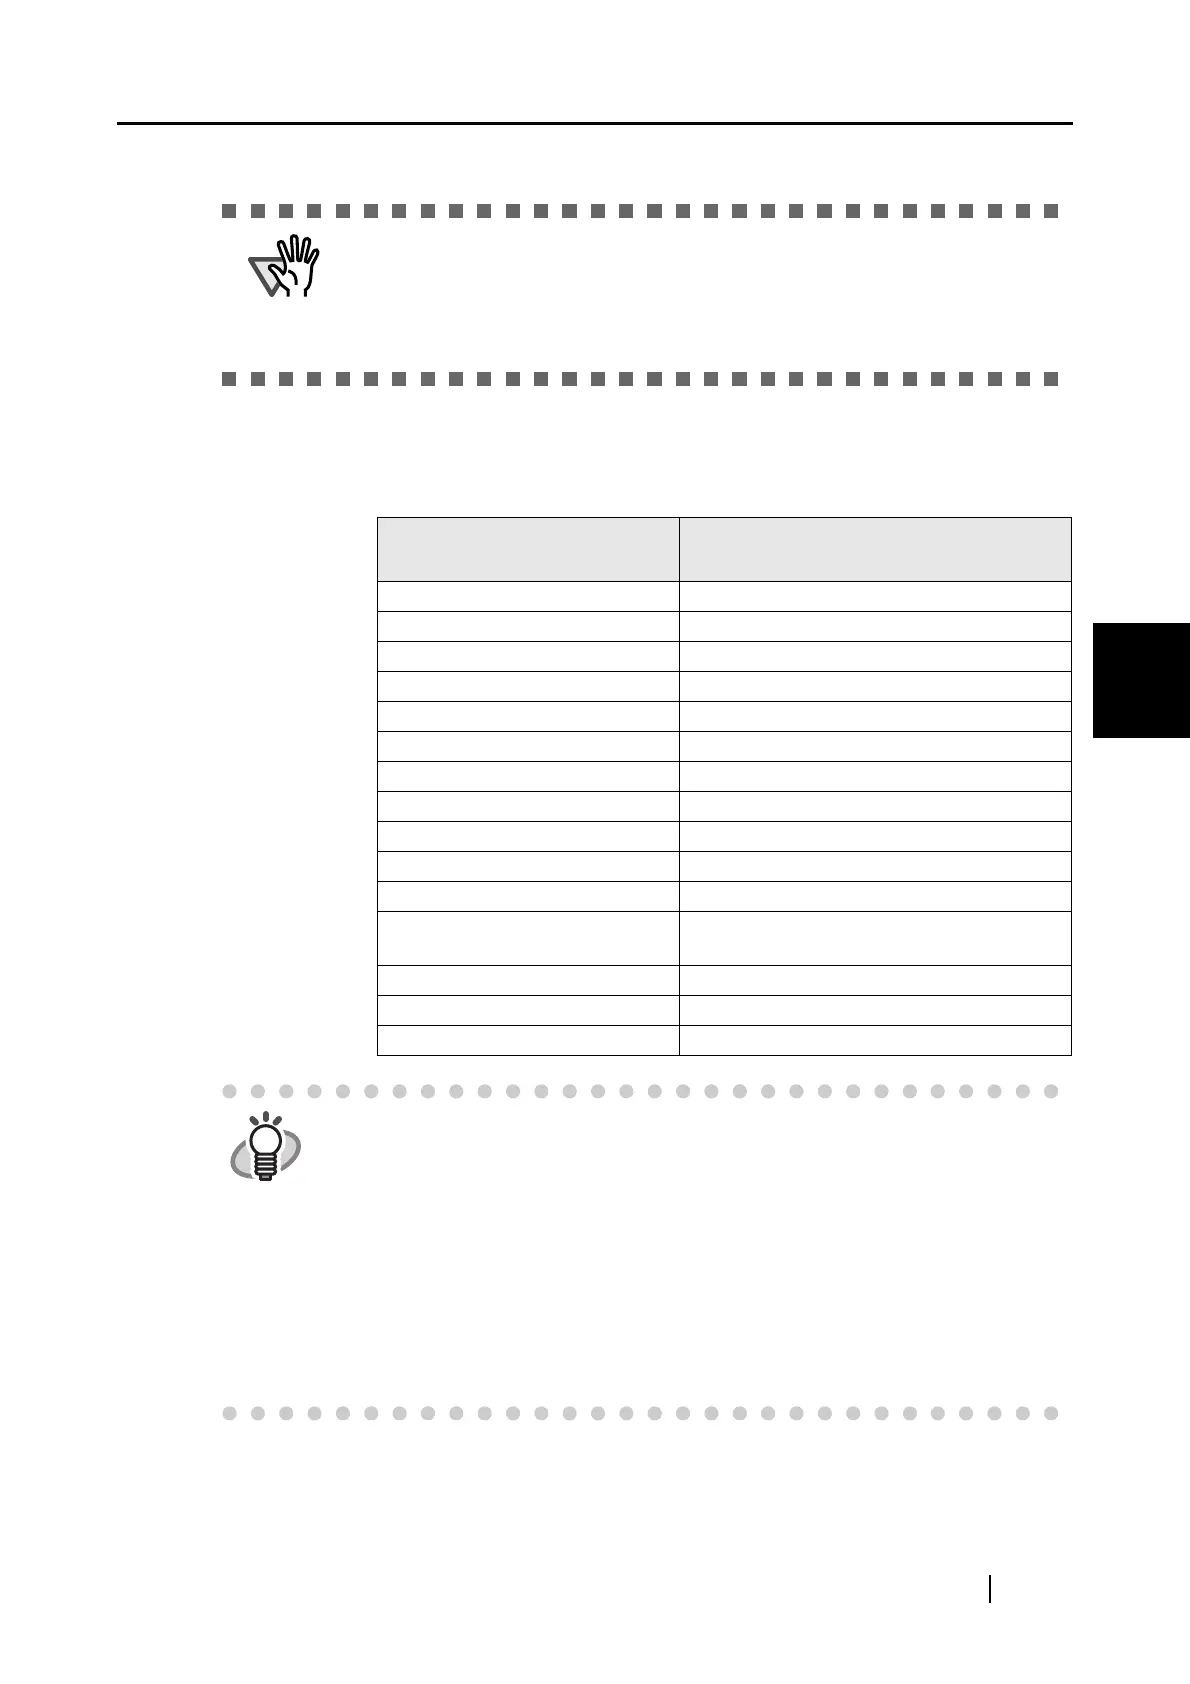
■ Output image size
You can specify an image size to output images of scanned documents.
You can select it from the following paper sizes.
• When scanning documents in [Create facing pages in one image] mode,
select [Duplex Scan] in the [Scanning side] pop-up menu on the [Scanning]
tab of the "ScanSnap Manager - Scan and Save Settings" window.
• How to load documents differs between modes. For details, refer to "6.2 Using
the Carrier Sheet" (page 184).
Mode: Create facing pages in
one image
Mode: Create front and back images
separately
Automatic detection Automatic detection
A3 (297 x 420 [mm]) -
- Carrier Sheet size (216 x 297 [mm])
- A4 (210 x 297 [mm])
- A5 (148 x 210 [mm])
- A6 (105 x 148 [mm])
- Post Card (100 x 148 [mm])
B4 (JIS) (257 x 364 [mm]) -
- B5 (JIS) (182 x 257 [mm])
- B6 (JIS) (128 x 182 [mm])
- Letter (8.5 x 11 [in.], 216 x 279.4 [mm])
11 x 17 (11 x 17 [in.],
279.4 x 431.8 [mm])
-
- Business Card Portrait (55 x 90 [mm])
- Business Card Landscape (90 x 55 [mm])
- Custom (up to five sizes can be created)
HINT
• When you select [Automatic detection] in the [Output image size] pop-up
menu, scanned document sizes are automatically detected, and each image
is output in a standard size (other than Custom and Carrier Sheet size) in the
above table, which best matches the original document size. You do not have
to select a size in the [Output image size] pop-up menu every time.
• When you select [Carrier Sheet size] in the [Output image size] pop-up menu,
images are output in the Carrier Sheet size. With Adobe Acrobat, you can trim
images to create images in a preferred size.
In Adobe Acrobat, to trim an image, select [Tools] from the menu bar, and
select [Advanced Editing] D [Crop tool]. Select an rectangular area you want
to trim using the Crop tool, and then double-click the selected area.
 Loading...