Questions? Call (315) 298-5121, or visit us online at www.fulton.com
SECTION 2 CAL-IOM-2012-1220 INSTALLATION
2-13
pressure-reducing ( ll) valve set pressure (minimum 12
psig). No more water should be entering the system.
Close the shuto valve on the cold-water ll line.
14. Visually inspect all pipe joints and equipment
connections for leaks. If necessary, drain system, repair
leaks and re ll/purge the system. If no pressure drop is
detected for a period of two hours under pressure, the
system may be considered watertight.
15. When purging is completed, make sure the following
are open—combination shut-o /purge valve, shuto
valve to pressure reducing ( ll valve), shuto valve in
cold water ll line, and shuto valve in return line.
16. Make sure the following are closed--all drain cocks, the
vent on the combination shuto purge valve, and all
manual vents. Reset zone valves to normal mode of
operation and turn o power to boiler.
17. Open fuel shuto valve, allowing fuel to ow to boiler.
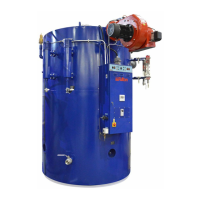
Install Gas Piping
The Caliber boiler is factory test red and combustion is
adjusted per the boiler data plate and test re sheet.
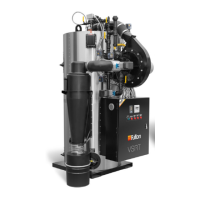
The gas train (Figure 5) components are UL-795 certi ed to
operate at speci c gas pressure requirements. If available gas
pressure is greater than 14” W.C., a lock up style gas pressure
regulator must be provided to reduce the provided pressure
to the acceptable range of 3.5” W.C. to 14” W.C. for natural gas,
and 7” W.C to 14” W.C. for propane.
Adhere to the following for gas piping installation:
1. See Table 4 for required natural gas pipe size, based on
overall length of pipe from the meter plus equivalent
length of all ttings. Approximate sizing may be based
on 1,020 BTU for 1 cubic foot of natural gas.
2. Piping must be installed such that no piping stresses
are transmitted to the boiler. The boiler cannot be used
as a pipe anchor.
3. The boiler and all gas piping connections must be
pressure-tested and checked for leaks before being
placed into service. Test with compressed air or inert
gas if possible.
4. The boiler must be disconnected at the boiler manual
shuto valve (located at the end of the supplied gas
train) from the gas supply piping system during any
pressure testing of the system at pressures in excess of
1/2 psig (14 inch W.C.).
5. Gas piping must be installed in accordance with
National Fuel Gas Code, ANSI Z223.1 1991 or latest
addenda and any other local codes, which may apply.
6. The pipe and the ttings used must be new and free of
dirt or other deposits.
7. Piping must be of the proper size to ensure adequate
gas supply. A drip leg and union connection must be
installed upstream of the gas safety shut o valves.
8. Connect gas supply line to the open end of the tee on
which the drip leg is installed.
9. When making gas-piping joints, use a sealing
compound resistant to lique ed petroleum gases. Do
not use Te on tape on gas line threads.
10. After gas piping is completed and before wiring
TABLE 4 NOMINAL PIPE SIZE
Nominal
Pipe Size
ID Equivalent Pipe
Length
Max Capacity in ft3 of natural gas per hour. Pressure drop of
0.5”wc/Equivalent length of pipe (feet)
(“) (“) 90 Elb
(Feet)
Tee
(Feet)
20 40 60 80 100 150 200
1-1/4 1.380 3.45 6.9 950 ----- ----- ----- ----- ----- -----
1-1/2 1.610 4.02 8.04 1460 990 810 ----- ----- ----- -----
2 2.067 5.17 10.3 2750 1900 1520 1300 1150 950 800
2-1/2 2.469 6.16 12.3 4350 3000 2400 2050 1850 1500 1280
3 3.068 7.67 15.3 7700 5300 4300 3700 3250 2650 2280
4 4.026 10.1 20.2 15800 10900 8800 7500 6700 5500 4600