3.1 Set Access Password
Method one: Set the Access Password in BarTender
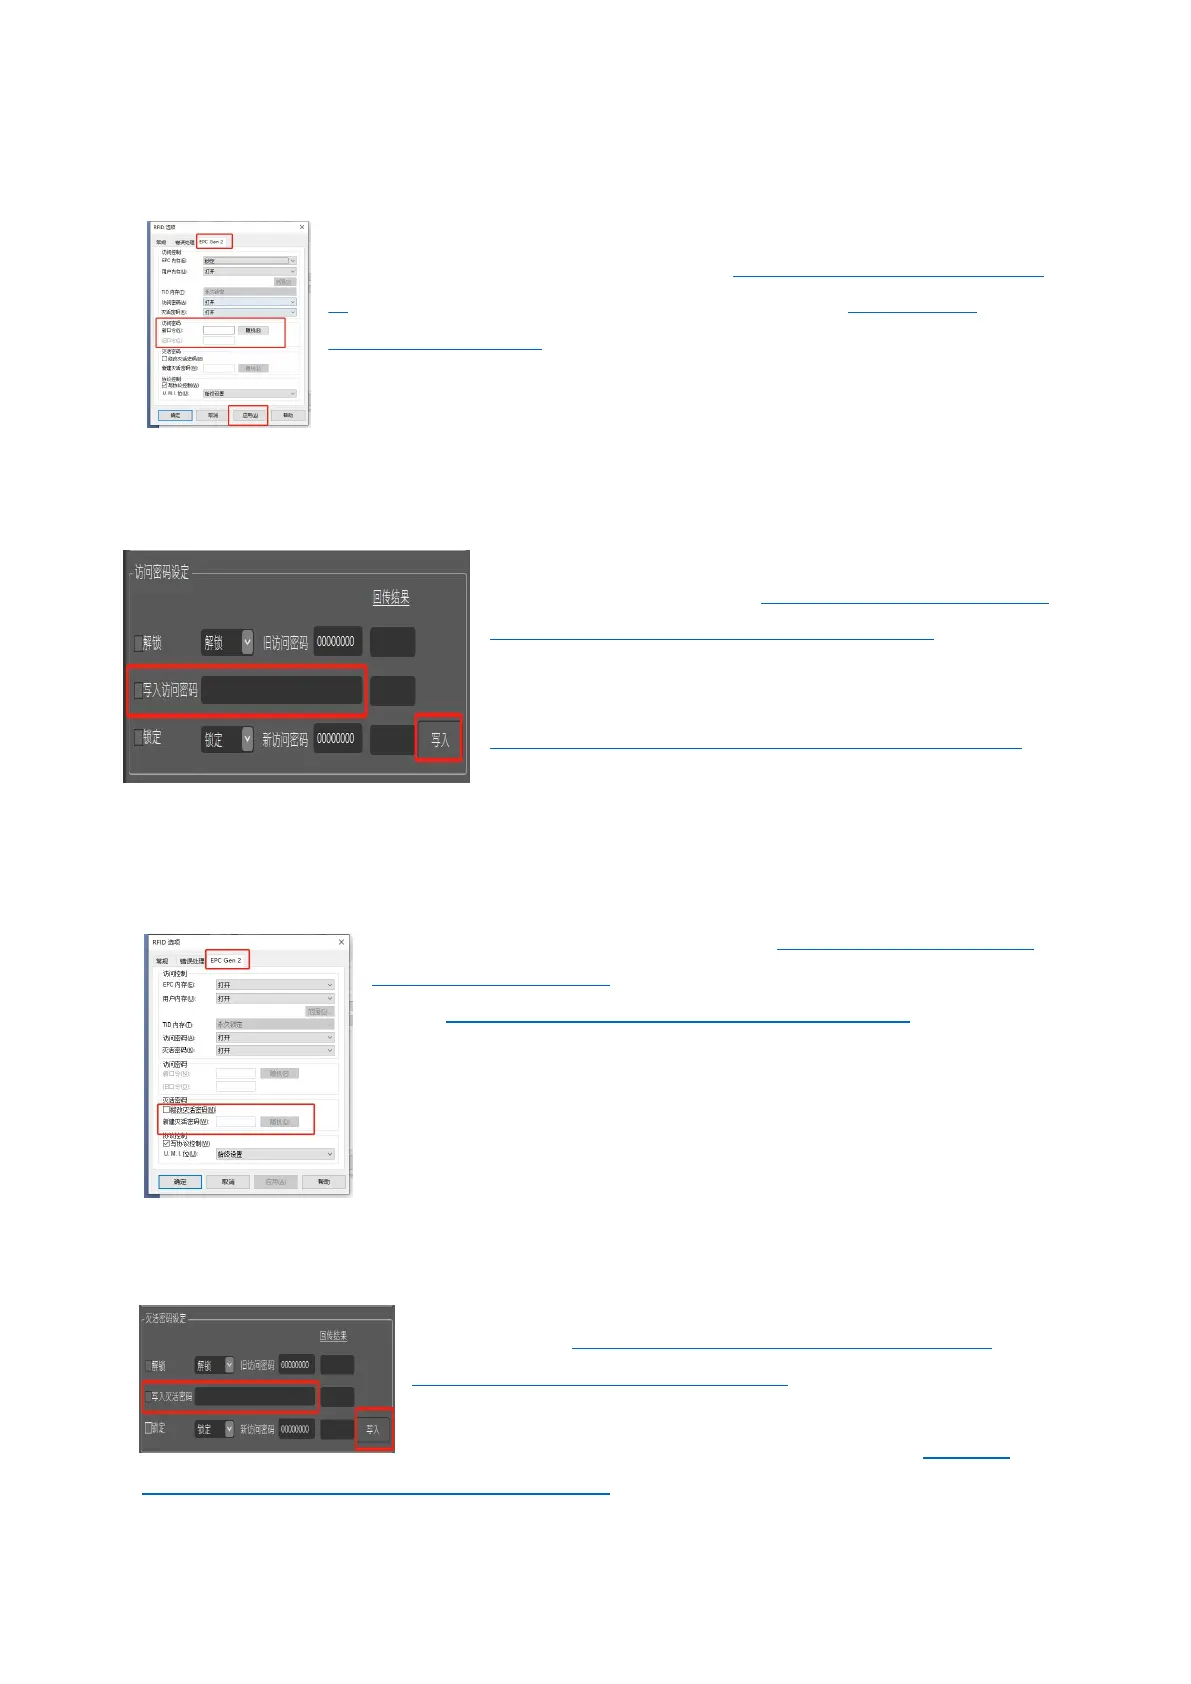
Open BarTender and add the RFID tag (Detailed in Chapter 6, Section
5) After adding the RFID tag, open the RFID option (Detailed in
Chapter 6, Section 6). In EPC Gen 2, select an area to lock and the
Access password box will change from dark to light. Enter Access
Password in the input box and click “Apply” or “OK” below
Method Two: Set Access Password in PrinterUtility
Click the “Access Password Setupet” in PrinterUtility
RFID Test plate for setting (Detailed explanation of the
plate can be seen in Section 8 of Chapter 5), enter the
access password to be written in the input box of
“Access Pwd.”, and then click the “Write” button,
return error code details can be seen in Appendix A.
3.2 Set Kill Password
Method 1: Set Kill Password in BarTender
Open BarTender and add the RFID tag (the details are described
in Chapter 6, Section 5). After adding the RFID tag, open the RFID
option (details are described in Chapter 6, Section 6). In EPC Gen
2, check the button to change the Kill password and enter the Kill
password in the password box. Click “Apply” or “OK” below. After
the Kill command is executed, labels die permanently and cannot
be used any more. Labels that are not configured with the Kill
Password cannot be killed.
Method Two: Set Kill Password in PrinterUtility
It can be set in the Kill Password Setup area of PrinterUtility
RFID Test plate (detailed explanation of the plate can be
referred to in Section 8 of Chapter 5). Enter the Access
password to be written in the input box of Access Pwd., then
click the “Write” button on the lower right corner. Refer to
Appendix A for details of returned error code.
 Loading...