EasyManuals Logo

Garage Smart GS100-CR User Manual

Garage Smart GS100-CR
41 pages
To Next Page IconTo Next Page
To Previous Page IconTo Previous Page
Page #22 background imageLoading...
Page #22 background image
22
GarageSmart
TM
User’s Manual
Alternate Mounting
The GarageSmart™ GS100-CR can also be mounted upside down for installations requiring
bottom ended connections.
1. Remove the existing mechanical 3-button wall switch from the wall.
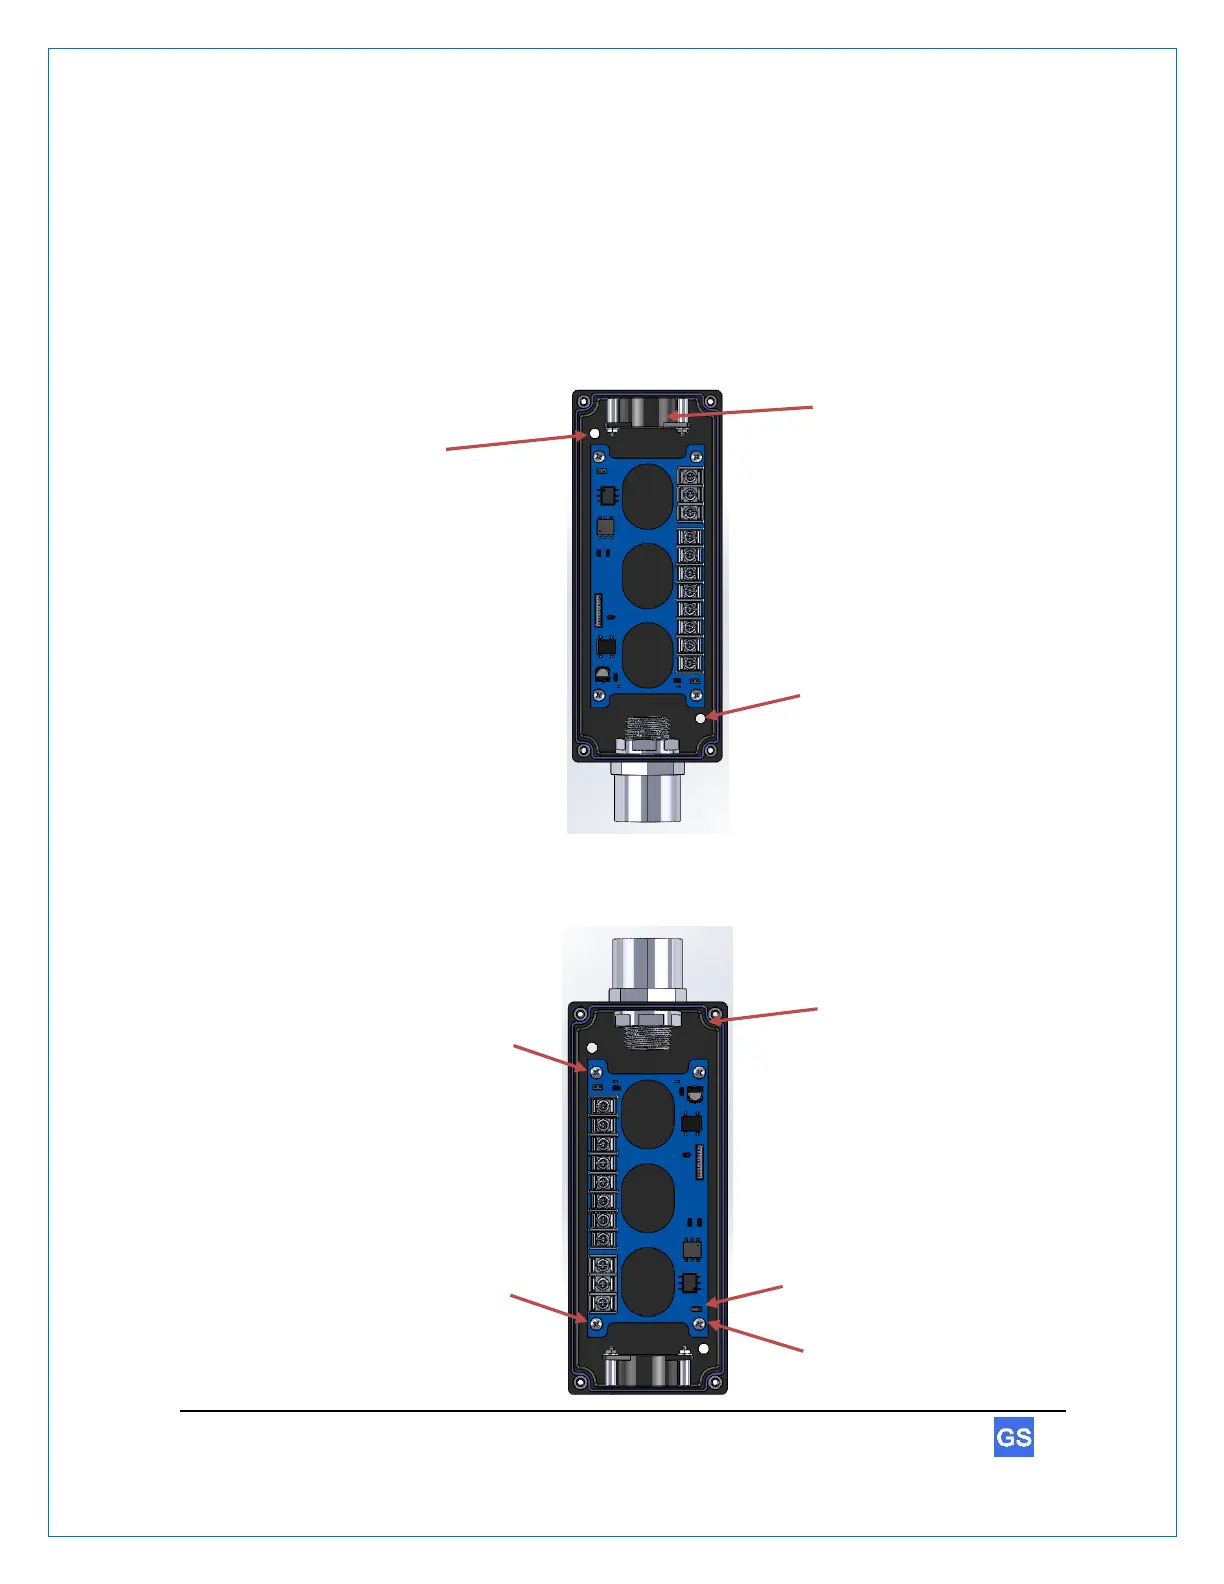
2. Remove the cover of the GarageSmart device and using screws (not included),
secure the GarageSmartGS100-CR (with the buzzer towards the top of the
enclosure) to the wall using the mounting holes as shown below.
3. Remove the buzzer connector from the J4 terminal of the PCB, then remove the (4)
PCB screws from the bottom enclosure.
Mounting Hole
Mounting Hole
PCB Screw
PCB Screw
PCB Screw
PCB Screw
J4
Buzzer

Questions and Answers:

Question and Answer IconNeed help?

Do you have a question about the Garage Smart GS100-CR and is the answer not in the manual?

Garage Smart GS100-CR Specifications

General IconGeneral
BrandGarage Smart
ModelGS100-CR
CategoryGarage Door Opener
LanguageEnglish