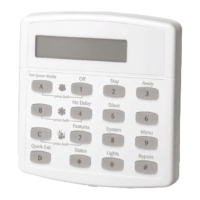
Concord Ultra 44
No Activity (partition 1: 06103, partition 2: 06203)
Reporting-Partition 1-2 (Default = off)
When this setting is on, the panel sends a no activity report to the central
station when the activity timeout expires (see
TIMERS—ACTIVITY TIMEOUT).
¾
To turn No Activity reports off or on:
1. With the display showing NO ACTIVITY OFF/
ON
(current setting), press 1 (off) or 2 (on).
The display flashes the entered setting.
2. Press # and the display shows the new setting.
Duress Option (partition 1: 06104, partition 2: 06204)
Reporting-Partition 1-2 (Default = off)
When this setting is on, the system can be controlled using a programmed
duress code (see
SECURITY—PARTITION N—DURESS CODE).
Note
For UL Listed installations, Duress Option must be set to off.
Do not use a duress code unless it is absolutely necessary. Using duress
codes often results in false alarms due to code entry errors. If a duress
code is absolutely necessary, use it with the audio verification module to
reduce false alarms and accidental dispatches.
¾
To turn Duress Option off or on:
1. With the display showing DURESS OFF/ON
(current setting), press 1 (off) or 2 (on). The
display flashes the entered setting.
2. Press # and the display shows the new setting.
Forced Armed (partition 1: 06105, partition 2: 06205)
Reporting-Partition 1-2 (Default = off)
When this setting is on, the panel reports to the central monitoring station
when a user “force arms” the system.
Note
Forced arming occurs if the user presses BYPASS when arming the system
with open sensors or zones protesting.
Auto-forced arming occurs if the user does not press BYPASS (when arming
the system with open sensors/zones protesting) and the siren time expires.
Auto-forced arming always reports to the central monitoring station.
¾To turn Force Armed off or on:
1. With the display showing FORCE ARMED OFF/
ON (current setting), press 1 (off) or 2 (on).
The display flashes the entered setting.
2. Press # and the display shows the new setting.
Latchkey Format (partition 1: 06106, partition 2: 06206)
Reporting-Partition 1-2 (Default = off)
This setting determines whether the selected partition is set up for basic
(off) or advanced (on) latchkey opening report operation.
Basic:
If the partition is armed by entering 2 (or
3) + CODE, disarming using a
designated latchkey user code or keychain touchpad within an assigned
time schedule sends a page.
If the partition is armed by entering 2 (or
3) + CODE + 6 (Latchkey), dis-
arming using a designated latchkey user code or keychain touchpad
inside or outside of an assigned time schedule sends a page.
Advanced:
If the partition is armed by entering 2 (or
3) + CODE + 6 (Latchkey), dis-
arming using a latchkey designated user code or keychain touchpad
within an assigned time schedule sends a page.
Refer to the User’s Guide for complete Latchkey setup and operation.
¾
To turn Latchkey Format off or on:
1. With the desired partition selected, press A or
B until the display shows
LATCHKEY FORMAT
OFF/ON
(current setting).
2. Press 1 (off—basic) or 2 (on—advanced). The
display flashes the entered setting.
3. Press # and the display shows the new setting.

 Loading...