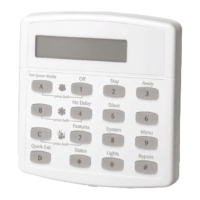
Concord Ultra
61
Exception Reports (062nn-Open-
ing, 063nn-Closing, where
nn=Schedule number [0 to 15])
Attach Schedules To Events (Default = off)
This setting lets you attach the Exception
Opening report feature and the Exception
Closing report feature to time schedules.
¾
To Attach a Schedule to Exception Opening or Exception Closing:
1. Press A or B until the display shows ATTACH SCHEDULES TO EVENTS.
2. Press # then A or B until the display shows
EXCEPTION OPENING OR EXCEP-
TION CLOSING
.
3. Press # and the display shows
SCHEDULE 00 OFF/ON (current setting). If
you want a different schedule, press A or B until the desired schedule
appears.
4.
Press 1 (off) or 2 (on). The display flashes the entered selection.
5. Press # and the display shows the new setting for the selected schedule.
Lights (064xnn, where nn=Sched-
ule number [0 to 15] and x=light
number [1 to 9] minus 1)
Attach Schedules To Events (Default = off)
This setting lets you attach light controls to a
time schedule.
¾To Attach Schedules to Lights:
1. Press A or B until the display shows ATTACH SCHEDULES TO EVENTS.
2. Press # then A or B until the display shows
LIGHTS. Press # to enter the
LIGHTS menu.
3. Press A or B until the desired light appears.
4. Press # and the display shows SCHEDULE 00 OFF/ON (current setting). If
you want a different schedule, press A or B until the desired schedule
appears.
5. Press 1 (off) or 2 (on). The display flashes the entered selection.
6. Press # and the display shows the new setting for the selected schedule.
7. Repeat steps 3, 4, and 5 until all desired lights are attached to schedules.
Outputs (065xnn, where
nn=Schedule number [0 to 15] and
x=output number [1 to 6] minus 1)
Attach Schedules To Events (Default = off)
This setting lets you attach outputs to a time
schedule. Onboard outputs are 1–2, Snap-
Card outputs are 3–6.
Note
Outputs can only be scheduled if text has been
entered in installer programming. Only onboard
and SnapCard outputs can be scheduled.
¾To Attach Schedules to Outputs:
1. Press A or B until the display shows ATTACH SCHEDULES TO EVENTS.
2. Press # then A or B until the display shows
OUTPUTS. Press É to enter the
OUTPUTS menu.
3. Press A or B until the desired output appears.
4. Press # and the display shows SCHEDULE 00 OFF/ON (current setting). If
you want a different schedule, press A or B until the desired schedule
appears.
5. Press 1 (off) or 2 (on). The display flashes the entered selection.
6. Press # and the display shows the new setting for the selected schedule.
7. Repeat steps 3, 4, and 5 until all desired outputs are attached to schedules.

 Loading...