At
all
.
times
it
is
important not
to
·permit
pencil
lines,
paint,
oil
or
.other
foreign
mater-
ials
to
remain
on the insulating
surf
aces
of the
breaker
as
they may
cause
low
resistance
between
points of different potential and
result
in
eventual
electrical
~reakdown.
The
breaker
should-
be
operated
several
times
at
a
rated
voltage
to
assure
that the control
circuits
are
'
properly
connected and
that
all
electrical
attachments
are
functioning
properly.
A complete contact inspection, including con-
tact
wipe and·
pressure,
should be made
at
regu
-
lar
inspection
periods
and always
after
a known
short
circuit
current
has been
interrupted,
to
determine
whether
the
contacts
are
worn
or
pitted
in
which
case
they should be
dressed
or
replaced.
It
is
necessary
to
remove
the
arc
quenchers
to
properly
inspect the contacts.
Arc-
ing contacts and
arc
quencher
barriers
should be
replaced
when they
are
eroded to half
their
original
thickness.
LUBRICATION
In
general,
the
circuit
breaker
requires
mod-
erate
lubrication.. _Mechanical bearing points
and
sliding
surfaces
should be lubricated
at
the
regular
inspe
_ction
periods
with a thin film of
G-E
Lubricant
D50Hl~ . Sli<lingsilver plated con-
tact
surfaces
should
be
lubricated with G-E Lub-
ricant
D50H47. Hardened
grease
and
dirt
should
be
removed
from
latch
and bearing
surf
aces
by
using
kerosene.
ALL
EXCESS
LUBRICANT
SHOULD
BE
REMOVED
TO
AVOID ANY
ACCUMULATION
OF
DIRT OR
DUST
. ·
The
use
of
cotton waste to wipe
bearing
surfaces
should
be
avoided,
as
the cotton ravelings may
become
entangled
under
the
bearing
surfaces
and
destroy
the
surfac.e of the bearing.
On drawout
breakers,
the contact
surface
of the
disconnect
studs
should -be
greased
· with G-E
Grease
Specificati~n D50H47. .
SEPARATION OF FRONT
AND
REAR
FRAMES
To
repair
or
replace
contacts·, operating mech-
anism,
o
x:
the
overcurrent
devices, the front
frame
must
be
separated
from
the
back
frame.
To
-
separate
the two
frames
pro~eed
as
follows:
1. · _ The
breaker
contacts
must
be
open with
the
safe!}7
pin
in
place.
(See MAINTENANCE.)
_
2.
Remove ·the two opening
springs
(on
lower
part
o! the
~reaker)
from
the
outside
pole units.
3.
Remove the clevis pin (14,
Fig.
6)
(13, Fig.
7)
from
the
center
pole unit.
4.
Remove the
six
nuts
from
the back
frame
using a
socket
wrench with an extension.
These
include
the
two nuts
at
the top of the
frame.
Low Voltage
Power
Circuit
Breakers
GEK-7303
5. Remove the auxiliary
switch
operating
rod
··
(5-,
Fig.
20).
6. Check along the·
trip
shaft
for
a mech-
anical
interference
or
connection between the
overcurrent
trip
device and the
trip
paddles.
Remove mechanical · connection if
present,
or
if
interference
exists,
use
extreme
care
when
removing
or
re-assembling
front
and
back
frames
to
avoid mechanical breakage of
trip
devices. In
reassembling
the
front
and
rear
frames,
the two
frames
should
be
positioned
vertically
so
that
the
trip
shaft
is
hori
zontally aligned.
NOTE
:
It
is
recommended
that
the
breaker
be
fastened to a suitable maouting
base
with
the
front
frame
supported by a sling
or
hook
as
the bolts
are
being installed.
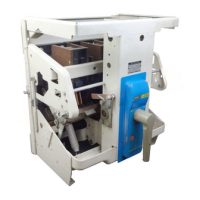
BASIC
BREAKER
COMPONENTS
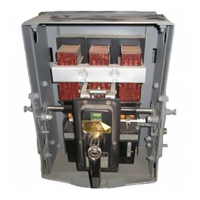
ARC QUENCHERS
(Fig •.. 4
and
·
5)
The
arc
quenchers should be inspected
at
the
regular
inspection
period.
If
the
barriers
·
are
cracked
or
eroded to one-half
their
original
thickness, they should be
rep_lacec;i
.
REPLACEMENT-AK
BREAKERS
1. Be
sure
the
breaker
is
open.
2. Remove the channel-shaped retaining
bar
by removing two
screws
and two
nuts.
3.
Lift the quenchers
clear
of the· movable
arcin
g co~tacts.
4.
.During _replacement be careful
r.iot
to
overtight~n the
screw
which
secure
the channel-
shaped retaining
bar.
Overtightening the
screws
will bow the
bar
and leave the
center
arc
quen-
·
cher
loose. · · ·
REPLACEMENT-
·AKF
BREA~ERS
The
center-pole
arc
quencher of
these
breakers
is
similar
to· the
arc
quenchers of the standard
breakers
and
is
replaced
in a
similar
manner,·
except
that
the
breaker
must be closed. With
the
breaker
closed the center-pole contacts
are
open and the
arc
quencher can be remov.ed.
Replace the
outer-pole
arc
quenchers of the
Type AKF
breaker
as
follows:
1. Be
sure
the
breaker
is
open.
2. Remove the two channel-shaped r_etaining .-
bars
which
bear
against the front of the
arc
quenchers by removing four -screws, two on each
side.
-
3.
Lift .the
arc
quenchers
clear
of
the movable
arcing contacts.
4. Replace
arc
quenchers and
insert
the
four
screws
holding the retaining
bars
in position.
 Loading...