Installation
15
User Manual V1.3-2022-11-18
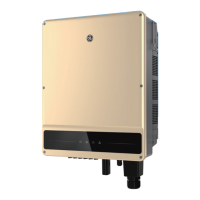
5.2 Inverter Installation
5.2.2 Installing the Inverter
5.2.1 Moving the Inverter
CAUTION
0RYHWKHLQYHUWHUWRWKHVLWHEHIRUHLQVWDOODWLRQ)ROORZWKHLQVWUXFWLRQVEHORZWRDYRLG
personal injury or equipment damage.
1. &RQVLGHUWKHZHLJKWRIWKHHTXLSPHQWEHIRUHPRYLQJLW$VVLJQHQRXJKSHUVRQQHOWRPRYH
the equipment to avoid personal injury.
2. Wear safety gloves to avoid personal injury.
3. Keep balance to avoid falling down when moving the equipment.
NOTICE
• $YRLGWKHZDWHUSLSHVDQGFDEOHVEXULHGLQWKHZDOOZKHQGULOOLQJKROHV
• Wear goggles and a dust mask to prevent the dust from being inhaled or contacting eyes
when drilling holes.
• The DC switch lock is prepared by the customer.
Step 1 Put the mounting plate on the wall or the support horizontally and mark positions for
drilling holes.
Step 2 Drill holes to a depth of 80mm using the hammer drill. The diameter of the drill bit
should be 10mm.
Step 3 Secure the mounting plate using the expansion bolts.
Step 4 (Only for Australia.) Install the DC switch lock.
Step 5 Install the inverter on the mounting plate.
Step 6 Install the anti-theft lock.