– 31 –
The coil-style water tank is located inside the
bottom of the dispenser door.
Water Tank Removal
1. Remove the water tank cover.
2. Remove two Phillips-head screws.
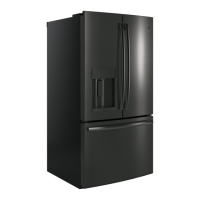
The water tank cover is located behind the
lower door bin of the dispenser door. The cover
conceals the water tank and dual valve.
Water Tank Cover Removal
1. Remove the lower door bin.
2. Remove three Phillips-head screws.
3. Pull the clip from the collar of the dispenser
valve.
4. Push in on the collar of the dispenser valve
while pulling on the tank tubing to remove the
tubing from the valve.
5. Push in on the collar of the door water line
union while pulling on the tank tubing to
remove the tank tubing from the union.
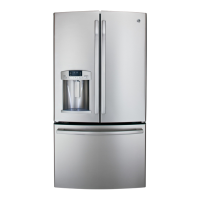
Clip
Collar
The dual valve is located behind the water tank
cover of the dispenser door. One solenoid opens
the dispenser side of the valve and the other
solenoid opens the icemaker side of the valve.
Dual Valve Diagnosing
The main board supplies voltage to the dual valve
and isolation valve. To test the dispenser side
of the dual valve, engage the dispenser paddle
switch while both door switches are engaged.
Voltage checks can be performed at the dual
valve connector or main board. If the dual valve
is getting voltage but no water, ensure isolation
valve is working.
Dispenser Valve:
• Yellow - orange: 120 VAC
(Continued next page)
Water Tank Cover
Dual Valve
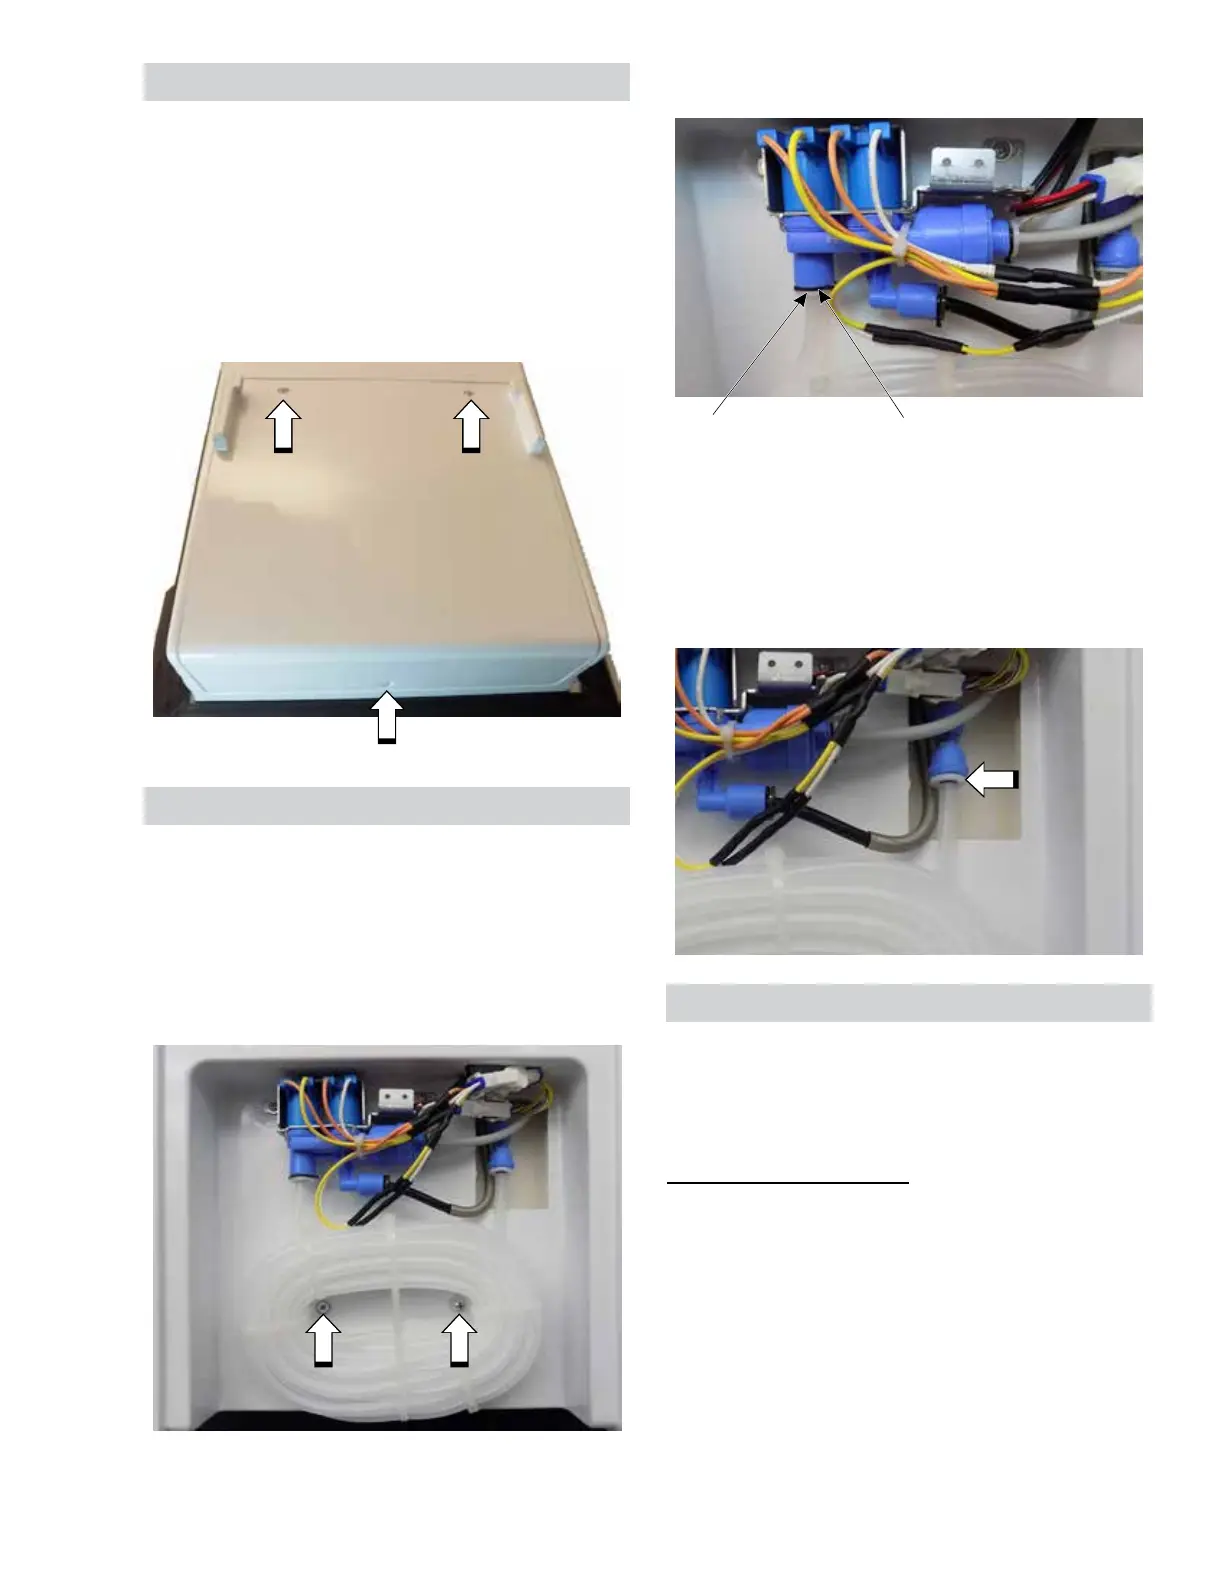
Water Tank
 Loading...