COMMISSIONING
REV7 /REV6 OI 250 (EN) 51 / 146
7.2.1 Installing the Gas Piping for Circuit Breaker with One Density Monitor
(Standard Configuration)
We recommend that the following tools be used to connect the gas
couplings:
- T022: Compact open-end wrench (open-ended spanner),
SW27
- WK001: Torque wrench (spanner) with ratchet adapter and
SW27 open-end wrench head
• Remove the protective caps from the gas couplings on the pole
columns and the gas piping.
• Lubricate O-ring (5) per L5 and slide it onto the sleeve (6) so that
it is centered.
• Insert the sleeve (6) with O-ring (5) in the screw-in connector (9).
• Apply locking adhesive to the external thread of the screw-in
connector (9) per L1.
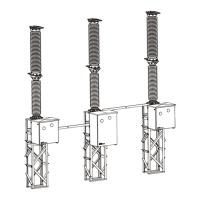
• Insert the pieces of gas piping (2, 3 and 4) one after the other into
the respective screw-in connectors (9) and screw tight using
union nuts (7). Tighten to a torque of 30 Nm.
1 Filler block with density monitor and central sup-
ply connection
1x
2 Gas piping for pole A 1x
3 Gas piping for pole B 1x
4 Gas piping for pole C 1x
5 O-ring 3x
6 Sleeve 3x
7 Union nut 3x
8 Filling connection 3x
9 Screw-in connector 3x
 Loading...
