Installation Instructions
I-]-]ADJUST BROIL AND OVEN BURNER
AIR ADJUSTMENT SHUTTERS
IF NECESSARY
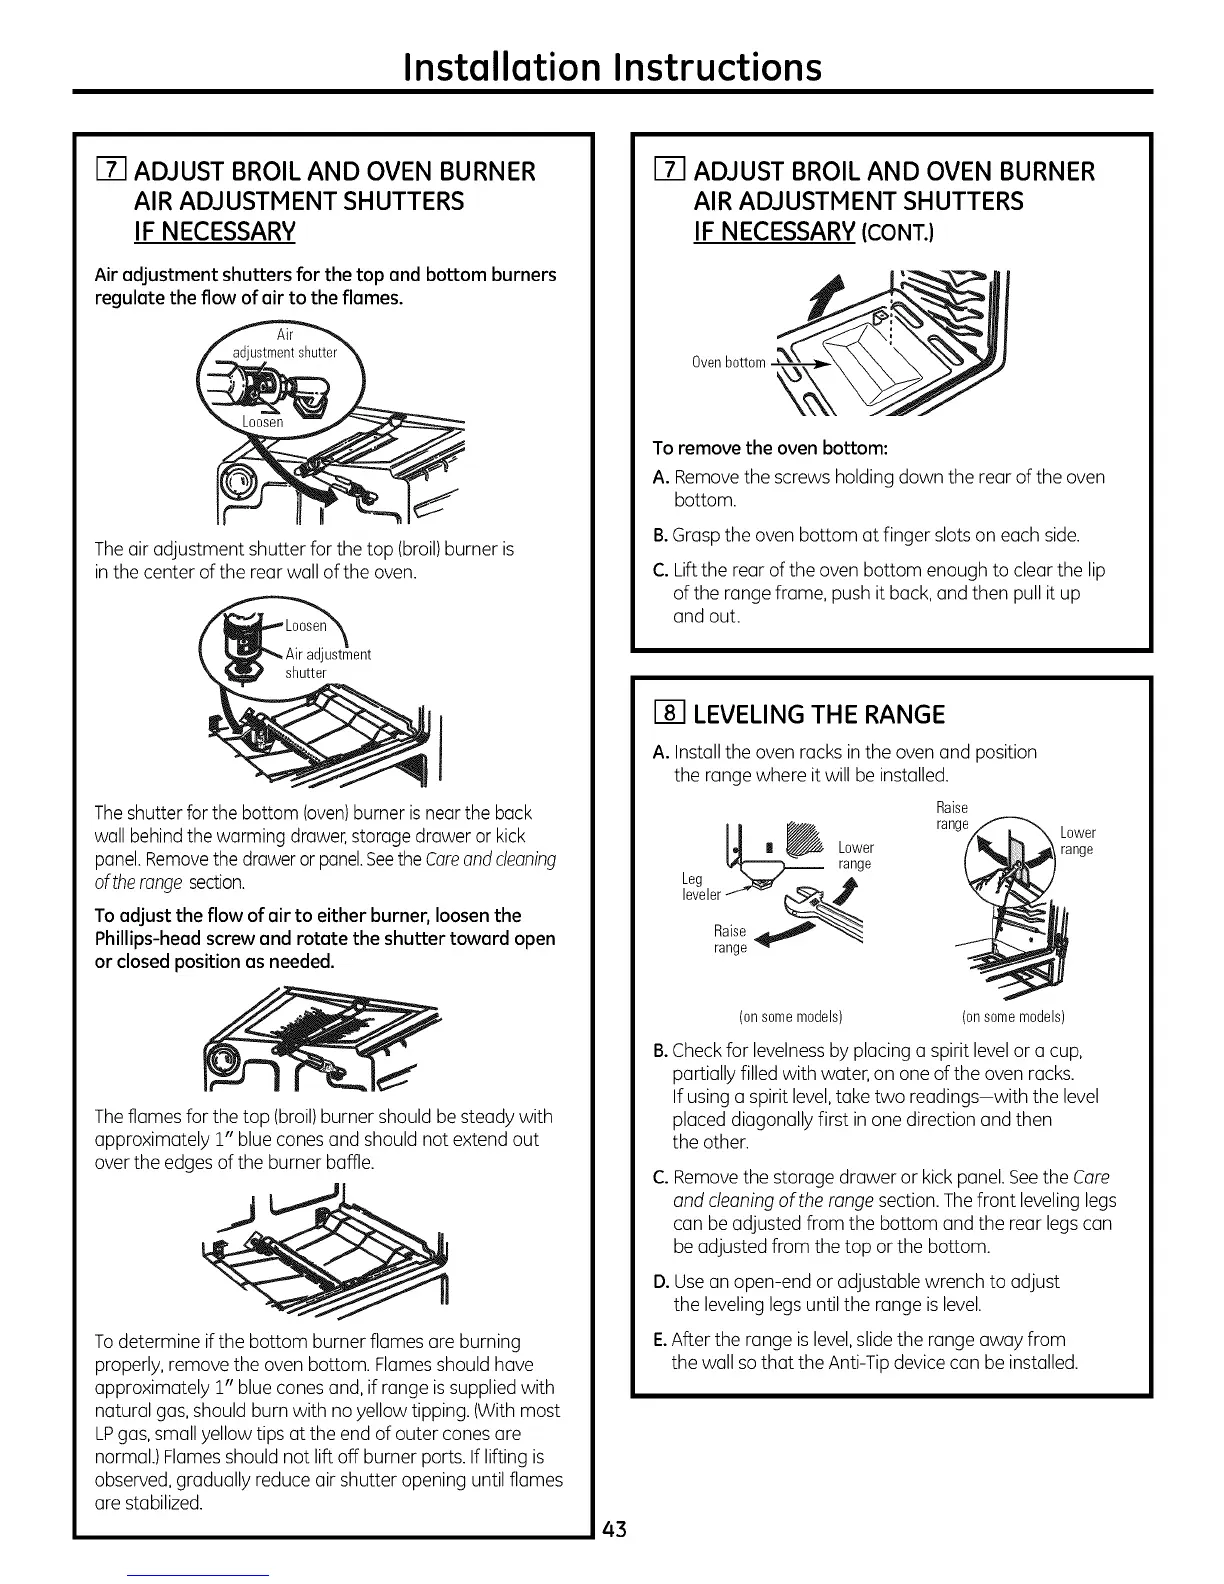
Air adjustment shutters for the top and bottom burners
regulate the flow of air to the flames.
Theair adjustment shutter for the top (broil)burner is
in the center of the rear wall of the oven.
ustment
shutter
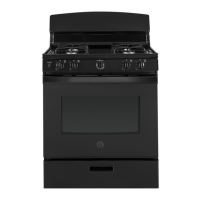
Theshutter for the bottom (oven)burner is near the back
wall behindthe warming drawer,storage drawer or kick
panel.Removethe drawerorpanel.SeetheCoreandcleaning
oftherange section.
Toadjust the flow of air to either burner, loosen the
Phillips-heed screw end rotate the shutter toward open
or closed position as needed.
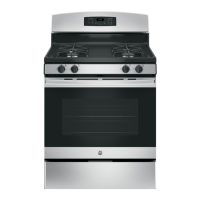
Theflames for the top (broil)burner should be steady with
approximately 1" blue cones and should not extend out
overthe edgesof the burner baffle.
Todetermine if the bottom burner flames are burning
properly, remove the oven bottom. Flames should have
approximately 1" blue cones and, if range issupplied with
natural gas,should burn with no yellow tipping. (With most
LPgas,small yellow tips at the end of outer cones are
normal.) Flamesshould not lift off burner ports. If lifting is
observed,gradually reduce air shutter opening until flames
are stabilized.
I-]-I ADJUST BROIL AND OVEN BURNER
AIR ADJUSTMENT SHUTTERS
IF NECESSARY (CONT.)
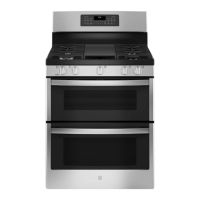
Ovenbottom
To remove the oven bottom:
A. Remove the screws holding down the rear of the oven
bottom.
B.Graspthe oven bottom at finger slots on each side.
C. Liftthe rear of the oven bottom enough to clear the lip
of the range frame, push it back, and then pull it up
and out.
[] LEVELING THE RANGE
A. Installthe oven racks in the oven and position
the range where it will be installed.
Raise
_ II _ Lower range
v,,r---------_ range
Leg b__/ _1_
leveler.._.v _
Lower
range
a.
(on some models) (on some models)
Checkfor levelnessby placing a spirit levelor a cup,
partially filled with water, on one of the oven racks.
If using a spirit level,take two readings-with the level
placed diagonally first in one direction and then
the other.
C.
D.
Removethe storage drawer or kick panel. Seethe Care
and cleaning of the range section.Thefront levelinglegs
can be adjusted from the bottom and the rear legscan
be adjusted from the top or the bottom.
Usean open-end or adjustable wrench to adjust
the levelinglegsuntil the range is level.
E.After the range is level,slidethe range away from
the wall sothat the Anti-Tipdevice can be installed.
43